Dishwasher Repair Services in Chicago

How to Find Reliable Dishwasher Repair Services in Chicago US

How to Find Reliable Dishwasher Repair Services in Chicago US

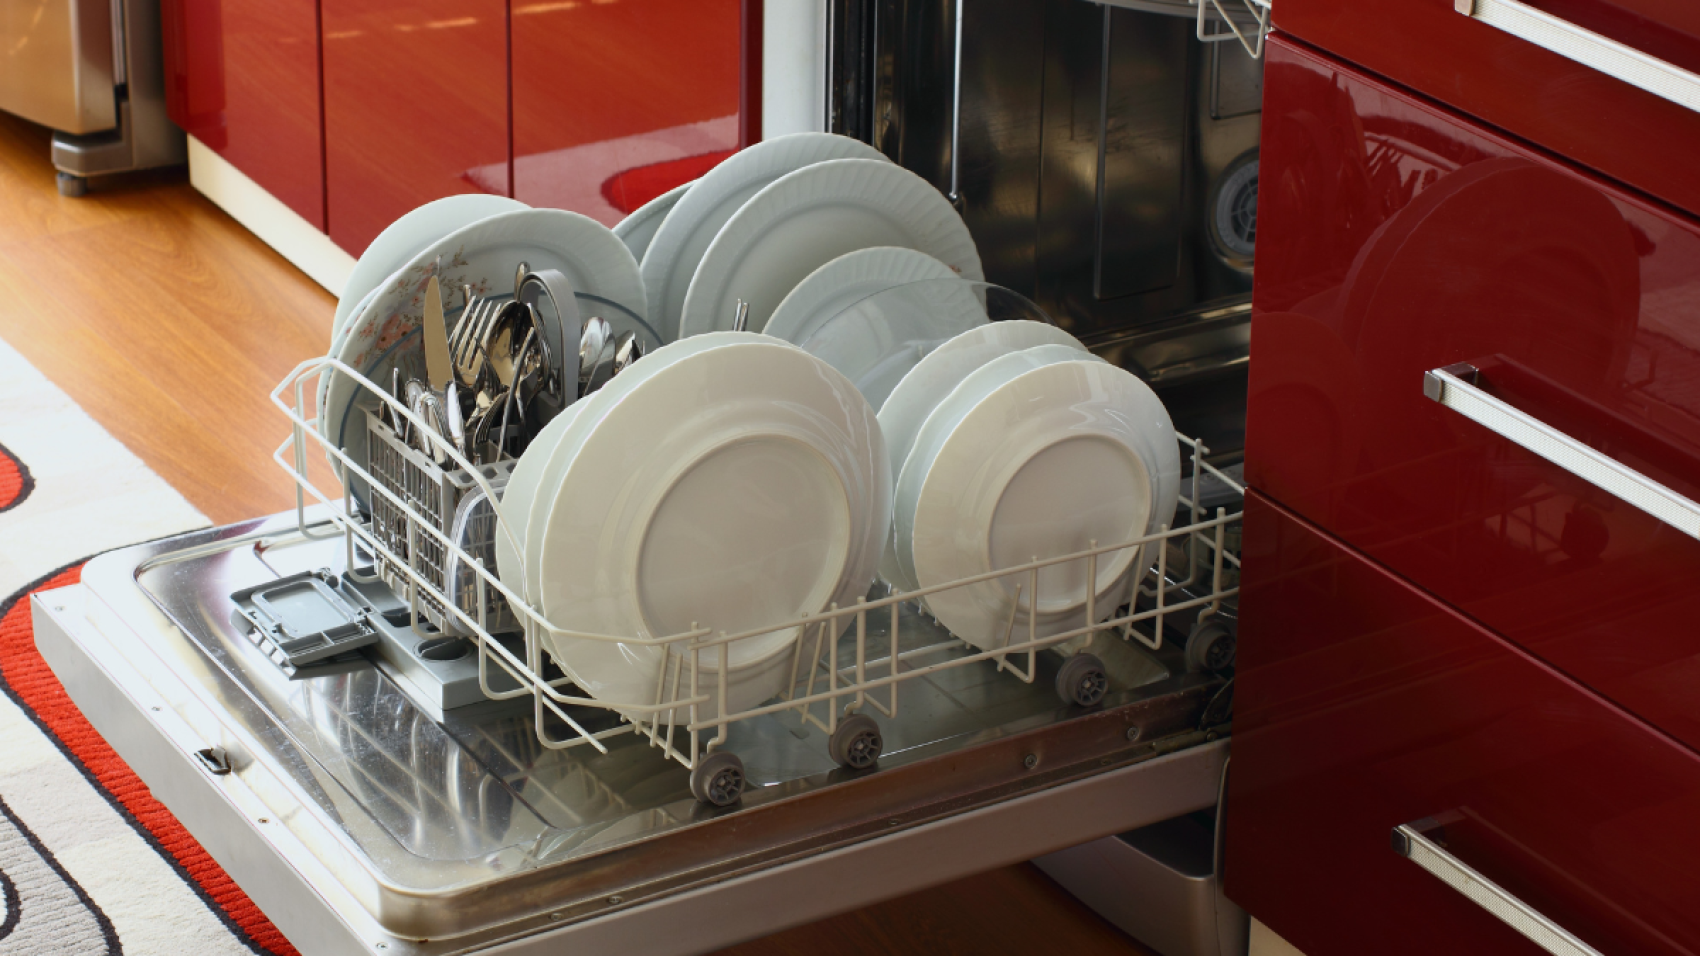
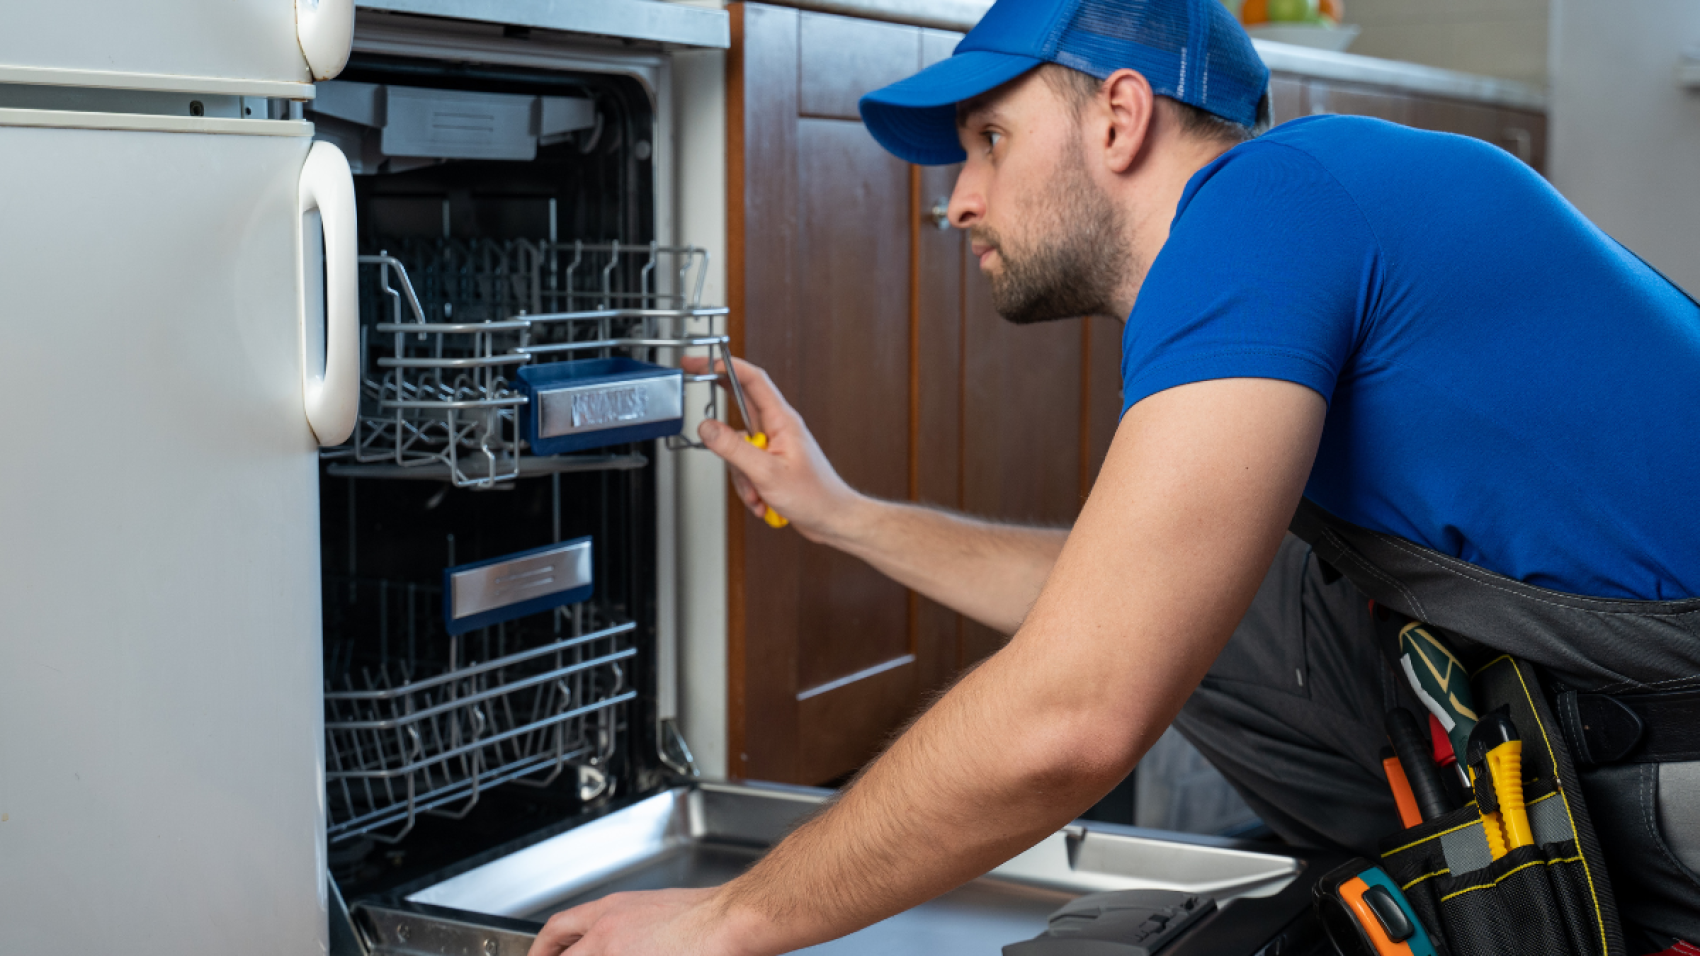
If you own a dishwasher in Chicago, you know how important it is to have it working efficiently. A malfunctioning dishwasher can lead to piles of dirty dishes, and that can be a nightmare for anyone. When your dishwasher is not working, it is essential to find reliable dishwasher repair services in Chicago as soon as possible.

However, with so many repair companies in the market, finding the right one can be a daunting task. You need to ensure that the service provider you choose has the skills and experience to fix your dishwasher correctly. In this article, we will provide you with some tips on how to find reliable dishwasher repair services in Chicago.

1. Ask for referrals

One of the most effective ways to find a reliable dishwasher repair service in Chicago is to ask for referrals from friends, family, or neighbors. Word of mouth is an excellent way to find trustworthy repair companies as you can get an honest opinion from someone who has used the service before.

Ask your friends, family, or neighbors if they have used any dishwasher repair services in the past and if they were satisfied with the service provided. If they were happy with the service, ask for the company’s name and contact information.

2. Check online reviews

The internet is a great resource for finding reliable dishwasher repair services in Chicago. You can use search engines like Google to find repair companies in your area. Once you have a list of potential service providers, check their websites and read customer reviews.

Look for repair companies that have positive reviews from customers. If a company has many negative reviews, it may be a red flag that its service is not reliable. However, don’t be deterred by one or two negative reviews. Instead, look for companies that have a majority of positive reviews.

3. Check for certification and licensing

When searching for a reliable dishwasher repair service in Chicago, it is essential to check if the service provider has the proper certification and licensing. A certified and licensed repair company means that they have met the requirements to provide quality services.

Make sure to check if the repair company is certified by the manufacturer of your dishwasher. If they are certified, it means they have undergone the necessary training to repair your dishwasher correctly.

4. Experience

Experience is critical when it comes to dishwasher repair services in Chicago. Look for repair companies that have been in business for several years. An experienced repair company will have encountered various dishwasher problems and know how to fix them correctly.

Ask the repair company how long they have been in business and if they have experience repairing your particular dishwasher model. If they have experience with your dishwasher model, it means they have the necessary skills to diagnose and fix any problem with your dishwasher.

5. Warranty

When searching for a reliable dishwasher repair service in Chicago, look for companies that offer a warranty on their service. A warranty ensures that if the same problem occurs within a specified period after the repair, the company will fix it without charging you additional fees.

Ask the repair company about their warranty policy and the duration of the warranty. Make sure to read and understand the warranty policy before agreeing to the repair service.

6. Cost

Cost is an essential factor to consider when searching for a reliable dishwasher repair service in Chicago. However, don’t choose a repair company based solely on the price. Some companies may offer low prices, but their services may be substandard.

Compare the prices of several repair companies and choose one that offers quality services at a reasonable price. Ensure that the cost of the repair service is within your budget.

7. Customer service

When searching for a reliable dishwasher repair service in Chicago, paying attention to customer service is crucial. A repair company with excellent customer service will respond promptly to your inquiries, provide you with all the necessary information you need, and ensure that you are satisfied with their service.

Here are some factors to consider when evaluating a repair company’s customer service:

  1. Communication

A reliable dishwasher repair service should communicate effectively with its customers. They should provide clear and concise information about their services, pricing, and warranty policy. They should also respond promptly to your inquiries and keep you informed about the progress of the repair.

Pay attention to how the repair company communicates with you. Do they respond to your calls and emails promptly? Do they provide clear and concise information? Are they friendly and helpful?

  1. Professionalism

A professional repair company will treat its customers with respect and courtesy. They will arrive on time for appointments, wear appropriate attire, and be knowledgeable about their services.

When the repair technician arrives at your home, pay attention to their appearance and behavior. Are they dressed appropriately and professionally? Do they greet you politely and explain the repair process clearly?

  1. Availability

A reliable dishwasher repair service should be available when you need them. They should have flexible scheduling options and be able to accommodate emergency repairs.

Check the repair company’s availability before booking their service. Do they offer same-day or emergency repairs? Do they have flexible scheduling options that can work with your schedule?

  1. Follow-up

After the repair is complete, a reliable repair company should follow up with you to ensure that you are satisfied with their service. They should also provide you with information on how to maintain your dishwasher properly.

Pay attention to the follow-up process. Did the repair company follow up with you after the repair was complete? Did they provide you with information on how to maintain your dishwasher properly?

Conclusion

Finding a reliable dishwasher repair service in Chicago can be a challenging task, but it is essential for the proper maintenance of your appliance. To find the best repair company, you need to consider several factors, including experience, reputation, pricing, warranty, and customer service.

When searching for a dishwasher repair service in Chicago, start by researching different companies online and reading reviews from previous customers. Look for companies with a proven track record of success and satisfied customers.

Check the repair company’s experience and expertise in repairing dishwashers. You should also consider the pricing of the service and the warranty offered to ensure that you are getting the best value for your money.

Lastly, customer service is a crucial factor to consider when choosing a repair company. A reliable repair service should communicate effectively, act professionally, be available when you need them, and follow up with you after the repair is complete.

By considering all of these factors, you can find a reliable dishwasher repair service in Chicago that can help you maintain your appliance and ensure that it functions properly for years to come.

Common Causes of Dishwasher Breakdowns and How to Avoid Them

Common Causes of Dishwasher Breakdowns and How to Avoid Them

Common Causes of Dishwasher Breakdowns and How to Avoid Them

Dishwashers are essential appliances that make our lives easier by cleaning dirty dishes quickly and efficiently. However, like all machines, they can experience breakdowns and malfunctions from time to time. Here are some common causes of dishwasher breakdowns and how to avoid them:
  1. Clogged filters
  2. Hard water
  3. Broken spray arm
  4. Faulty door latch
  5. Malfunctioning thermostat
  6. Blocked drainage

1. Clogged filters

Clogged filters are one of the most common causes of dishwasher breakdowns. Over time, food particles and debris can accumulate in the dishwasher filters, restricting water flow and reducing cleaning efficiency. To avoid clogged filters, it is essential to clean them regularly.

Here are the steps to clean dishwasher filters:

  1. Turn off the dishwasher and unplug it from the power source.
  2. Remove the lower rack of the dishwasher to access the filters.
  3. Locate the filters at the bottom of the dishwasher. Depending on your dishwasher model, there may be one or two filters.
  4. Remove the filters from the dishwasher. If they are removable, detach them carefully. If they are not detachable, clean them in place.
  5. Rinse the filters under running water to remove any loose debris.
  6. Use a soft brush or toothbrush to clean any stubborn food particles or debris from the filters.
  7. If the filters are dishwasher-safe, place them in the dishwasher and run a cycle with hot water to sanitize them.
  8. If the filters are not dishwasher-safe, rinse them thoroughly and replace them in the dishwasher.
  9. Once the filters are clean, replace the lower rack, plug in the dishwasher, and turn it on.

Cleaning the dishwasher filters regularly will help to prevent clogs and ensure that your dishwasher works efficiently. It is recommended to clean the filters at least once a month, or more often if you use the dishwasher frequently or have hard water.

2. Hard water

Hard water can cause mineral buildup in your dishwasher, which can lead to clogs and reduced cleaning efficiency. To avoid hard water issues in your dishwasher, you can try the following solutions:

  1. Use a water softener: Water softeners are designed to remove minerals from hard water, which can help prevent buildup in your dishwasher. You can install a whole-house water softener or use a portable water softener for your dishwasher.
  2. Use a rinse aid: A rinse aid can help to prevent mineral buildup in your dishwasher by reducing the surface tension of the water. This allows water to flow more freely and prevents minerals from sticking to the dishwasher surfaces. Be sure to follow the manufacturer’s instructions for using rinse aid.
  3. Clean your dishwasher regularly: Regular cleaning of your dishwasher can help to prevent mineral buildup. Remove any visible buildup from the dishwasher using a soft brush or toothbrush, and run a cycle with hot water and vinegar to remove any hidden buildup.
  4. Use a dishwasher cleaner: A dishwasher cleaner is a specialized cleaning product that is designed to remove mineral buildup from your dishwasher. Use a dishwasher cleaner once a month or as recommended by the manufacturer.
  5. Use a water filter: A water filter can help to remove minerals from your water before it enters your dishwasher. There are several types of water filters available, including carbon filters and reverse osmosis filters.

By using these solutions, you can help to prevent mineral buildup in your dishwasher and keep it running efficiently.

3. Broken spray arm

A broken or damaged spray arm can cause your dishwasher to clean poorly, leading to dirty dishes and inefficient water usage. Here’s what you can do to avoid a broken spray arm:

  1. Avoid overloading the dishwasher: Overloading the dishwasher can put extra pressure on the spray arm, causing it to break or become damaged. Be sure to load the dishwasher according to the manufacturer’s instructions, leaving enough space for the spray arm to rotate freely.
  2. Inspect the spray arm regularly: Regularly inspect the spray arm for any signs of damage or blockages. Remove any food particles or debris that may have accumulated in the spray arm holes.
  3. Clean the spray arm: If the spray arm is not rotating correctly, it may be due to a clog. To clean the spray arm, remove it from the dishwasher and rinse it under running water. Use a toothbrush or a soft brush to remove any stubborn debris. If the spray arm is damaged, replace it.
  4. Replace the spray arm: If the spray arm is damaged beyond repair, you’ll need to replace it. You can purchase a replacement spray arm from the dishwasher manufacturer or a home improvement store. Be sure to choose the correct spray arm for your dishwasher model.

By following these tips, you can help to prevent a broken spray arm and ensure that your dishwasher cleans your dishes efficiently.

4. Faulty door latch

A faulty door latch can prevent your dishwasher from starting or cause it to stop mid-cycle. Here’s what you can do to avoid a faulty door latch:

  1. Clean the latch area: The door latch can become dirty or greasy over time, causing it to malfunction. Clean the latch area with a soft cloth and soapy water to remove any buildup.
  2. Check the door alignment: If the door is not aligned properly, it can put pressure on the latch and cause it to malfunction. Adjust the door so that it aligns correctly with the latch.
  3. Inspect the latch for damage: Check the latch for any visible signs of damage or wear. If the latch is damaged, it will need to be replaced.
  4. Replace the latch: If the latch is faulty or damaged, you’ll need to replace it. You can purchase a replacement latch from the dishwasher manufacturer or a home improvement store. Be sure to choose the correct latch for your dishwasher model.
  5. Avoid slamming the door: Slamming the dishwasher door can put extra pressure on the latch and cause it to malfunction. Gently close the door to avoid damaging the latch.

By following these tips, you can help to prevent a faulty door latch and ensure that your dishwasher operates smoothly.

5. Malfunctioning thermostat

A malfunctioning thermostat can cause your dishwasher to run too hot or too cold, leading to poor cleaning performance or even damage to the dishwasher. Here’s what you can do to avoid a malfunctioning thermostat:

  1. Run the dishwasher on the correct setting: Use the correct dishwasher cycle and temperature setting for the type of dishes you are washing. This will prevent the thermostat from working too hard and potentially malfunctioning.
  2. Clean the dishwasher regularly: A buildup of debris or hard water deposits can cause the thermostat to malfunction. Clean the dishwasher regularly to prevent this from happening.
  3. Check the thermostat for damage: Inspect the thermostat for any visible signs of damage or wear. If it appears damaged, it will need to be replaced.
  4. Replace the thermostat: If the thermostat is faulty or damaged, you’ll need to replace it. You can purchase a replacement thermostat from the dishwasher manufacturer or a home improvement store. Be sure to choose the correct thermostat for your dishwasher model.
  5. Have a professional inspect and repair the dishwasher: If you suspect a problem with the thermostat or any other component of your dishwasher, it’s best to have a professional inspect and repair it. They will have the expertise and equipment needed to diagnose and fix the problem correctly.

By following these tips, you can help to prevent a malfunctioning thermostat and keep your dishwasher running smoothly.

6. Blocked drainage

Blocked drainage in your dishwasher can cause water to back up and prevent your dishwasher from working correctly. Here’s what you can do to avoid blocked drainage:

  1. Clean the dishwasher filter: A clogged dishwasher filter can prevent water from draining properly. Clean the filter regularly to prevent the buildup of debris.
  2. Run hot water before starting the dishwasher: Run hot water in your sink before starting the dishwasher. This will help to clear any blockages in the drain hose.
  3. Use the correct dishwasher detergent: Using the wrong detergent or too much detergent can cause excess suds, which can clog the dishwasher’s drainage system. Use the recommended amount of dishwasher detergent for your dishwasher.
  4. Load the dishwasher correctly: Overloading the dishwasher can prevent water from draining properly. Load the dishwasher according to the manufacturer’s instructions, leaving enough space for water to flow freely.
  5. Inspect the drain hose: Check the drain hose for any visible signs of damage or wear. If the hose is damaged, it will need to be replaced.
  6. Use a dishwasher cleaner: A dishwasher cleaner can help to remove any buildup of grease or debris in the dishwasher. Use a dishwasher cleaner once a month or as recommended by the manufacturer.

By following these tips, you can help to prevent blocked drainage in your dishwasher and ensure that it operates smoothly.

Summary

In summary, some common causes of dishwasher breakdowns include clogged filters, hard water, broken spray arms, faulty door latches, malfunctioning thermostats, and blocked drainage. To avoid these issues, you should regularly clean your dishwasher, use the correct detergent and settings, load the dishwasher properly, inspect components for damage, and replace any faulty or damaged parts. By following these tips, you can keep your dishwasher running smoothly and avoid costly repairs or replacements.

Troubleshooting Tips for an Oven That Wonโ€™t Turn Off

Troubleshooting Tips for an Oven That Wonโ€™t Turn Off

Troubleshooting Tips for an Oven That Wonโ€™t Turn Off

If your oven wonโ€™t turn off, it could be a serious problem that requires the attention of a professional technician. However, here are some troubleshooting tips you can try:

  1. Check the thermostat: The thermostat is responsible for regulating the temperature in your oven. If it is faulty, it may not be able to turn off the oven. Check the thermostat to ensure it is functioning correctly.
  2. Check the oven timer: If your oven has a timer, make sure it is not set to stay on indefinitely. Turn off the timer if necessary.
  3. Check the oven control board: The oven control board is the electronic control center for your oven. If it is faulty, it may not be able to turn off the oven. Check the control board for any signs of damage, such as burned or corroded connections.
  4. Check the oven door switch: The oven door switch is a safety mechanism that prevents the oven from operating when the door is open. If the switch is faulty, it may prevent the oven from turning off. Check the switch to ensure it is functioning correctly.
  5. Turn off the power: If none of the above steps work, turn off the power to the oven at the circuit breaker. This will ensure the oven is completely turned off until a professional can diagnose and repair the problem.

It is important to note that working with an oven can be dangerous, and it is recommended to seek the help of a qualified technician for repairs.

Check the thermostat

To check the thermostat in your oven, follow these steps:

  1. Turn off the power to the oven at the circuit breaker.
  2. Locate the thermostat in your oven. It is typically a knob that controls the temperature setting.
  3. Remove the knob by pulling it straight off.
  4. Use a multimeter to test the thermostat for continuity. Set the multimeter to the ohms setting and touch the probes to the thermostat’s terminals.
  5. If the thermostat has continuity, it is functioning correctly. If not, it may be faulty and need to be replaced.

If you are not comfortable testing the thermostat yourself, it is recommended to seek the help of a qualified technician.

Check the oven timer

To check the oven timer, follow these steps:

  1. Look for the timer controls on the control panel of your oven. The timer controls are typically separate from the temperature and cooking mode controls.
  2. Check the timer settings to make sure the timer is not set to stay on indefinitely. If it is, turn off the timer or adjust the settings to a specific time.
  3. If the timer is not the issue, try resetting it by unplugging the oven from the power source for a few minutes and then plugging it back in.
  4. Test the oven to see if it turns off properly. If the oven still won’t turn off, it may be a different issue and you may need to seek the help of a qualified technician.

It’s important to note that not all ovens have timers, so if you don’t see timer controls on your oven, this may not be the issue.

Check the oven control board

To check the oven control board, follow these steps:

  1. Turn off the power to the oven at the circuit breaker.
  2. Locate the oven control board, which is typically located behind the control panel.
  3. Inspect the control board for any signs of damage, such as burned or corroded connections.
  4. Check the wiring connections to the control board to ensure they are secure.
  5. If you don’t see any obvious signs of damage, turn the power back on and test the oven to see if it turns off properly.
  6. If the oven still won’t turn off, use a multimeter to test the control board for continuity. Set the multimeter to the ohms setting and touch the probes to the appropriate terminals on the control board.
  7. If the control board has continuity, it may be functioning correctly. If not, it may be faulty and need to be replaced.

If you are not comfortable testing the control board yourself, it is recommended to seek the help of a qualified technician.

Check the oven door switch

To check the oven door switch, follow these steps:

  1. Turn off the power to the oven at the circuit breaker.
  2. Locate the oven door switch, which is typically located near the door latch or hinges.
  3. Inspect the switch to make sure it is not damaged or broken.
  4. Test the switch for continuity using a multimeter. Set the multimeter to the ohms setting and touch the probes to the appropriate terminals on the switch.
  5. With the door closed the switch should have continuity. With the door open, the switch should not have continuity.
  6. If the switch is not functioning properly, it may need to be replaced.
  7. If the switch is functioning correctly, turn the power back on and test the oven to see if it turns off properly.

If you are not comfortable testing the door switch yourself, it is recommended to seek the help of a qualified technician.

Turn off the power

To turn off the power to your oven, follow these steps:

  1. Locate the circuit breaker for your oven. This is typically located in the electrical panel of your home.
  2. Flip the circuit breaker to the off position.
  3. If you are unable to locate the circuit breaker or if it is not labeled, you can turn off the power to your entire home by flipping the main circuit breaker to the off position.
  4. It is important to ensure the power is completely turned off before attempting any repairs or troubleshooting.
  5. Once you have completed your troubleshooting or repairs, you can turn the power back on by flipping the circuit breaker back to the on position.

It is recommended to seek the help of a qualified technician if you are unsure of how to turn off the power or if you are not comfortable working with electrical components.

Top 5 Signs Your Freezer Needs Professional Repair Services

Top 5 Signs Your Freezer Needs Professional Repair Services

ย Top 5 Signs Your Freezer Needs Professional Repair Services

Here are some signs that your freezer may need professional repair services:

  1. Frost Buildup
  2. Excessive Noise
  3. Uneven Cooling
  4. Door Seal Issues
  5. Water Leakage

1. Frost Buildup

Frost buildup in your freezer is a common issue that can indicate a problem with the defrost system. When the defrost system is not functioning properly, ice can accumulate on the walls and other surfaces in the freezer, which can cause the freezer to work inefficiently and increase your energy bills.

There are several possible causes of frost buildup in your freezer, including a faulty defrost thermostat, defrost heater, or defrost timer. It’s important to address this issue as soon as possible to prevent further damage to your freezer and ensure that your food stays fresh and safe to eat.

To troubleshoot the issue, you can try manually defrosting your freezer and cleaning it thoroughly. If the problem persists, it’s best to contact a professional appliance repair technician to diagnose and fix the issue. They will have the tools and expertise to safely and effectively repair your freezer and restore it to proper working condition.

2. Excessive Noise

If your freezer is making excessive noise, it could be a sign of a mechanical problem. Some common causes of excessive noise in freezers include:

  1. Malfunctioning compressor: If the compressor in your freezer is making loud or unusual noises, it could be a sign that it’s failing. This could also cause your freezer to stop cooling properly.
  2. Faulty fan motor: A noisy fan motor can cause a high-pitched or grinding sound. This could be caused by a worn or damaged fan blade, or a faulty fan motor that needs to be replaced.
  3. Dirty condenser coils: If the condenser coils on the back of your freezer are dirty or clogged, it can cause the compressor to work harder than it needs to and make more noise than usual.
  4. Loose parts: Loose or damaged parts, such as a rattling condenser fan, can also cause excessive noise in your freezer.

If you notice any excessive noise coming from your freezer, it’s best to turn it off and unplug it until you can get it checked by a professional. Attempting to fix the issue yourself could result in further damage or injury. A trained technician will be able to diagnose the problem and recommend the appropriate repair or replacement of the faulty parts.

3. Uneven Cooling

Uneven cooling in your freezer is a common problem that can be caused by a variety of factors. Some possible causes of uneven cooling in your freezer include:

  1. Blocked air vents: If the air vents in your freezer are blocked by food or other items, it can prevent proper air circulation and cause uneven cooling.
  2. Damaged door gasket: If the door gasket on your freezer is damaged or not sealing properly, it can allow warm air to enter the freezer and cause uneven cooling.
  3. Malfunctioning fan: If the fan in your freezer is not working properly, it can cause uneven cooling. This could be caused by a faulty fan motor, a worn-out fan blade, or other mechanical issues.
  4. Faulty thermostat: If the thermostat in your freezer is not working properly, it can cause uneven cooling by not regulating the temperature correctly.

If you notice uneven cooling in your freezer, it’s important to address the issue as soon as possible to prevent spoilage of your food. You can try adjusting the temperature settings or rearranging the items in your freezer to improve air circulation. If the problem persists, it’s best to contact a professional appliance repair technician to diagnose and fix the issue. They will have the tools and expertise to safely and effectively repair your freezer and restore it to proper working condition.

4. Door Seal Issues

Door seal issues in your freezer can cause cold air to escape, which can result in your freezer working harder than it needs to and increase your energy bills. Here are some signs of door seal issues in your freezer:

  1. The door doesn’t close properly: If your freezer door doesn’t close all the way or is difficult to close, it may indicate a problem with the door seal.
  2. Ice buildup: If you notice ice buildup on the door or around the edges of your freezer, it could be a sign of a damaged door seal.
  3. Temperature fluctuations: If the temperature inside your freezer fluctuates or doesn’t stay consistent, it could be caused by a faulty door seal.
  4. Visible damage: If you can see cracks, tears, or other damage to the door seal, it should be replaced to ensure proper sealing.

If you notice any of these signs, it’s important to address the issue as soon as possible to prevent further damage to your freezer and ensure that your food stays fresh and safe to eat. You can try cleaning the door seal with warm, soapy water and checking for any visible damage. If the problem persists, it’s best to contact a professional appliance repair technician to replace the door seal and ensure proper sealing. They will have the tools and expertise to safely and effectively repair your freezer and restore it to proper working condition.

5. Water Leakage

Water leakage in your freezer can be a sign of a few different issues, all of which should be addressed as soon as possible to prevent damage to your freezer and your home. Here are some possible causes of water leakage in your freezer:

  1. Clogged drain tube: Your freezer has a drain tube that allows water to escape from the defrost cycle. If this tube becomes clogged, it can cause water to back up and leak out of the freezer.
  2. Faulty water inlet valve: If your freezer has a water dispenser or ice maker, a faulty water inlet valve can cause water to leak into the freezer.
  3. Damaged water filter: If the water filter in your freezer is damaged or not installed properly, it can cause water to leak.
  4. Cracked or damaged water line: If the water line that feeds your freezer’s water dispenser or ice maker is cracked or damaged, it can cause water to leak into the freezer.

If you notice water leakage in your freezer, it’s important to turn off the power to the freezer and unplug it immediately. Try to determine the source of the leak and inspect the drain tube, water inlet valve, water filter, and water line for any visible damage or clogs. If you are unsure or unable to locate the source of the leak, it’s best to contact a professional appliance repair technician to diagnose and fix the issue. They will have the tools and expertise to safely and effectively repair your freezer and restore it to proper working condition.

Expert Solutions for Your Appliance Woes

Expert Solutions for Your Appliance Woes

Expert Solutions for Your Appliance Woes

Expert Solutions for Your Appliance Woes: Tips to Save Time and Money

Appliances have become an integral part of our daily lives, making our work easier and more efficient. From washing machines to refrigerators, these devices help us perform our daily chores with ease. However, appliances can malfunction and break down over time, causing inconvenience and stress. Fortunately, there are expert solutions for your appliance woes that can save you time and money.

In this article, we will provide tips and tricks for fixing common appliance problems and recommend when itโ€™s time to call in the experts.

1- Regular Maintenance

One of the simplest ways to avoid appliance problems is by performing regular maintenance. Regular maintenance can extend the lifespan of your appliances and prevent costly repairs. Here are some tips for maintaining your appliances:

Refrigerator:

  • Clean the condenser coils every six months.
  • Keep the temperature between 37 and 40 degrees Fahrenheit.
  • Check the door seal for leaks and replace if necessary.
  • Keep the refrigerator clean and organized.

Washing Machine:

  • Use the correct amount of detergent.
  • Don’t overload the machine.
  • Clean the lint filter after each use.
  • Run an empty cycle with hot water and white vinegar once a month.

Dishwasher:

  • Clean the filter regularly.
  • Check for leaks and repair if necessary.
  • Run the dishwasher empty with white vinegar once a month.
  • Use the appropriate amount of detergent.

Oven:

  • Clean the oven regularly.
  • Use aluminum foil or a baking sheet to catch spills.
  • Check the door seal for leaks and replace if necessary.
  • Don’t use the self-cleaning feature too often.

2-ย  DIY Repairs

Sometimes, your appliance may break down or malfunction, and you may be tempted to call a professional. However, there are some DIY repairs you can do yourself that can save you money. Here are some common appliance problems and how to fix them:

Refrigerator:

The refrigerator is not cooling: Check the thermostat and make sure it’s set to the correct temperature. Clean the condenser coils and check the door seal for leaks.

Washing Machine:

The machine is making strange noises: Check the load to make sure it’s balanced. Clean the lint filter and check the hoses for kinks or blockages.

Dishwasher:

The dishwasher is not cleaning properly: Clean the filter and check the spray arms for blockages. Make sure you’re using the correct amount of detergent.

Oven:

The oven is not heating properly: Check the temperature sensor and the heating element. Make sure the oven door is closing properly.

3- When to Call in the Experts

While regular maintenance and DIY repairs can save you money, there are times when you need to call in the experts. Here are some signs that it’s time to call a professional:

Refrigerator:

  • The compressor is making strange noises.
  • The refrigerator is leaking coolant.
  • The door seal is damaged.

Washing Machine:

  • The drum is not spinning.
  • The machine is leaking water.
  • The motor is making strange noises.

Dishwasher:

  • The dishwasher is not draining.
  • The machine is leaking water.
  • The motor is making strange noises.

Oven:

  • The oven door is not closing properly.
  • The oven is not heating at all.
  • The control panel is not functioning.

When choosing an appliance repair service, make sure you choose a reputable and experienced company. Look for reviews online and ask for recommendations from family and friends. A good repair service will provide you with a written estimate, explain the problem, and offer a warranty for their work.

4- Tips for Extending the Lifespan of Your Appliances

Extending the lifespan of your appliances not only saves you money, but it also reduces your carbon footprint by reducing waste. Here are some tips to help you prolong the life of your appliances:

1- Follow the manufacturerโ€™s instructions

The manufacturer’s instructions provide valuable information on how to use and maintain your appliance. Follow these instructions carefully to avoid damaging your appliance and to ensure it lasts as long as possible.

2- Clean and maintain your appliances regularly

Regular cleaning and maintenance can help extend the life of your appliances. Clean the interior and exterior of your appliances regularly, and replace any worn or damaged parts immediately. For example, clean the lint filter in your dryer after every use, and clean the condenser coils on your refrigerator at least twice a year.

3- Use your appliances correctly

Using your appliances correctly can also help extend their lifespan. Don’t overload your washing machine or dryer, as this can put a strain on the motor and other components. Also, don’t use your oven as a storage space, as this can cause the heating elements to burn out.

4- Replace worn or damaged parts

If you notice that a part of your appliance is worn or damaged, don’t hesitate to replace it. Continuing to use an appliance with a damaged part can cause more damage to other components, resulting in a more expensive repair bill.

5- Hire a professional for repairs

If you are not comfortable repairing your appliances yourself, hire a professional to do the job. DIY repairs can sometimes cause more damage to your appliances, and this can result in a more expensive repair bill in the long run. A professional repair service can quickly diagnose and repair any issues with your appliances, helping to prolong their lifespan.

6- Upgrade to energy-efficient appliances

If your appliances are old and inefficient, consider upgrading to energy-efficient models. Energy-efficient appliances use less energy and can help you save money on your energy bills. They also tend to have longer lifespans than older, less efficient models.

7- Avoid overloading your electrical outlets

Overloading your electrical outlets can cause damage to your appliances and potentially cause a fire. Be sure to spread out your appliances throughout your home and avoid using too many appliances at once.

In conclusion, taking good care of your appliances can help you save time and money in the long run. Follow the manufacturer’s instructions, clean and maintain your appliances regularly, use them correctly, replace worn or damaged parts, hire a professional for repairs, upgrade to energy-efficient models, and avoid overloading your electrical outlets. By following these tips, you can extend the lifespan of your appliances and enjoy their benefits for years to come.

How to Keep Your Home Appliances Running Smoothly

How to Keep Your Home Appliances Running Smoothly

How to Keep Your Home Appliances Running Smoothly

Here are some tips to help keep your home appliances running smoothly:

  1. Read the manual
  2. Clean regularly
  3. Check for wear and tear
  4. Use the right detergent
  5. Avoid overloading
  6. Check the seals
  7. Service regularly
  8. Power off when not in use

1. Read the manual

Yes, reading the manual is a crucial step in keeping your home appliances running smoothly. The manual provides important information about how to use and maintain your appliances properly. It contains instructions on how to operate the appliance, troubleshoot common problems, and perform regular maintenance tasks. Make sure to read the manual thoroughly and keep it in a safe place for future reference. If you have lost the manual, you can often find it online by searching for the make and model of your appliance.

2. Clean regularly

Yes, cleaning your home appliances regularly is also an important step in keeping them running smoothly. Dirt and grime can build up on the surfaces and components of appliances, which can cause them to malfunction or break down over time. Here are some tips for cleaning different types of appliances:

  1. Refrigerator: Clean the inside of your refrigerator at least once a month, and wipe down the exterior with a damp cloth. Check the door seals for signs of wear and tear, and replace them if necessary.
  2. Oven and stovetop: Wipe down the stovetop after each use, and clean the oven at least once a month. Use a non-abrasive cleaner and avoid using harsh chemicals that can damage the surface.
  3. Dishwasher: Clean the filter and spray arm regularly to prevent clogs and ensure proper water flow. Run a cleaning cycle with a dishwasher cleaner once a month.
  4. Washing machine: Clean the lint filter and fabric softener dispenser after each use, and run a cleaning cycle with a washing machine cleaner once a month.
  5. Dryer: Clean the lint filter after each use, and wipe down the interior with a damp cloth. Check the vent and hose for clogs, and clean them if necessary.

By cleaning your appliances regularly, you can help prevent breakdowns and extend their lifespan.

3. Check for wear and tear

Checking for wear and tear is another crucial step in keeping your home appliances running smoothly. Wear and tear can occur due to regular use or due to external factors such as exposure to heat, moisture, or other environmental factors. Here are some tips for checking for wear and tear on different types of appliances:

  1. Refrigerator: Check the door seals for signs of wear and tear, such as cracks or tears. If the seals are damaged, they can allow cold air to escape, which can cause the refrigerator to work harder and use more energy.
  2. Oven and stovetop: Check the burners and heating elements for signs of damage, such as cracks or discoloration. If the elements are damaged, they can affect the performance of the appliance and may need to be replaced.
  3. Dishwasher: Check the spray arm for damage or clogs, and replace it if necessary. Check the door seal for signs of wear and tear, and replace it if it is damaged.
  4. Washing machine: Check the hoses and connections for signs of wear and tear, such as cracks or leaks. Check the drum and agitator for signs of damage, such as dents or cracks.
  5. Dryer: Check the drum and belt for signs of wear and tear, such as cracks or fraying. Check the lint filter and vent for clogs or damage, and clean or replace them if necessary.

By checking your appliances for wear and tear regularly, you can catch any potential issues early and prevent them from causing more significant problems down the line.

4. Use the right detergent

Using the right detergent is another important step in keeping your home appliances running smoothly. Different appliances require different types of detergents to work effectively and avoid damage. Here are some tips for using the right detergent for different types of appliances:

  1. Dishwasher: Use a detergent that is specifically formulated for dishwashers. Regular dish soap can create excessive suds and cause the dishwasher to overflow or malfunction. Use the recommended amount of detergent for your specific dishwasher model.
  2. Washing machine: Use a laundry detergent that is designed for your type of washing machine, such as high-efficiency (HE) detergent for HE machines. Using too much detergent can cause the machine to overwork and lead to a buildup of soap scum.
  3. Dryer sheets: Use dryer sheets that are specifically designed for use in dryers. Other types of fabric softeners can cause clogs in the lint filter or damage the dryer drum.

By using the right detergent for your appliances, you can help prevent damage and ensure that they work effectively. Always follow the manufacturer’s instructions for detergent usage and avoid using excessive amounts of detergent.

5. Avoid overloading

Avoiding overloading is another important step in keeping your home appliances running smoothly. Overloading appliances can cause them to work harder than necessary, which can lead to breakdowns or malfunctions. Here are some tips for avoiding overloading different types of appliances:

  1. Refrigerator: Avoid overloading the refrigerator with too much food, as this can block the air vents and affect the performance of the appliance. Make sure there is enough space between food items to allow air to circulate.
  2. Oven and stovetop: Avoid overcrowding the oven or stovetop, as this can affect the circulation of hot air and cause uneven cooking or burning. Use the recommended cookware sizes for your appliance and avoid placing items too close together.
  3. Dishwasher: Avoid overloading the dishwasher with too many dishes, as this can affect the cleaning performance and cause damage to the spray arm. Load the dishwasher according to the manufacturer’s instructions and use the appropriate detergent amount.
  4. Washing machine: Avoid overloading the washing machine with too much laundry, as this can cause the machine to work harder and lead to damage. Follow the manufacturer’s instructions for load size and avoid packing the machine too tightly.
  5. Dryer: Avoid overloading the dryer with too much laundry, as this can cause the machine to overwork and lead to damage or malfunctions. Follow the manufacturer’s instructions for load size and avoid packing the machine too tightly.

By avoiding overloading your appliances, you can help prevent damage and ensure that they work effectively. Always follow the manufacturer’s instructions for load size and avoid exceeding the recommended limits.

6. Check the seals

Checking the seals is an important step in keeping your home appliances running smoothly. Seals are found on various appliances and are responsible for keeping the appliance airtight and preventing leaks. Here are some tips for checking the seals on different types of appliances:

  1. Refrigerator: Check the door seals for signs of wear and tear, such as cracks or tears. If the seals are damaged, they can allow cold air to escape, which can cause the refrigerator to work harder and use more energy. To check the seal, close the refrigerator door on a piece of paper, and if the paper is easily pulled out, it is time to replace the seal.
  2. Oven and stovetop: Check the oven door seal for signs of damage or wear, such as cracks or tears. If the seal is damaged, it can affect the performance of the appliance and may need to be replaced.
  3. Dishwasher: Check the door seal for signs of wear and tear, such as cracks or tears. If the seal is damaged, it can cause water leaks or affect the cleaning performance of the appliance.
  4. Washing machine: Check the door seal for signs of wear and tear, such as cracks or tears. If the seal is damaged, it can cause water leaks or affect the cleaning performance of the appliance.
  5. Dryer: Check the door seal for signs of wear and tear, such as cracks or tears. If the seal is damaged, it can cause heat leaks and affect the drying performance of the appliance.

By checking the seals on your appliances regularly, you can catch any potential issues early and prevent them from causing more significant problems down the line. If you notice any damage or wear, replace the seal as soon as possible to ensure that your appliance works effectively.

7. Service regularly

Servicing your appliances regularly is an important step in keeping them running smoothly. Regular maintenance can help to identify and fix any small problems before they become bigger issues, which can save you money in the long run. Here are some tips for servicing different types of appliances:
  1. Refrigerator: Have a professional technician check the coolant level, clean the condenser coils, and check the door seals every six months to a year, depending on usage.
  2. Oven and stovetop: Have a professional technician check the burners, heating elements, and control knobs every year to ensure they are working correctly.
  3. Dishwasher: Have a professional technician check the spray arm, drain system, and door seal every year to ensure they are working correctly.
  4. Washing machine: Have a professional technician check the hoses, pumps, and suspension system every year to ensure they are working correctly.
  5. Dryer: Have a professional technician check the exhaust system, lint trap, and heating elements every year to ensure they are working correctly.

By having your appliances serviced regularly, you can help extend their lifespan, save money on repairs, and ensure that they work effectively. Always follow the manufacturer’s recommended maintenance schedule and use a professional technician for any repairs or maintenance.

8. Power off when not in use

Powering off your appliances when not in use is an important step in keeping them running smoothly and efficiently. Here are some tips for powering off different types of appliances:

  1. Refrigerator: The refrigerator should be left on at all times, as it is designed to maintain a consistent temperature. However, if you will be away from home for an extended period, you can empty the fridge and turn it off.
  2. Oven and stovetop: Make sure to turn off the oven and stovetop after use, as leaving them on can waste energy and potentially lead to accidents.
  3. Dishwasher: Turn off the dishwasher after use, and make sure to unplug it when not in use for an extended period.
  4. Washing machine: Turn off the washing machine after use, and make sure to unplug it when not in use for an extended period.
  5. Dryer: Turn off the dryer after use, and make sure to unplug it when not in use for an extended period.

By powering off your appliances when not in use, you can save energy and reduce your utility bills. It also reduces the risk of accidents and helps to extend the lifespan of your appliances. Always follow the manufacturer’s instructions for powering off your appliances and make sure to unplug them when not in use for an extended period.

Top five reasons for your oven to do not work properly

Top Five Reasons for Your Oven to Do Not Work Properly

Top Five Reasons for Your Oven to Do Not Work Properly

It is common now a day to use the oven for cooking or baking purposes but there are many common problems that we all face while using it. If your oven has reached its time i.e. it is causing problems very often then it is time to spend some savings and buy a new oven. But if you are facing some issues that can be fixed then this article is right for you.

There could be several reasons why an oven may not be working properly. Here are five common reasons:

  1. Faulty Heating Element
  2. Temperature Sensor Malfunction
  3. Control Board Failure
  4. Door Issues
  5. Gas Supply Issues

1. Faulty Heating Element

A faulty heating element is one of the most common reasons why an oven may not work properly. The heating element is responsible for generating the heat inside the oven, so if it’s not working, the oven may not heat up at all or may heat up unevenly.

One way to check if the heating element is faulty is to visually inspect it. Look for any signs of damage or wear, such as cracks or breaks in the heating coils. If you see any damage, the heating element will likely need to be replaced.

Another way to check the heating element is to use a multimeter to test it for continuity. This will determine if there is a complete electrical connection throughout the heating element. If there is no continuity, then the heating element is faulty and needs to be replaced.

It’s important to note that some ovens have two heating elements, one for baking and one for broiling. If one of the heating elements is faulty, it may only affect the cooking function that it’s associated with. For example, if the baking element is faulty, the broiling function may still work properly.

2. Temperature Sensor Malfunction

Another common reason why an oven may not work properly is due to a malfunctioning temperature sensor. The temperature sensor is a component that measures the temperature inside the oven and sends that information to the oven’s control board. If the sensor is not functioning correctly, it can cause the oven to overheat, undercook, or not heat up at all.

One way to check if the temperature sensor is faulty is to use a multimeter to test it for continuity. This will determine if there is a complete electrical connection throughout the sensor. If there is no continuity, then the temperature sensor is faulty and needs to be replaced.

Another way to check if the temperature sensor is working correctly is to use an oven thermometer to compare the temperature readings inside the oven with the set temperature on the control panel. If the temperatures are significantly different, then the temperature sensor may need to be calibrated or replaced.

It’s important to note that some ovens have a separate thermal fuse or thermostat that can also affect the temperature regulation in the oven. If these components are faulty, it can cause similar issues as a malfunctioning temperature sensor. It’s best to consult the oven’s manual or contact a professional if you suspect any of these components may be causing issues with your oven.

3. Control Board Failure

Control board failure is another common reason why an oven may not work properly. The control board is the component responsible for controlling various functions of the oven, such as temperature, cooking time, and settings. If the control board fails, it can cause the oven to not work at all or not work properly.

One way to check if the control board is faulty is to visually inspect it for any signs of damage, such as burn marks or blown capacitors. If there is visible damage, then the control board will likely need to be replaced.

Another way to check if the control board is faulty is to test it with a multimeter. This can determine if there is any electrical continuity throughout the control board. If there is no continuity, then the control board is likely faulty and needs to be replaced.

It’s important to note that control board failure can also be caused by power surges or electrical shorts. It’s important to have your oven plugged into a surge protector and to avoid using the oven during electrical storms to help prevent damage to the control board. If you suspect that a power surge or electrical short may have caused the control board to fail, it’s best to contact a professional to assess and repair the damage.

4. Door Issues

Door issues can also cause an oven to not work properly. The oven door is designed to seal tightly to help retain heat and cook food evenly. If the door is not sealing properly, it can cause the oven to lose heat, resulting in undercooked or unevenly cooked food.

One way to check if the oven door is sealing properly is to visually inspect the door gasket for any signs of wear or damage. The gasket is the rubber strip that runs along the edge of the oven door. If there are any cracks or tears in the gasket, it will need to be replaced.

Another way to check if the oven door is sealing properly is to do the dollar bill test. Place a dollar bill between the door and the oven frame and close the door. If you can easily pull the dollar bill out, then the door is not sealing properly and may need to be adjusted or repaired.

Additionally, the oven door switch can also cause issues with the oven. This switch is designed to detect when the door is closed and turn on the oven light and heating elements. If the switch is faulty, it can cause the oven to not turn on at all. A professional should be contacted to diagnose and repair any issues with the door switch.

It’s important to note that oven doors can be heavy and awkward to handle, so it’s recommended to seek professional assistance if you’re unsure how to properly adjust or repair the door.

5. Gas Supply Issues

If you have a gas oven, gas supply issues can also cause the oven to not work properly. A gas oven requires a steady supply of gas to properly heat up and cook food. If the gas supply is interrupted, it can cause the oven to not heat up at all or heat up unevenly.

One way to check if the gas supply is the issue is to check the gas valve to ensure that it’s open. The gas valve is typically located behind the oven and has a lever that can be turned to open or close the valve. If the valve is closed, the gas supply will be interrupted, causing the oven to not work properly.

Another way to check if the gas supply is the issue is to check other gas appliances in the home, such as the stove or water heater. If those appliances are also not working properly, it may indicate a larger issue with the gas supply in the home.

It’s important to note that gas leaks can be dangerous and should be taken seriously. If you suspect a gas leak, immediately turn off the gas supply to the home and contact a professional to assess and repair any damage.

If you’re unsure how to properly diagnose or repair any issues with the gas supply to your oven, it’s recommended to seek professional assistance.

Tips to make major kitchen appliance last longer

Tips to Make a Major Kitchen Appliance Last Longer

Tips to Make a Major Kitchen Appliance Last Longer

When we look around in our home, all we see are electronic appliances. We have appliances for almost everything like baking, cooking, storing food, etc. Among them there are some major machines that are definitely found in every kitchen

These appliances surely take a toll on your pocket.so their proper maintenance is necessary. If you do not take proper care of them, then be ready to spend your fortune to buy them.

Here are some ways through which you can increase the span of working.

  1. Regular Cleaning
  2. Proper Use
  3. Maintenance
  4. Avoiding Harsh Chemicals
  5. Proper Storage
  6. Timely Repairs
  7. Avoiding Overuse
  8. Handling with Care
  9. Upgrading When Necessary

1. Regular Cleaning

Regular cleaning is an essential part of maintaining your major kitchen appliances and ensuring they last longer. Here are some tips for regular cleaning:

  1. Follow the manufacturer’s instructions for cleaning each appliance.
  2. For appliances like ovens, microwaves, and toasters, use a damp cloth to wipe down the interior and exterior surfaces. For tougher stains, use a gentle cleaner recommended by the manufacturer.
  3. For refrigerators, remove all food and wipe down the shelves and drawers with a mixture of warm water and mild detergent. Make sure to wipe down the interior walls as well.
  4. For dishwashers, remove any food debris from the filters and spray arms. Use a dishwasher cleaner to remove any buildup and keep the machine running efficiently.
  5. For stovetops and ranges, clean up spills immediately with a damp cloth. Use a non-abrasive cleaner to remove any burnt-on stains.
  6. For blenders and food processors, disassemble the parts and clean them thoroughly with warm soapy water. Make sure to dry them completely before reassembling.
  7. For coffee makers, run a mixture of water and vinegar through the machine to remove any buildup. Run a few cycles of clean water through the machine to rinse it thoroughly.

By following these regular cleaning tips, you can keep your major kitchen appliances in top condition and extend their lifespan.

2. Proper Use

Using your major kitchen appliances properly is key to keeping them in good working condition and prolonging their lifespan. Here are some tips for proper use:

  1. Read and follow the manufacturer’s instructions and user manual carefully.
  2. Avoid overloading your appliances beyond their recommended capacity.
  3. Don’t use sharp or abrasive utensils that can scratch or damage the appliance.
  4. Use the right kind of cookware that is suitable for your appliance. For example, don’t use glass cookware on a ceramic stovetop.
  5. Avoid slamming or dropping appliance doors, lids, or drawers as it can damage the hinges or seals.
  6. For appliances like ovens, avoid using the self-cleaning feature too often, as it can cause wear and tear on the appliance.
  7. Always use the appropriate settings and temperatures for each appliance. For example, don’t use a high heat setting on a non-stick pan.
  8. Don’t leave appliances unattended while in use, and make sure to turn them off when not in use.

By following these tips, you can ensure that your major kitchen appliances are used properly and last longer.

3. Maintenance

Regular maintenance is crucial for keeping your major kitchen appliances in good working condition and prolonging their lifespan. Here are some tips for maintenance:

  1. Follow the manufacturer’s recommended maintenance schedule and instructions.
  2. Check the seals and hinges on your refrigerator and freezer doors regularly to make sure they are tight and not damaged.
  3. Replace filters in your range hood, refrigerator, and air conditioner as recommended by the manufacturer.
  4. Clean the coils on the back or underneath your refrigerator regularly to prevent dust and debris buildup.
  5. Check the burners and heating elements on your stove or oven for signs of wear or damage, and replace them as needed.
  6. Make sure to keep your dishwasher’s spray arms and filters clean to prevent clogs and improve performance.
  7. Have a professional technician service your appliances regularly to identify and fix any potential issues.
  8. Lubricate the moving parts of your appliances, such as the hinges and rollers, to prevent wear and tear.

By following these maintenance tips, you can keep your major kitchen appliances in good working condition and extend their lifespan.

4. Avoiding Harsh Chemicals

Using harsh chemicals or abrasive cleaners can damage the surface of your major kitchen appliances and shorten their lifespan. Here are some tips for avoiding harsh chemicals:

  1. Read the manufacturer’s instructions for cleaning and use only the recommended cleaning products.
  2. Avoid using abrasive cleaning tools like steel wool, scouring pads, or abrasive cleaners.
  3. For stubborn stains, use a non-abrasive cleaner, such as a mixture of warm water and mild detergent.
  4. For cleaning stainless steel appliances, use a soft cloth and mild detergent or a specialized stainless steel cleaner.
  5. Avoid using bleach or ammonia-based cleaners, which can damage or discolor surfaces.
  6. Use natural cleaning agents like vinegar or baking soda for cleaning appliances like ovens or microwaves.
  7. When using cleaning products, make sure to rinse the appliance thoroughly with water to remove any residue.

By following these tips, you can avoid harsh chemicals and abrasive cleaners, keeping your major kitchen appliances in good condition and extending their lifespan.

5. Proper Storage

Proper storage of your major kitchen appliances can help prolong their lifespan and prevent damage. Here are some tips for proper storage:

  1. When storing small appliances like blenders, food processors, or mixers, make sure to wrap the cords neatly and store them in a dry and safe place.
  2. For larger appliances like refrigerators or dishwashers, make sure they are installed in a well-ventilated and dry area, away from direct sunlight, heat, or moisture.
  3. Store your appliances in a place where they are easily accessible for cleaning, maintenance, or repairs.
  4. Make sure to turn off and unplug your appliances before storing them, and secure any moving parts or doors.
  5. For appliances like ovens or stovetops, cover them with a protective cover when not in use to prevent dust or debris buildup.
  6. Store your appliances according to their shape and size, making sure that they are not stacked or placed on top of each other.
  7. Store appliances like toasters, coffee makers, or microwaves on sturdy countertops or shelves to prevent them from falling or tipping over.

By following these tips, you can store your major kitchen appliances properly and ensure that they remain in good condition, functioning properly, and last longer.

6. Timely Repairs

Timely repairs are crucial for maintaining the performance and extending the lifespan of your major kitchen appliances. Here are some tips for timely repairs:

  1. Don’t wait until an appliance breaks down completely before calling a professional technician. Address any issues as soon as you notice them, such as unusual noises, leaks, or reduced performance.
  2. Follow the manufacturer’s instructions for troubleshooting and repairing minor issues, such as replacing a burnt-out light bulb or unclogging a drain.
  3. For major repairs, always call a professional technician who is trained and qualified to work on your specific appliance.
  4. Don’t attempt to repair an appliance if you don’t have the knowledge or expertise, as it can cause more damage or even be dangerous.
  5. Regularly schedule maintenance checkups with a professional technician to identify and fix any potential issues before they become major problems.
  6. Consider investing in a service contract or extended warranty for your major kitchen appliances to ensure timely repairs and avoid costly repairs in the future.

By following these tips, you can ensure that your major kitchen appliances are repaired promptly, maintained properly, and last longer.

7. Avoiding Overuse

Avoiding overuse is an important factor in prolonging the lifespan of your major kitchen appliances. Here are some tips for avoiding overuse:

  1. Follow the manufacturer’s recommended usage guidelines, including cooking times and load sizes.
  2. Avoid using your appliances for purposes they weren’t designed for. For example, don’t use your oven to heat your home or your dishwasher to wash non-dish items.
  3. Don’t overload your appliances, such as overpacking your refrigerator, overloading your dishwasher, or filling your washing machine beyond the recommended capacity.
  4. Don’t leave your appliances running when they’re not needed. For example, turn off your stove, oven, or dishwasher as soon as you’re done using them.
  5. Use energy-saving settings on your appliances when available, such as the “energy-saving” mode on your dishwasher or washing machine.
  6. For appliances like refrigerators or freezers, don’t keep the doors open for longer than necessary, as it can increase the workload and energy usage.
  7. Avoid using your appliances excessively, such as running your dishwasher or washing machine every day when it’s not necessary.

By following these tips, you can avoid overusing your major kitchen appliances, reduce their workload and energy usage, and extend their lifespan.

8. Handling with Care

Handling your major kitchen appliances with care is important to keep them in good condition and prevent damage. Here are some tips for handling your appliances with care:

  1. Handle your appliances gently, avoiding banging or dropping them. If you need to move your appliances, use a dolly or furniture sliders to avoid scratching or damaging the floors or appliance surfaces.
  2. For appliances with glass surfaces, such as ovens or stovetops, avoid using heavy or sharp objects that can scratch or crack the glass.
  3. Don’t use your appliances as a workspace or countertop. For example, don’t put heavy items on top of your stove or use your refrigerator as a shelf.
  4. When cleaning your appliances, use soft cloths or sponges to avoid scratching or damaging the surfaces. Avoid using abrasive cleaners or tools.
  5. For appliances with knobs or buttons, use them gently and avoid pulling or twisting them too hard.
  6. Don’t yank the cords of your appliances when unplugging them. Gently pull the plug out of the outlet.
  7. For appliances with removable parts, such as blender blades or mixer attachments, handle them carefully to avoid bending or breaking them.

By following these tips, you can handle your major kitchen appliances with care, preventing damage and ensuring they last longer.

9. Upgrading When Necessary

Upgrading your major kitchen appliances when necessary is important to ensure optimal performance and energy efficiency, and to take advantage of the latest technology advancements. Here are some tips for upgrading your appliances:

  1. Consider the age and condition of your appliances. If they are more than 10 years old or have frequent breakdowns, it may be time to consider upgrading.
  2. Look for appliances with energy-efficient features, such as Energy Star certified appliances, which can save you money on your energy bills in the long run.
  3. Consider the size and capacity of the appliance you need, based on your family size and cooking needs.
  4. Research the latest features and technologies available for the appliance you’re considering, such as self-cleaning ovens, smart appliances, or touchless faucets.
  5. Compare the prices and features of different brands and models before making a purchase.
  6. Don’t be swayed by unnecessary features or gadgets that you may not use or need.
  7. When upgrading, properly dispose of your old appliances according to local regulations, such as recycling or donating them to charity.

By following these tips, you can upgrade your major kitchen appliances when necessary, ensuring optimal performance and energy efficiency, and taking advantage of the latest technology advancements.

Tips and tricks to keep your refrigerator work smoothly and efficiently

Easy Tips and Tricks to Keep Your Refrigerator to Work Smoothly and Efficiently

Easy Tips and Tricks to Keep Your Refrigerator to Work Smoothly and Efficiently

We all tend to buy expensive appliances, but when it comes to their proper care and maintenance, we pay the minimum or no attention.

Maintenance surely increases the life span of working appliances. If we take care of them properly and use them nicely, then they can run for a longer amount of time without causing any problem.

When it comes to maintenance of the refrigerator, we get confused as to how to do it properly.

So donโ€™t need to worry. We have here some tips and tricks for you to do it properly.

  1. Clean the condenser coils
  2. Check the temperature
  3. Keep the door seals clean
  4. Keep the fridge full
  5. Use storage containers
  6. Keep the fridge organized
  7. Check the door seal

1. Clean the condenser coils

Cleaning the condenser coils is an important part of maintaining your refrigerator’s efficiency. Here’s how to do it:

  1. Unplug the refrigerator or turn off the power at the circuit breaker.
  2. Locate the condenser coils. They are usually located on the back of the refrigerator or underneath it.
  3. Remove the grille or cover that protects the coils. This may require a screwdriver.
  4. Use a vacuum cleaner or a coil cleaning brush to remove dust and debris from the coils. Be careful not to damage the coils while cleaning them.
  5. Once you’ve removed as much debris as possible, use a damp cloth to wipe down the coils and any other accessible areas.
  6. Replace the grille or cover and plug the refrigerator back in or turn the power back on.

It’s a good idea to clean the condenser coils at least once or twice a year to keep your refrigerator running efficiently. If you have pets or your home is particularly dusty, you may need to clean them more often.

2. Check the temperature

Checking the temperature of your refrigerator is an important step to ensure that it is working efficiently. Here’s how to do it:

  1. Purchase a thermometer: You can find a thermometer designed for use in refrigerators at most hardware or home goods stores. Look for one that is easy to read and can be easily hung or placed inside the refrigerator.
  2. Place the thermometer inside the refrigerator: Hang or place the thermometer in the middle of the fridge, away from the walls and the door. Leave it there for a few hours to allow it to adjust to the temperature.
  3. Check the temperature: After a few hours, check the thermometer to see what temperature your refrigerator is maintaining. The recommended temperature range for most refrigerators is between 35-38ยฐF (1.7-3.3ยฐC).
  4. Adjust the temperature: If the temperature is too warm, adjust the thermostat to a colder setting. If it’s too cold, adjust it to a warmer setting. Wait for a few hours and check the thermometer again until you find the ideal temperature.

It’s a good idea to check the temperature of your refrigerator every few months to ensure it’s working efficiently. If you notice that the temperature is consistently too warm or too cold, it may be time to call a repair technician to diagnose and fix the problem.

3. Keep the door seals clean

Keeping the door seals of your refrigerator clean is important to ensure that they form a tight seal with the fridge, preventing cool air from escaping and warm air from getting in. Here’s how to keep your door seals clean:

  1. Mix a solution of equal parts water and vinegar in a spray bottle.
  2. Open the fridge door and examine the door seal for any debris or grime that may have accumulated.
  3. Spray the solution directly onto the seal and let it sit for a few minutes.
  4. Wipe the seal with a clean, damp cloth to remove the vinegar solution and any dirt or grime that may have accumulated.
  5. Dry the seal thoroughly with a clean, dry cloth.

It’s a good idea to clean the door seals at least once a month to ensure that they are working efficiently. If you notice any tears or cracks in the seal, they will need to be replaced to ensure that your fridge is running efficiently.

4. Keep the fridge full

Keeping your refrigerator full is a great way to help it run efficiently. Here’s why:

  1. Reduces energy consumption: When your fridge is full, the items inside act as insulation, helping to keep the air inside cold. This means that the fridge doesn’t have to work as hard to maintain a cold temperature, reducing energy consumption and lowering your energy bill.
  2. Prevents air circulation: When your fridge is empty, air circulates more freely, causing the compressor to work harder to maintain the set temperature. This can lead to increased wear and tear on your fridge and a shorter lifespan.
  3. Helps with organization: A full fridge makes it easier to keep it organized. You can use storage containers and keep like items together, as mentioned earlier, and it’s easier to find what you need when everything is neatly arranged.

That being said, it’s important not to overfill your fridge. Overfilling can prevent air from circulating properly, leading to pockets of warm air that can cause food to spoil. It’s best to aim for a fridge that is about 75% full. This gives you enough space to organize your items and keeps your fridge running efficiently.

5. Use storage containers

Using storage containers is a great way to keep your refrigerator organized and running efficiently. Here are some tips on using storage containers:

  1. Choose the right containers: Look for airtight containers that are the right size for the food you’ll be storing. Glass containers with Snap-On lids are a good option, as they are durable and won’t absorb odors like plastic containers.
  2. Label containers: Use labels or masking tape to label the contents and date the container was filled. This helps you keep track of what’s in the fridge and when it needs to be consumed.
  3. Keep containers clean: Wash containers in hot soapy water and dry thoroughly before using. This helps to prevent the growth of bacteria and keeps food fresher for longer.
  4. Store like items together: Keep similar items in the same container, such as all your cheese in one container or all your cut vegetables in another. This makes it easier to find what you need and helps you keep track of what you have.
  5. Stack containers properly: Stack containers with heavier items at the bottom and lighter items at the top. This helps to prevent the containers from tipping over and spilling their contents.

By using storage containers, you can help to keep your refrigerator organized and running efficiently. It also helps to prevent spills and leaks, which can be hard to clean and can cause further problems.

6. Keep the fridge organized

Keeping your refrigerator organized is an important part of maintaining its efficiency. Here are some tips to help you keep your fridge organized:

  1. Group similar items together: Keep all your dairy products together, all your meats together, and all your vegetables together. This makes it easier to find what you need and helps you keep track of what you have.
  2. Use storage containers: As mentioned earlier, using storage containers is a great way to keep your refrigerator organized. By using containers, you can group similar items together, label them, and stack them neatly in your fridge.
  3. Keep a clean fridge: Regularly clean out any expired or spoiled items from your fridge. This helps to prevent odors from building up and ensures that you have enough space for fresh food.
  4. Use the right shelves: Use the shelves in your fridge to their best advantage. For example, store items that need to be kept cold, like dairy products, on the top shelves where it’s coldest. Keep raw meat on the bottom shelf to prevent any cross-contamination with other foods.
  5. Arrange items by size: Keep taller items, like bottles, at the back of the fridge and shorter items, like jars, at the front. This makes it easier to see what’s in the fridge and prevents smaller items from getting lost behind larger ones.

By keeping your fridge organized, you can reduce the amount of time it takes to find what you need and ensure that your fridge is running efficiently.

7. Check the door seal

  1. Close the door on a piece of paper or a dollar bill so that it is partially sticking out.
  2. Try to pull the paper or bill out. If you can easily pull it out, then the seal may not be tight enough.
  3. Inspect the door seal for any signs of damage, such as cracks or tears. If you notice any damage, it’s important to replace the seal to ensure that your fridge is running efficiently.
  4. Clean the door seal with warm soapy water and a clean cloth to remove any dirt or debris that may be preventing it from forming a tight seal.

If you find that the door seal is not tight enough, you may need to adjust the hinges or the latch on the door to ensure that it closes properly. A loose door can cause warm air to enter the fridge, which can lead to spoilage and increased energy consumption. Checking the door seal regularly can help you catch any problems early and ensure that your fridge is running efficiently.

Large appliance energy efficinet

Ways to Increase The Energy Efficiency of Large Appliances at Home

Ways to Increase The Energy Efficiency of Large Appliances at Home

Saving energy is the major concern of all the people especially in developing countries. People always remain conscious of using it carefully. When it comes to large appliances of home, we think we can do nothing to save energy from there. But you can definitely save energy form there also.

There are some ways through which you can save stop your large appliances to eat more energy.

  1. Choose energy-efficient appliances
  2. Properly maintain appliances
  3. Use appliances efficiently
  4. Upgrade to energy-efficient lighting
  5. Improve insulation
  6. Consider renewable energy

1. Choose energy-efficient appliances

Choosing energy-efficient appliances is an important step in increasing the energy efficiency of large appliances at home. Here are some tips for selecting energy-efficient appliances:

  1. Look for the ENERGY STAR label: The ENERGY STAR label indicates that the appliance meets energy efficiency guidelines set by the U.S. Environmental Protection Agency. ENERGY STAR certified appliances are designed to use less energy than conventional models, which can translate to significant energy and cost savings over time.
  2. Compare energy ratings: When shopping for appliances, compare their energy ratings. The most common energy rating system is the Energy Guide label, which provides information on the appliance’s energy consumption and estimated annual operating costs. Look for appliances with the lowest energy consumption and operating costs.
  3. Consider the size of the appliance: Larger appliances typically use more energy than smaller ones. When choosing an appliance, consider the size of your household and how much you will actually use the appliance. Choose an appropriately sized appliance to minimize energy waste.
  4. Look for advanced features: Some energy-efficient appliances have advanced features that can help save energy and reduce costs. For example, some refrigerators have sensors that adjust the temperature based on the amount of food inside, while some washing machines have settings that use less water.

By choosing energy-efficient appliances, you can reduce your energy consumption and save money on your energy bills over time.

2. Properly maintain appliances

Properly maintaining appliances is an important step in increasing their energy efficiency and lifespan. Here are some tips for properly maintaining appliances:

  1. Clean appliances regularly: Regular cleaning can help improve the performance of appliances. For example, cleaning the lint filter in a dryer can help it run more efficiently, while cleaning the coils on a refrigerator can help it cool more efficiently.
  2. Check and replace filters: Air filters in appliances such as air conditioners, furnaces, and vacuum cleaners should be checked and replaced regularly. Dirty filters can reduce the efficiency of the appliance and cause it to use more energy.
  3. Use appliances according to the manufacturer’s instructions: Following the manufacturer’s instructions can help prolong the life of an appliance and improve its energy efficiency. For example, overloading a washing machine can cause it to use more energy, while using the wrong type of detergent can damage the machine.
  4. Schedule regular maintenance: Many appliances require regular maintenance to operate efficiently. For example, a furnace should be inspected and cleaned annually, while an air conditioner may need to be serviced before the cooling season.
  5. Fix problems promptly: If an appliance is not working properly, it should be repaired promptly. A malfunctioning appliance can waste energy and may be a safety hazard.

By properly maintaining appliances, you can improve their energy efficiency, prolong their lifespan, and save money on energy bills and repairs over time.

3. Use appliances efficiently

Using appliances efficiently can help increase their energy efficiency and reduce energy consumption. Here are some tips for using appliances efficiently:

  1. Run appliances only when necessary: Use appliances only when needed, and avoid leaving them running unnecessarily. For example, turn off lights and electronics when leaving a room, and don’t run the dishwasher or washing machine until you have a full load.
  2. Use the correct settings: Many appliances have settings that can help save energy. For example, use the “energy saver” setting on a dishwasher to reduce water and energy consumption, and use the “eco” or “low heat” setting on a dryer to reduce energy use.
  3. Set the temperature correctly: Setting the thermostat on the air conditioner or heater to the correct temperature can help save energy. For example, setting the air conditioner to 78 degrees Fahrenheit during the summer can help reduce energy consumption.
  4. Use natural light: Use natural light to illuminate your home during the day instead of turning on lights. Open blinds and curtains to let in sunlight and save energy.
  5. Unplug electronics when not in use: Electronics such as televisions, computers, and chargers continue to use energy even when they are not in use. Unplug them when not in use or use a power strip with an on/off switch to make it easier to turn them off.

By using appliances efficiently, you can reduce your energy consumption and save money on your energy bills over time.

4. Upgrade to energy-efficient lighting

Upgrading to energy-efficient lighting can help reduce energy consumption and save money on energy bills. Here are some tips for upgrading to energy-efficient lighting:

  1. Choose LED bulbs: LED bulbs are the most energy-efficient lighting option and last much longer than traditional incandescent bulbs. They use up to 90% less energy than incandescent bulbs, and can last up to 25 times longer.
  2. Look for the ENERGY STAR label: ENERGY STAR certified lighting products meet energy efficiency guidelines set by the U.S. Environmental Protection Agency. Look for the ENERGY STAR label when purchasing lighting products to ensure that you are getting an energy-efficient product.
  3. Use motion sensors or timers: Using motion sensors or timers can help reduce energy consumption by turning off lights when they are not needed. For example, install motion sensors in rooms that are not frequently used, such as a guest room or storage area.
  4. Use natural light: Use natural light to illuminate your home during the day instead of turning on lights. Open blinds and curtains to let in sunlight and save energy.
  5. Consider dimmer switches: Dimmer switches can help reduce energy consumption by allowing you to adjust the brightness of your lights. This can be particularly useful in rooms where you do not need bright lighting.

By upgrading to energy-efficient lighting, you can reduce your energy consumption and save money on your energy bills over time.

5. Improve insulation

Improving insulation can help reduce energy consumption and save money on energy bills. Here are some tips for improving insulation:

  1. Check for air leaks: Air leaks can cause energy loss and make it difficult to maintain a consistent temperature in your home. Check for air leaks around windows, doors, and other openings, and seal them with caulk or weather stripping.
  2. Add insulation to the attic: Adding insulation to the attic can help reduce energy loss through the roof. Aim for a minimum of 12 inches of insulation in the attic.
  3. Insulate the walls: If your home has older walls that are not insulated, consider adding insulation to reduce energy loss through the walls. This may involve removing the drywall and installing insulation, which can be a major project.
  4. Insulate the floors: If your home has a crawl space or an unfinished basement, adding insulation to the floors can help reduce energy loss and improve energy efficiency.
  5. Consider replacing windows: If your windows are old and drafty, replacing them with energy-efficient windows can help improve insulation and reduce energy consumption. Look for windows with low-E coatings, which can help block heat and UV rays.

By improving insulation, you can reduce energy consumption and save money on your energy bills over time.

6. Consider renewable energy

Considering renewable energy sources can help reduce your environmental impact and save money on your energy bills over time. Here are some options to consider:

  1. Solar panels: Installing solar panels can help you generate your own electricity from the sun. This can help reduce your dependence on grid electricity and save you money on your energy bills over time.
  2. Wind turbines: If you live in an area with steady winds, installing a small wind turbine can help you generate your own electricity. This can be a good option if you have a large property and want to generate your own energy.
  3. Geothermal systems: Geothermal systems use the constant temperature of the earth to heat and cool your home. This can be an efficient and cost-effective way to heat and cool your home, especially in areas with extreme temperatures.
  4. Biomass heating: Biomass heating systems burn organic materials such as wood pellets, corn, or straw to generate heat. This can be a good option if you have access to a reliable supply of biomass fuel and want to reduce your dependence on fossil fuels.
  5. Hydro power: If you have a property with a stream or river, you may be able to generate your own electricity using a small hydro power system. This can be a good option if you live in an area with consistent water flow and want to generate your own energy.

By considering renewable energy sources, you can reduce your environmental impact and save money on your energy bills over time. Be sure to do your research and consult with a professional before making any major investments in renewable energy systems.