Frigidaire Dishwasher

Diagnose Dishwasher UO Error Code: How To Get Rid Of Frigidaire Dishwasher UO Error Code?

How To Get Rid Of Frigidaire Dishwasher UO Error Code?

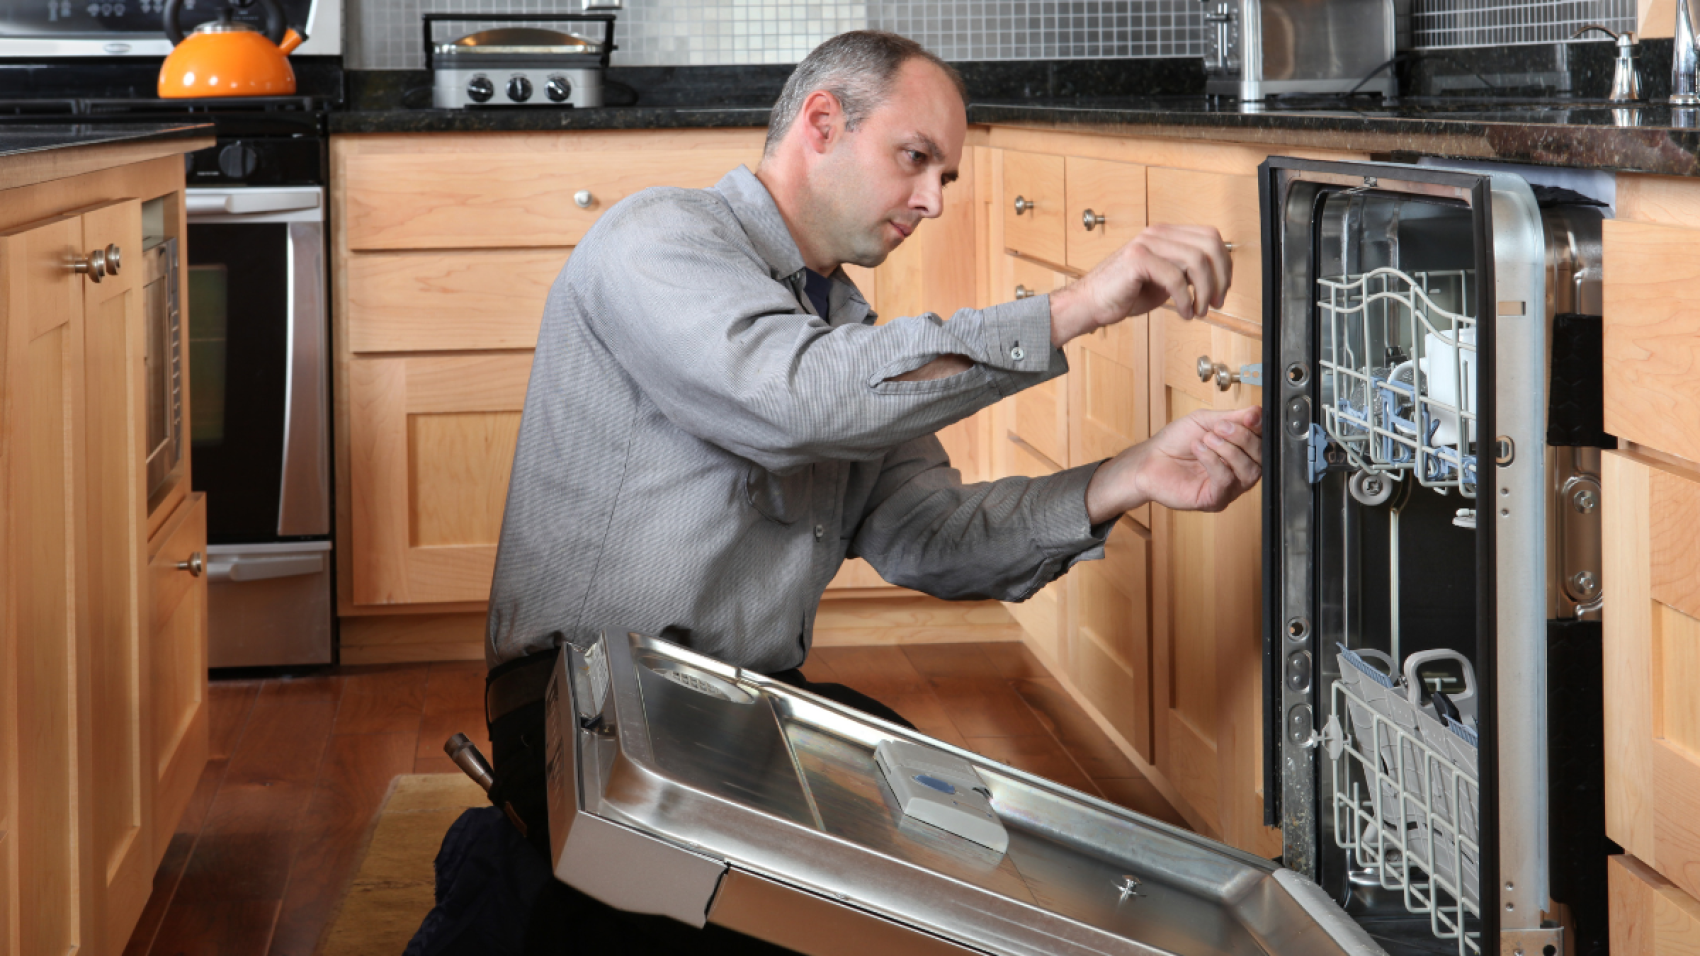
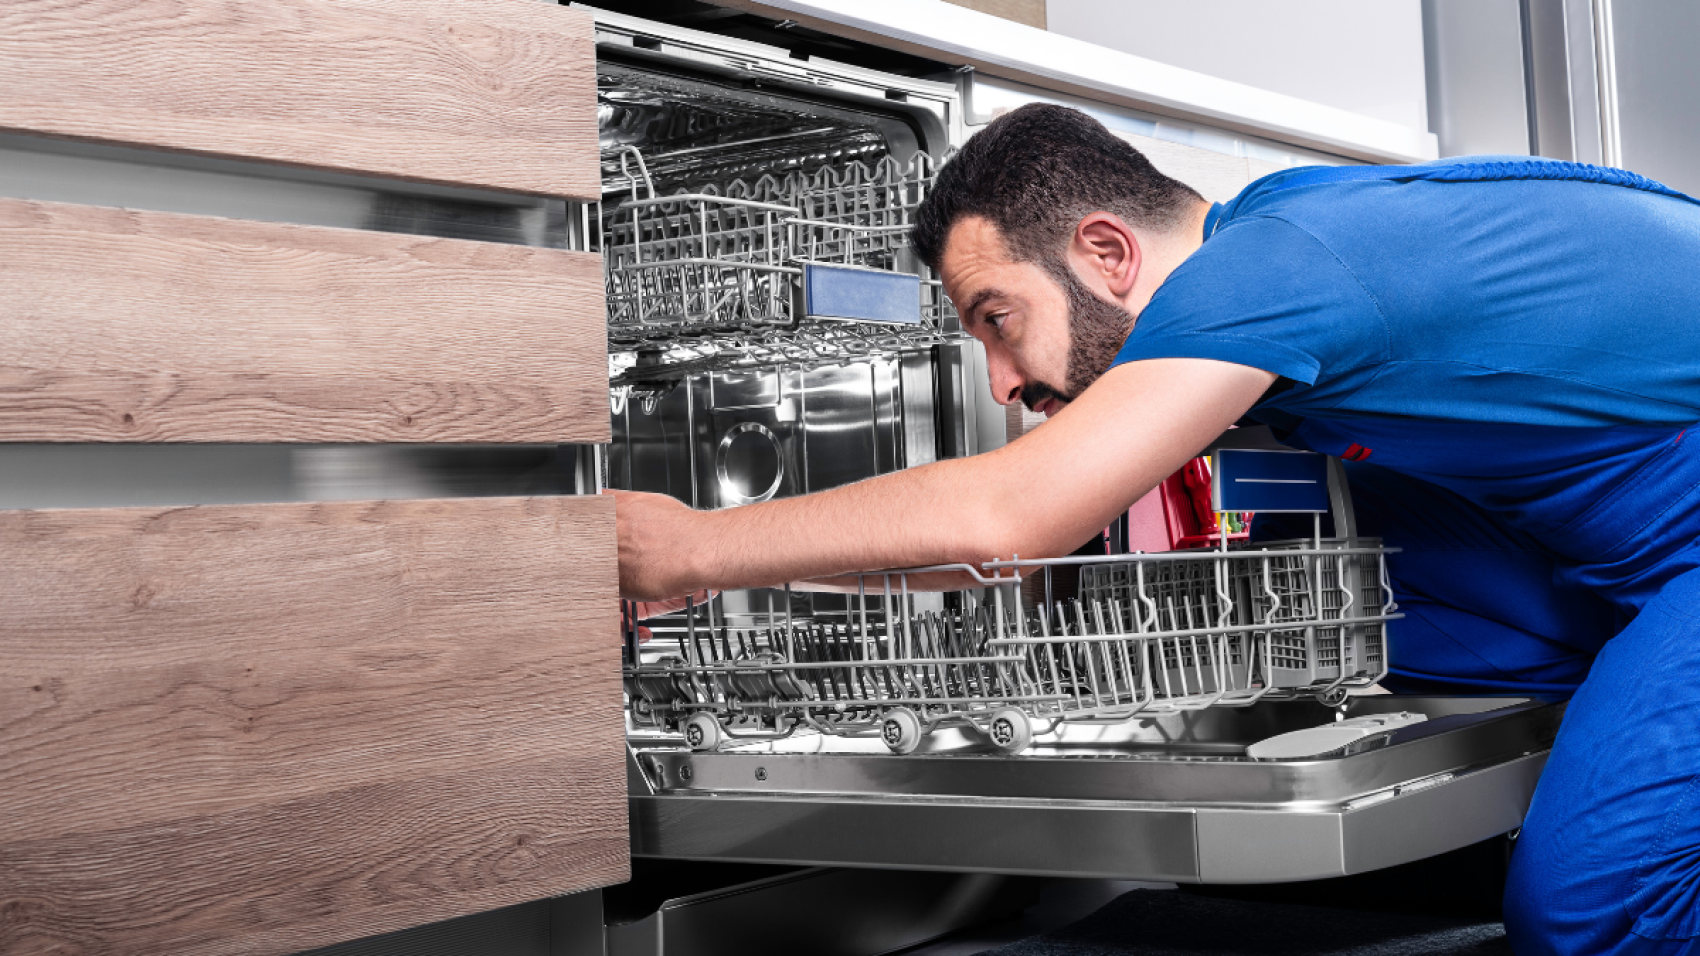
As a Frigidaire dishwasher owner, you may have encountered the UO error code at some point in time. This error code indicates that the dishwasher is experiencing a venting issue, which can prevent it from functioning properly. Fortunately, there are several steps you can take to resolve this error code and get your dishwasher back in working order. In this article, we will discuss how to get rid of the Frigidaire dishwasher UO error code and provide a step-by-step guide to help you troubleshoot and resolve this issue.

Table of Contents

  1. Introduction
  2. What Is The UO Error Code?
  3. Why Does The UO Error Code Occur?
  4. Troubleshooting The UO Error Code
    1. Check The Dishwasher Vent
    2. Inspect The Ventilation Fan
    3. Clean The Ventilation Fan And Filter
    4. Inspect The Ventilation System
  5. Fixing The UO Error Code
    1. Replace The Ventilation Fan
    2. Replace The Ventilation System
  6. Conclusion
  7. FAQs

1. Introduction

A dishwasher is a time-saving appliance that can make your life much easier. However, when it stops working properly, it can be frustrating. One common issue that Frigidaire dishwasher owners may experience is the UO error code. This error code can prevent your dishwasher from functioning properly and may require some troubleshooting to resolve. In this article, we will discuss the causes of the UO error code and provide a step-by-step guide to help you get rid of it.

2. What Is The UO Error Code?

The UO error code on a Frigidaire dishwasher indicates a venting issue. The dishwasher is designed to have a vent that allows steam to escape during the drying cycle. If there is an issue with the vent or the ventilation system, the dishwasher will display the UO error code. This error code can prevent the dishwasher from functioning properly and may require some troubleshooting to resolve.

3. Why Does The UO Error Code Occur?

There are several reasons why the UO error code may occur on a Frigidaire dishwasher. One common cause is a blockage in the dishwasher vent. This blockage can prevent steam from escaping during the drying cycle, causing the dishwasher to display the UO error code. Another possible cause is a malfunctioning ventilation fan or ventilation system. If either of these components is not working properly, the dishwasher may display the UO error code.

4. Troubleshooting The UO Error Code

If your Frigidaire dishwasher is displaying the UO error code, there are several steps you can take to troubleshoot the issue.

4.1 Check The Dishwasher Vent

The first step in troubleshooting the UO error code is to check the dishwasher vent. The vent is typically located on the top of the dishwasher door and can be easily accessed by opening the door. Check the vent for any blockages or debris that may be preventing steam from escaping during the drying cycle. If there is a blockage, remove it and run the dishwasher again to see if the UO error code has been resolved.

4.2 Inspect The Ventilation Fan

If the dishwasher vent is clear and the UO error code persists, the next step is to inspect the ventilation fan. The ventilation fan is responsible for moving air through the ventilation system and out of the dishwasher. Check the fan for any damage or signs of wear and tear. If the fan is not working properly, it may need to be replaced.

4.3 Clean The Ventilation Fan And Filter

If the ventilation fan appears to be functioning properly, the next step is to clean it and the filter. Over time, the ventilation fan and filter can become clogged with debris, preventing air from moving through the ventilation system. Remove the fan and filter and clean them thoroughly. Once they are clean, reassemble the dishwasher and run it to see if the UO error code has been resolved.

4.4 Inspect The Ventilation System

If the UO error code persists after cleaning the ventilation fan and filter, the next step is to inspect the ventilation system. The ventilation system is responsible for moving air through the dishwasher and out of the house. Check the ventilation system for any damage or blockages that may be preventing air from moving through it. If there is a blockage, remove it and run the dishwasher again to see if the UO error code has been resolved.

5. Fixing The UO Error Code

If you have completed all of the troubleshooting steps and the UO error code still persists, there are two possible solutions.

5.1 Replace The Ventilation Fan

If the ventilation fan is not working properly, it may need to be replaced. A faulty ventilation fan can cause the UO error code to appear and prevent your dishwasher from functioning properly. Contact a qualified technician or Frigidaire service center to have the fan replaced.

5.2 Replace The Ventilation System

If the ventilation system is damaged or not working properly, it may need to be replaced. A faulty ventilation system can cause the UO error code to appear and prevent your dishwasher from functioning properly. Contact a qualified technician or Frigidaire service center to have the ventilation system replaced.

6. Conclusion

The UO error code on a Frigidaire dishwasher indicates a venting issue that can prevent the dishwasher from functioning properly. By following the troubleshooting steps outlined in this article, you can resolve the UO error code and get your dishwasher back in working order. If all else fails, contact a qualified technician or Frigidaire service center to have your dishwasher repaired.

7. FAQs

  1. What does the UO error code on a Frigidaire dishwasher mean?

The UO error code on a Frigidaire dishwasher indicates a venting issue. It means that the dishwasher is unable to move air through the ventilation system properly.

  1. How do I troubleshoot the UO error code on my Frigidaire dishwasher?

To troubleshoot the UO error code on your Frigidaire dishwasher, start by checking the ventilation fan for any obstructions. If the fan is obstructed, clear it out and try running the dishwasher again. If the fan appears to be functioning properly, check the ventilation system for any damage or blockages. Clean the ventilation fan and filter if necessary.

  1. What do I do if the UO error code persists after troubleshooting?

If the UO error code persists after troubleshooting, you may need to replace the ventilation fan or system. Contact a qualified technician or Frigidaire service center for assistance.

  1. Can I replace the ventilation fan or system myself?

Replacing the ventilation fan or system can be a complex process that requires specialized tools and knowledge. It is recommended that you contact a qualified technician or Frigidaire service center to have the fan or system replaced.

  1. How do I prevent the UO error code from occurring in the future?

To prevent the UO error code from occurring in the future, regularly clean the ventilation fan and filter to ensure proper airflow. Also, be sure to check the ventilation system for any damage or blockages. If you notice any issues, have them repaired as soon as possible to prevent further problems.

Bosch Dishwasher

Bosch Dishwasher Troubleshooting: How To Reset The Bosch Dishwasher Error Code E24?

Bosch Dishwasher Troubleshooting: How To Reset The Bosch Dishwasher Error Code E24?

If you own a Bosch dishwasher, you may have experienced the error code E24. This error code indicates a drainage problem and can prevent your dishwasher from functioning properly. However, you don’t need to panic as there are ways to fix the issue. In this article, we’ll guide you through the process of resetting the Bosch dishwasher error code E24 and getting your dishwasher back in working condition.

Table of Contents

  1. Understanding the Bosch Dishwasher Error Code E24
  2. Reasons Behind the Bosch Dishwasher Error Code E24
  3. Checking the Drainage System
  4. Cleaning the Dishwasher Filter
  5. Checking the Drain Hose
  6. Resetting the Bosch Dishwasher Error Code E24
  7. Running a Test Cycle
  8. Additional Tips to Avoid Bosch Dishwasher Error Code E24
  9. When to Call a Professional
  10. Frequently Asked Questions
    1. What does the Bosch dishwasher error code E24 mean?
    2. Can I fix the Bosch dishwasher error code E24 by myself?
    3. How often should I clean the dishwasher filter?
    4. Can a clogged garbage disposal cause the Bosch dishwasher error code E24?
    5. How much does it cost to repair the Bosch dishwasher with error code E24?

Understanding the Bosch Dishwasher Error Code E24

The Bosch dishwasher error code E24 indicates a drainage problem. This means that the dishwasher is not able to drain the water properly, resulting in an error code on the display panel. If you see the error code E24 on your Bosch dishwasher, you need to address the issue before using your dishwasher again.

Reasons Behind the Bosch Dishwasher Error Code E24

There are several reasons why you might be seeing the error code E24 on your Bosch dishwasher. Some of the most common causes include:

  • Clogged drain hose
  • Clogged garbage disposal
  • Blocked dishwasher filter
  • Malfunctioning drain pump
  • Broken drain pump impeller

Checking the Drainage System

Before you reset the Bosch dishwasher error code E24, it’s essential to check the drainage system of your dishwasher. Start by turning off the power to your dishwasher and disconnecting it from the electrical outlet. Next, remove the bottom dish rack and inspect the drain area. Remove any food debris or other objects that may be clogging the drain.

Cleaning the Dishwasher Filter

Another common cause of the Bosch dishwasher error code E24 is a blocked dishwasher filter. Over time, food particles and other debris can accumulate in the filter, preventing water from draining properly. To clean the filter, follow these steps:

  1. Turn off the power to the dishwasher and unplug it from the electrical outlet.
  2. Locate the filter on the bottom of the dishwasher.
  3. Twist the filter counterclockwise and remove it from the dishwasher.
  4. Rinse the filter under running water to remove any debris.
  5. Reinstall the filter by twisting it clockwise.

Checking the Drain Hose

If the drain hose is clogged, it can cause the Bosch dishwasher to error code E24. To check the drain hose, follow these steps:

  1. Turn off the power to the dishwasher and unplug it from the electrical outlet.
  2. Locate the drain hose at the back of the dishwasher.
  3. Remove the hose from the dishwasher and check for any clogs or obstructions.
  4. Use a pipe cleaner or a long wire brush to clear any clogs.
  5. Reattach the hose to the dishwasher and make sure it’s securely fastened.

Resetting the Bosch Dishwasher Error Code E24

After checking the drainage system, cleaning the dishwasher filter, and checking the drain hose, it isย time to reset the Bosch dishwasher error code E24. Follow these steps:

  1. Press the power button to turn off the dishwasher.
  2. Wait for a few minutes to allow the dishwasher to cool down.
  3. Press and hold the Start button for about 5 seconds until the Active light starts flashing.
  4. Release the Start button and wait for the dishwasher to finish its reset cycle.
  5. Once the reset is complete, the Active light will stop flashing, and the dishwasher will be ready to use again.

Running a Test Cycle

After resetting the Bosch dishwasher error code E24, it’s a good idea to run a test cycle to make sure everything is working correctly. Follow these steps:

  1. Load the dishwasher with a few dishes and close the door.
  2. Press the power button to turn on the dishwasher.
  3. Select a cycle and press Start.
  4. Wait for the dishwasher to complete the cycle and check for any error codes.

If you don’t see the error code E24 again, your dishwasher is now functioning correctly.

Additional Tips to Avoid Bosch Dishwasher Error Code E24

To avoid the Bosch dishwasher error code E24, follow these tips:

  • Run hot water in the sink before starting the dishwasher to ensure that the water entering the dishwasher is hot.
  • Don’t overload the dishwasher, as this can prevent water from draining properly.
  • Scrape any excess food particles off dishes before loading them in the dishwasher.
  • Clean the dishwasher filter regularly to prevent clogs.

When to Call a Professional

If you’ve tried all the steps above and are still seeing the Bosch dishwasher error code E24, it may be time to call a professional. A qualified technician can diagnose and fix any underlying issues with your dishwasher.

Frequently Asked Questions

  1. What does the Bosch dishwasher error code E24 mean?

The Bosch dishwasher error code E24 indicates a drainage problem.

  1. Can I fix the Bosch dishwasher error code E24 by myself?

Yes, you can fix the Bosch dishwasher error code E24 by following the steps outlined in this article.

  1. How often should I clean the dishwasher filter?

It’s a good idea to clean the dishwasher filter once a month to prevent clogs.

  1. Can a clogged garbage disposal cause the Bosch dishwasher error code E24?

Yes, a clogged garbage disposal can prevent water from draining properly, causing the Bosch dishwasher error code E24.

  1. How much does it cost to repair the Bosch dishwasher with error code E24?

The cost of repairing the Bosch dishwasher error code E24 can vary depending on the underlying issue. It’s best to contact a qualified technician for an accurate quote.

Conclusion

The Bosch dishwasher error code E24 can be a frustrating issue, but with the steps outlined in this article, you can reset the error code and get your dishwasher back in working condition. By taking care to clean your dishwasher filter regularly and avoiding overloading your dishwasher, you can prevent the error code from occurring in the future.

LG Dishwasher AE Error

LG Dishwasher AE Error: How To Fix The LG Dishwasher AE Error Code?

How To Fix The LG Dishwasher AE Error Code?

If you have an LG dishwasher, then you might have encountered the AE error code at some point. This error code indicates a problem with the dishwasher’s water inlet. It can be frustrating to see your dishwasher not working correctly, but fortunately, there are several steps you can take to fix the LG dishwasher AE error code. In this article, we will provide you with a comprehensive guide on how to troubleshoot and fix this error code.

Table of Contents

  • Understanding the AE error code
  • Reasons for the AE error code
  • Steps to fix the LG dishwasher AE error code
    • Step 1: Check the water supply
    • Step 2: Check the water inlet valve
    • Step 3: Check the water inlet filter
    • Step 4: Check the dishwasher’s drain hose
    • Step 5: Check the dishwasher’s pressure switch
    • Step 6: Check the dishwasher’s control board
  • Additional tips for maintaining your LG dishwasher
  • Conclusion
  • FAQs

Understanding the AE error code

Before we dive into the steps to fix the LG dishwasher AE error code, it’s essential to understand what this error code means. The AE error code stands for “Water Inlet Error.” This error code indicates that the dishwasher is not getting enough water to clean the dishes properly.

Reasons for the AE error code

Several reasons can cause the LG dishwasher AE error code, including:

  • Low water pressure
  • Clogged water inlet filter
  • Malfunctioning water inlet valve
  • Kinked or blocked drain hose
  • Faulty pressure switch
  • Defective control board

Steps to fix the LG dishwasher AE error code

Now that you understand the causes of the AE error code let’s dive into the steps to fix it.

Step 1: Check the water supply

The first step is to ensure that your dishwasher is receiving enough water supply. Check if the water supply to the dishwasher is turned on and the water pressure is adequate. If the water supply is low, you can try turning off other appliances that are using water, such as washing machines or showers.

Step 2: Check the water inlet valve

If the water supply is not the issue, the next step is to check the water inlet valve. The water inlet valve is responsible for allowing water into the dishwasher. If the valve is not functioning correctly, it can cause an AE error code. To check the valve, turn off the water supply to the dishwasher, disconnect the water inlet hose, and inspect the valve. If the valve is damaged or clogged, you need to replace it.

Step 3: Check the water inlet filter

If the water inlet valve is not the issue, the next step is to check the water inlet filter. The filter on the inlet valve can become clogged with debris over time. If the filter is dirty, clean it with a soft-bristled brush and some warm water. Once you’ve cleaned the filter, reassemble the valve and check if the dishwasher is working correctly.

Step 4: Check the dishwasher’s drain hose

If the water inlet valve and filter are not the issues, the next step is to check the dishwasher’s drain hose. A kinked or blocked drain hose can prevent the dishwasher from draining correctly, which can cause the AE error code. Inspect the drain hose for any kinks or blockages and straighten it out if necessary.

Step 5: Check the dishwasher’s pressure switch

If the drain hose is not the issue, the next step is to check the dishwasher’s pressure switch. The pressure switch is responsible for detecting the water level in the dishwasher. If the button is malfunctioning or not working correctly, it can cause the AE error code. To check the pressure switch, remove the dishwasher’s front panel and locate the button. Test the switch with a multimeter and replace it if it’s defective.

Step 6: Check the dishwasher’s control board

If none of the previous steps have fixed the AE error code, the next step is to check the dishwasher’s control board. The control board is the brains of the dishwasher and is responsible for controlling all of the dishwasher’s functions. A faulty control board can cause an AE error code. To check the control board, remove the dishwasher’s top panel and locate the board. Inspect the board for any visible signs of damage, such as burnt-out components or loose connections. If you find any damage, you need to replace the control board.

Additional tips for maintaining your LG dishwasher

To prevent the AE error code and other issues with your LG dishwasher, here are some additional tips for maintaining your dishwasher:

  • Clean the dishwasher’s filter regularly to prevent clogs.
  • Run the dishwasher on a hot water cycle at least once a month to remove any buildup.
  • Use only dishwasher detergent and avoid using regular dish soap.
  • Load the dishwasher correctly to ensure that the water can circulate correctly.

Conclusion

The LG dishwasher AE error code can be frustrating, but with the steps outlined in this article, you should be able to troubleshoot and fix the issue. Remember to follow the additional tips for maintaining your dishwasher to prevent future issues.

Don’t hesitate to seek professional help if you’re not comfortable working with appliances or if the issue persists. With proper maintenance and care, your LG dishwasher can provide you with many years of trouble-free service.

FAQs

  1. Can I fix the LG dishwasher AE error code myself, or do I need to call a professional?

Answer: You can try fixing the AE error code yourself by following the steps outlined in this article. However, if you’re not comfortable working with appliances or if the issue persists, it’s best to call a professional.

  1. How often should I clean my LG dishwasher’s filter?

Answer: You should clean the filter at least once a month to prevent clogs.

  1. Can use regular dish soap in my LG dishwasher cause the AE error code?

Answer: Yes, using regular dish soap can cause the dishwasher to overflow and trigger the AE error code.

  1. What should I do if none of the steps in this article fix the AE error code?

Answer: If none of the steps fix the issue, you should call a professional for help.

  1. Is the LG dishwasher AE error code covered by warranty?

Answer: It depends on your dishwasher’s warranty. Check your warranty documentation to see if the AE error code is covered.

LG Dishwasher Cleaning Tips

LG Dishwasher Cleaning Tips – How to Clean an LG Dishwasher: A Step-by-Step Guide

LG Dishwasher Cleaning Tips – How to Clean an LG Dishwasher: A Step-by-Step Guide

Cleaning a dishwasher can seem like a daunting task, but with the right tools and knowledge, it can be an easy and straightforward process. LG dishwashers are known for their efficiency and effectiveness in cleaning dishes, but just like any other appliance, they require regular maintenance to function at their best. In this article, we will go through a step-by-step guide on how to clean an LG dishwasher.

Table of Contents

  1. Why Clean Your LG Dishwasher?
  2. Materials Needed to Clean Your LG Dishwasher
  3. Preparing Your LG Dishwasher for Cleaning
  4. Cleaning the Exterior of Your LG Dishwasher
  5. Cleaning the Interior of Your LG Dishwasher
  6. Cleaning the Filters of Your LG Dishwasher
  7. Cleaning the Spray Arms of Your LG Dishwasher
  8. Cleaning the Dish Rack of Your LG Dishwasher
  9. Running a Cleaning Cycle in Your LG Dishwasher
  10. Maintaining a Clean LG Dishwasher
  11. Troubleshooting LG Dishwasher Cleaning Issues
  12. Can I Use Dish Soap Instead of Dishwasher Detergent in my LG Dishwasher?
  13. Why is My LG Dishwasher Leaking?
  14. How Do I Clean the Spray Arms in My LG Dishwasher?
  15. How Do I Clean the Interior of My LG Dishwasher?
  16. Can I Clean the Filters in My LG Dishwasher?
  17. How Do I Prevent Rusting in My LG Dishwasher?
  18. Conclusion
  19. FAQs

1. Why Clean Your LG Dishwasher?

Cleaning your LG dishwasher is important for a few reasons. Firstly, a dirty dishwasher can cause unpleasant odors in your kitchen. Secondly, built-up dirt and grime can affect the efficiency of your dishwasher, leading to longer cleaning times and higher energy bills. Lastly, cleaning your dishwasher can help prolong its lifespan and prevent breakdowns.

2. Materials Needed to Clean Your LG Dishwasher

To clean your LG dishwasher, you will need the following materials:

  • Dish soap
  • White vinegar
  • Baking soda
  • Soft-bristled brush
  • Microfiber cloth
  • Dishwasher-safe container
  • Toothbrush

3. Preparing Your LG Dishwasher for Cleaning

Before you start cleaning your LG dishwasher, make sure it is empty and unplugged. Remove the dish rack and utensil holder and set them aside. Next, inspect the spray arms and filters for any debris or buildup.

4. Cleaning the Exterior of Your LG Dishwasher

To clean the exterior of your LG dishwasher, mix a solution of equal parts water and vinegar in a spray bottle. Spray the solution onto the front of the dishwasher and wipe it down with a microfiber cloth. For tougher stains or grime, use a soft-bristled brush and baking soda paste to scrub the affected areas.

5. Cleaning the Interior of Your LG Dishwasher

To clean the interior of your LG dishwasher, first, remove any debris or food particles from the bottom of the dishwasher with a toothbrush. Then, use a soft-bristled brush and dish soap to clean the inside of the dishwasher, paying special attention to the corners and crevices.

6. Cleaning the Filters of Your LG Dishwasher

Cleaning the filters of your LG dishwasher is an important step in maintaining its efficiency. Remove the filters from the dishwasher and rinse them under hot water. Use a soft-bristled brush and dish soap to clean any buildup or debris on the filters.

7. Cleaning the Spray Arms of Your LG Dishwasher

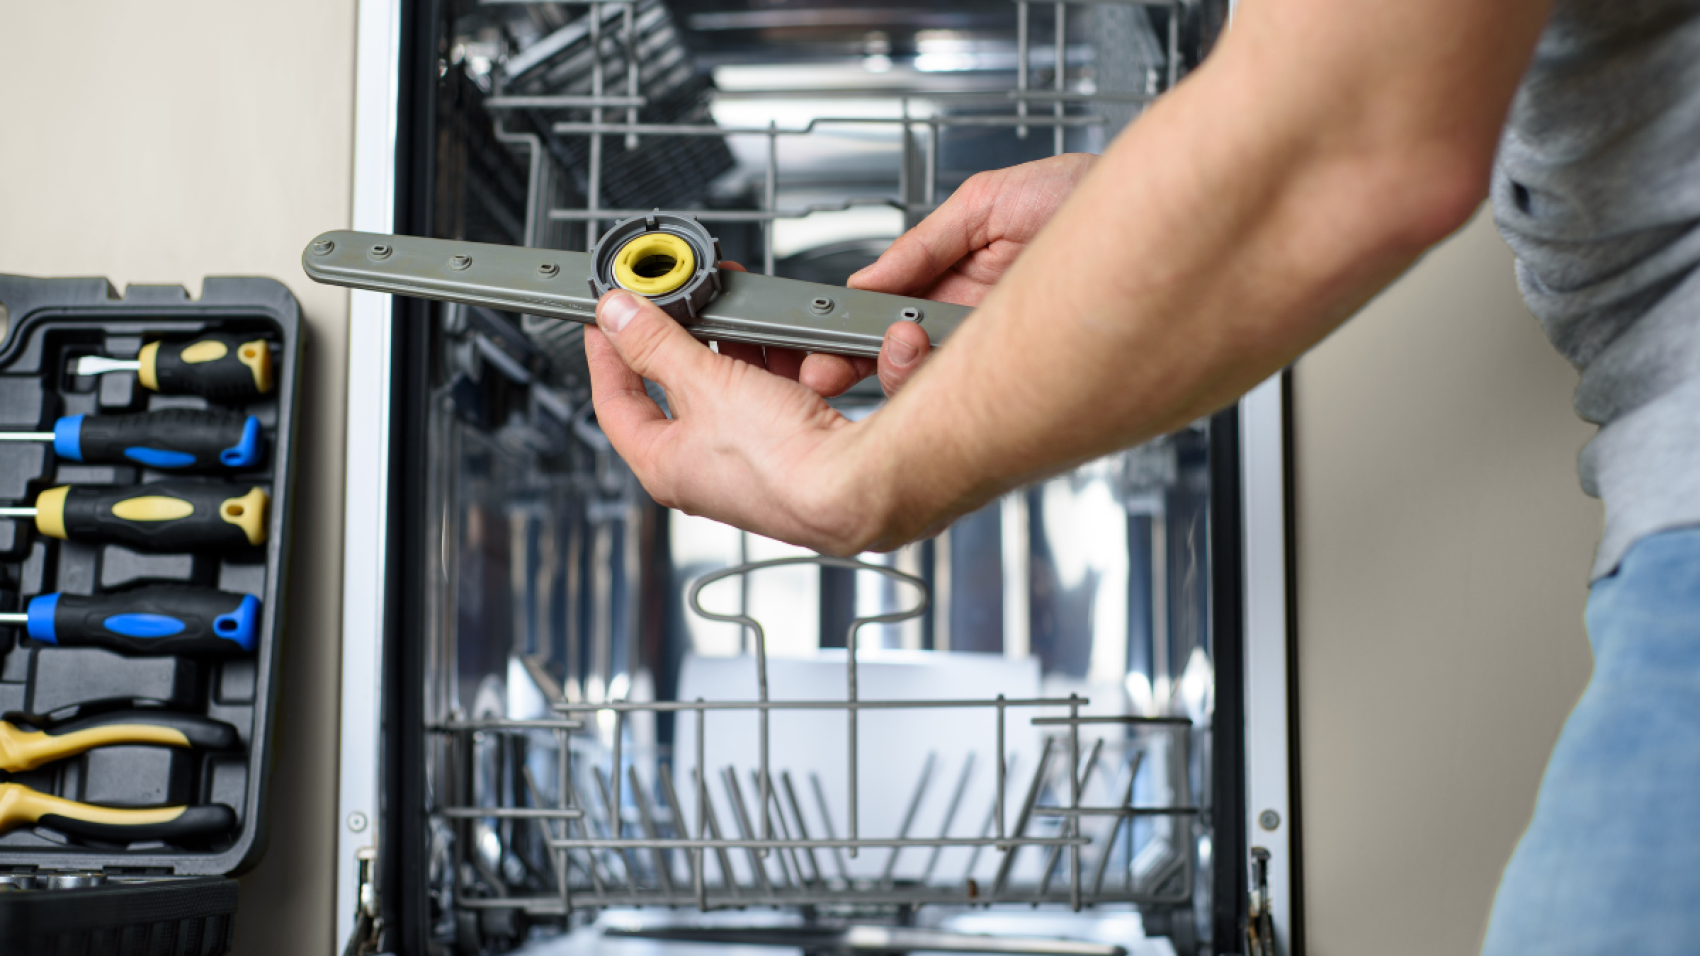
The spray arms of your LG dishwasher are responsible for distributing water during the cleaning cycle. To clean them, remove them from the dishwasher and rinse them under hot water. Use a toothbrush to clean any debris or buildup on the spray arms.

8. Cleaning the Dish Rack of Your LG Dishwasher

The dish rack of your LG dishwasher can accumulate dirt and grime over time. To clean it, remove it from the dishwasher and soak it in a dishwasher-safe container filled with hot water and dish soap. Use a soft-bristled brush to scrub.

9. Running a Cleaning Cycle in Your LG Dishwasher

After cleaning the different parts of your LG dishwasher, it’s a good idea to run a cleaning cycle to flush out any remaining debris or buildup. To do this, place a dishwasher-safe container filled with white vinegar on the bottom rack of your dishwasher and run a cycle on the hottest setting. This will help remove any residual grime and leave your dishwasher smelling fresh.

10. Maintaining a Clean LG Dishwasher

To keep your LG dishwasher clean, there are a few things you can do on a regular basis. First, make sure to scrape off any large pieces of food from your dishes before placing them in the dishwasher. This will help prevent clogs in the spray arms and filters. Second, run a cleaning cycle once a month using white vinegar. Finally, wipe down the exterior of your dishwasher regularly to prevent dirt and grime buildup.

11. Troubleshooting LG Dishwasher Cleaning Issues

If you’re experiencing issues with your LG dishwasher, such as dirty dishes or unpleasant odors, there may be a few things you can do to troubleshoot the problem. First, check the spray arms and filters for any buildup or debris. Second, make sure you’re using the correct amount of detergent for your dishwasher. Finally, run a cleaning cycle using white vinegar to flush out any remaining debris.

12. Can I Use Dish Soap Instead of Dishwasher Detergent in my LG Dishwasher?

No, it’s not recommended to use dish soap instead of dishwasher detergent in your LG dishwasher. Dish soap creates a lot of suds that can overflow from the dishwasher and cause damage to the machine. Additionally, using dish soap can leave a residue on your dishes and in your dishwasher.

13. Why is My LG Dishwasher Leaking?

There are several reasons why your LG dishwasher may be leaking. One possible cause is a damaged or worn-out door gasket. Another reason could be a malfunctioning inlet valve or a clogged drain hose. If you notice water pooling around your dishwasher, it’s important to identify the source of the leak and address the issue promptly to prevent water damage.

14. How Do I Clean the Spray Arms in My LG Dishwasher?

To clean the spray arms in your LG dishwasher, remove them from the dishwasher and rinse them under running water to remove any debris. You can also use a toothbrush or a small brush to remove any buildup from the spray arm nozzles. Once they’re clean, reinstall the spray arms back in the dishwasher.

15. How Do I Clean the Interior of My LG Dishwasher?

To clean the interior of your LG dishwasher, start by removing any large pieces of food or debris from the bottom of the dishwasher. Then, mix a paste of baking soda and water and use a soft-bristled brush to scrub the interior of the dishwasher. Pay special attention to the corners and edges where dirt and grime tend to accumulate. Rinse with water and run a cleaning cycle using white vinegar to remove any remaining buildup.

16. Can I Clean the Filters in My LG Dishwasher?

Yes, it’s important to clean the filters in your LG dishwasher regularly to prevent buildup and ensure that the dishwasher is functioning at its best. To clean the filters, remove them from the dishwasher and rinse them under running water to remove any debris. Use a soft-bristled brush to remove any stubborn buildup. Reinstall the filters back in the dishwasher.

17. How Do I Prevent Rusting in My LG Dishwasher?

To prevent rusting in your LG dishwasher, make sure to remove any metal objects from the dishwasher before running a cycle. If you notice any signs of rust on the interior of your dishwasher, you can use a rust remover solution and a soft-bristled brush to scrub the affected areas. Rinse with water and dry thoroughly before running another cycle.

18. Conclusion

Cleaning your LG dishwasher is an important part of maintaining its performance and prolonging its lifespan. By following the steps outlined in this article, you can keep your dishwasher clean and functioning at its best. Remember to regularly clean the different parts of your dishwasher, run a cleaning cycle with white vinegar, and address any issues promptly to prevent further damage.

Thank you for reading this article on how to clean an LG dishwasher. We hope you found it helpful!

19. FAQs

  1. How often should I clean my LG dishwasher?
  • It’s a good idea to clean your LG dishwasher once a month to prevent buildup and maintain efficiency.
  1. Can I use bleach to clean my LG dishwasher?
  • No, bleach is not recommended for cleaning your LG dishwasher as it can damage the machine and cause a chemical reaction with other cleaning agents.
  1. What should I do if my LG dishwasher is still dirty after cleaning it?
  • Check the spray arms and filters for any buildup or debris. Make sure you’re using the correct amount of detergent and consider running a cleaning cycle using white vinegar.
  1. How can I prevent clogs in the spray arms and filters of my LG dishwasher?
  • Scrape off any large pieces of food from your dishes before placing them in the dishwasher and run a cleaning cycle once a month using white vinegar.
  1. How can I remove tough stains from the interior of my LG dishwasher?
  • Use a soft-bristled brush and baking soda paste to scrub the affected areas.
Oven Repair & Dishwasher Repair

Oven Repair & Dishwasher Repair – How to Fix Your Oven or Dishwasher That Won’t Work Properly?

Oven Repair & Dishwasher Repair – How to Fix Your Oven or Dishwasher That Won’t Work Properly?

Are you facing issues with your oven or dishwasher? Do you have trouble getting it to work properly? If so, don’t worry, as there are ways to fix these problems. In this article, we will discuss some common issues that people face with their ovens and dishwashers and provide you with some tips on how to fix them.

Introduction

Before we dive into the details of fixing ovens and dishwashers, it’s important to understand that these appliances are complex machines that require proper care and maintenance. Neglecting them can lead to serious issues, such as fire hazards or electrical shocks. Therefore, it’s essential to take proper safety precautions and follow manufacturer instructions when attempting any repairs.

Common issues with Ovens

The oven not heating up

One of the most common issues with ovens is that they don’t heat up properly. This could be due to a malfunctioning thermostat or a faulty heating element. To fix this issue, you need to identify the source of the problem first. If the thermostat is broken, you’ll need to replace it. If the heating element is faulty, you can either repair or replace it.

Uneven cooking

Another issue that people face with their ovens is uneven cooking. This could be due to a faulty heating element or a malfunctioning convection fan. To fix this issue, you need to ensure that the heating element is working properly and that the convection fan is circulating the hot air evenly. If the heating element is faulty, you can either repair or replace it. If the convection fan is not working correctly, you’ll need to replace it.

The oven door not closing properly

If your oven door is not closing properly, it could be due to a broken hinge or a worn-out gasket. To fix this issue, you need to check the hinges and gasket and replace them if necessary.

Common issues with Dishwashers

The dishwasher not cleaning properly

One of the most common issues with dishwashers is that they don’t clean dishes properly. This could be due to a clogged spray arm or a malfunctioning pump. To fix this issue, you need to remove the spray arm and clean it thoroughly. If the pump is malfunctioning, you’ll need to replace it.

The dishwasher not draining properly

Another issue that people face with their dishwashers is that they don’t drain properly. This could be due to a clogged drain hose or a malfunctioning drain pump. To fix this issue, you need to remove the drain hose and clean it thoroughly. If the drain pump is malfunctioning, you’ll need to replace it.

The dishwasher making unusual noises

If your dishwasher is making unusual noises, it could be due to a malfunctioning motor or a worn-out pump. To fix this issue, you need to check the motor and pump and replace them if necessary.

Preventing Issues with Ovens and Dishwashers

Regular cleaning and maintenance can prevent most issues with your oven or dishwasher. Follow manufacturer instructions for cleaning and use, and avoid overloading or misusing these appliances.

For ovens, clean the heating element regularly to prevent excess food or grease buildup. Avoid slamming the oven door, as this can damage the seal and affect the ovenโ€™s performance.

For dishwashers, rinse dishes before loading to prevent clogs in the spray arm and filter. Clean the dishwasherโ€™s interior and components regularly to prevent mold and bacteria growth.

Conclusion:

In conclusion, fixing your oven or dishwasher that won’t work properly can be a challenging task, but it’s not impossible. With the right knowledge and tools, you can troubleshoot and fix many common issues on your own, saving you time and money. It’s important to always follow safety precautions and turn off the power before attempting any repairs. If you are unsure about a repair or feel uncomfortable doing it yourself, it’s best to call a professional for help.

FAQs

1. Can I fix my oven or dishwasher myself?
Answer: It depends on the issue. Minor issues like a dirty heating element or clogged filter can be easily fixed at home. However, for more complex issues, itโ€™s best to call a professional to avoid causing further damage or risking injury.

2. How often should I clean my oven or dishwasher?
Answer: Itโ€™s recommended to clean your oven and dishwasher at least once a month. However, if you use them frequently, you may need to clean them more often.

3. Why is my oven door not closing properly?
Answer: A faulty door hinge or latch could be causing your oven door to not close properly. Check these components and replace any that are damaged.

4. How do I clean the dishwasherโ€™s spray arm?
Answer: Remove the spray arm from the dishwasher and soak it in a solution of warm water and vinegar for 30 minutes. Use a toothbrush or other soft-bristled brush to remove any debris or buildup, then rinse the arm thoroughly and reinstall it in the dishwasher.

5. Why is my dishwasher making strange noises?
Answer: Strange noises in a dishwasher could be due to a clogged spray arm, a malfunctioning motor, or a faulty pump. Check these components and replace any that are damaged.

We hope this article has provided you with valuable insights and tips for fixing your oven or dishwasher that won’t work properly. Remember to always prioritize safety and turn off the power before attempting any repairs. If you’re unsure or uncomfortable with a repair, it’s best to call a professional. For more great prompts and topics, visit the link above and unlock a world of possibilities for your content writing needs. Thank you for reading!

Dishwasher Not Draining

Dishwasher Not Draining? Here’s What to Do

Dishwasher Not Draining? Here’s What to Do

A dishwasher is an essential appliance in many households, making cleaning up after meals a breeze. However, when it fails to drain properly, it can become a frustrating and inconvenient problem. In this article, we’ll explore the reasons why your dishwasher may not be draining correctly and provide practical solutions to fix the issue.

Table of Contents

  • Introduction
  • Understanding the dishwasher draining system
  • Common causes of dishwasher not draining
  • How to troubleshoot a dishwasher that’s not draining
    • Check for blockages in the dishwasher drain
    • Inspect the dishwasher’s air gap
    • Inspect the dishwasher’s garbage disposal
    • Check the dishwasher’s drain hose
    • Inspect the dishwasher’s drain pump
  • How to prevent future dishwasher draining problems
  • Conclusion
  • FAQs

Introduction

A dishwasher not draining is a common issue that can cause significant inconvenience in a household. It can lead to dirty dishes, bad smells, and even damage to the appliance if left unaddressed. Fortunately, there are several reasons why your dishwasher may not be draining, and there are also several solutions you can try to fix the problem.

Understanding the Dishwasher Draining System

Before diving into the reasons why your dishwasher may not be draining, it’s helpful to understand how the dishwasher draining system works. When you start a dishwasher cycle, water is pumped into the appliance and sprayed onto the dishes by a rotating arm. The dirty water then flows down into the drain, where it’s carried away by the drain pump and out of the appliance.

Common Causes of Dishwasher Not Draining

Several reasons can cause a dishwasher not to drain correctly, including:

  • Blockages in the dishwasher drain
  • Clogged air gap
  • Issues with the garbage disposal
  • Problems with the drain hose
  • Faulty drain pump

How to Troubleshoot a Dishwasher That’s Not Draining

If your dishwasher is not draining correctly, here are some troubleshooting steps you can take:

Check for Blockages in the Dishwasher Drain

One of the most common reasons for a dishwasher not draining is a blockage in the dishwasher drain. To check for blockages, start by turning off the dishwasher and unplugging it. Then, remove any standing water from the appliance using a towel or a cup.

Next, remove the dishwasher’s bottom rack to access the drain. Look for any debris or food particles that may be blocking the drain and remove them using a small brush or a toothbrush.

Inspect the Dishwasher’s Air Gap

The air gap is a small device that prevents dirty water from flowing back into the dishwasher. If the air gap becomes clogged, it can prevent the dishwasher from draining correctly.

To inspect the air gap, start by locating it on the countertop next to the sink. Remove the cap and clean any debris that may be blocking the device using a small brush or a toothbrush.

Inspect the Dishwasher’s Garbage Disposal

If your dishwasher is connected to a garbage disposal, issues with the disposal can cause the dishwasher not to drain correctly. To check the garbage disposal, start by turning off the power to the appliance.

Next, remove any standing water from the dishwasher using a towel or a cup. Then, use a flashlight to inspect the disposal for any blockages or clogs. If you find any debris, use tongs or pliers to remove it.

Check the Dishwasher, Drain Hose

If you are experiencing issues with your dishwasher not draining properly, one of the first things to check is the drain hose. The drain hose is responsible for carrying the water from the dishwasher to the sink drain or garbage disposal. If it is clogged or damaged, it can cause water to back up into the dishwasher, preventing it from draining properly.

To check the drain hose, turn off the power to the dishwasher and disconnect the hose from the sink drain or garbage disposal. Inspect the hose for any clogs or kinks. If you find any clogs, use a long, thin object such as a wire hanger or plumbing snake to remove them. If the hose is kinked, straighten it out to allow water to flow freely.

It is also important to ensure that the drain hose is properly installed. The hose should be installed so that it is not kinked or bent, and it should be positioned higher than the water level in the dishwasher to prevent backflow. If the hose is not installed correctly, consult the dishwasher’s manual or call a professional for assistance.

By checking the drain hose and ensuring that it is free of clogs, and kinks, and installed properly, you can help to ensure that your dishwasher drains properly and avoid any potential water damage.

Check the Dishwasher’s Drain Pump

The drain pump is responsible for pumping the dirty water out of the dishwasher and into the drain. If the pump is faulty, it can cause the dishwasher not to drain correctly.

To check the drain pump, start by disconnecting the power to the dishwasher. Then, remove any standing water from the appliance using a towel or a cup. Next, locate the drain pump and inspect it for any signs of damage or wear. If the pump is faulty, it will need to be replaced.

How to Prevent Future Dishwasher Draining Problems

To prevent future dishwasher draining problems, here are some tips to keep in mind:

  • Run hot water in the sink before starting the dishwasher to ensure that the water entering the appliance is hot.
  • Scrape any large food particles off of dishes before placing them in the dishwasher.
  • Run the garbage disposal before starting the dishwasher to prevent clogs.
  • Regularly clean the dishwasher’s filter to prevent blockages.

Conclusion

A dishwasher not draining is a frustrating problem that can cause inconvenience and damage to the appliance if left unaddressed. However, with the tips and solutions provided in this article, you can troubleshoot and fix the issue. Remember to regularly maintain your dishwasher to prevent future draining problems.

FAQs

  1. Can a clogged dishwasher drain cause water to back up into the sink? Yes, a clogged dishwasher drain can cause water to back up into the sink.
  2. How do I clean the dishwasher’s filter? To clean the dishwasher’s filter, remove the bottom rack of the dishwasher and locate the filter. Remove any debris or food particles from the filter using a brush or a toothbrush.
  3. How often should I clean my dishwasher’s filter? It’s recommended to clean your dishwasher’s filter at least once a month to prevent blockages.
  4. Can a faulty drain pump cause the dishwasher not to drain? Yes, a faulty drain pump can cause the dishwasher not to drain correctly.
  5. How can I prevent future dishwasher draining problems? To prevent future dishwasher draining problems, make sure to run hot water in the sink before starting the dishwasher, scrape large food particles off dishes, run the garbage disposal before starting the dishwasher, and regularly clean the dishwasher’s filter.
Why is My Dishwasher Leaking

Why is My Dishwasher Leaking – How to Troubleshoot and Fix a Dishwasher that is Leaking

Why is My Dishwasher Leaking – How to Troubleshoot and Fix a Dishwasher that is Leaking

A leaking dishwasher can be a frustrating and messy problem. Here are the steps you can take to troubleshoot and fix the issue:

  1. Turn off the power and water supply
  2. Inspect the door gasket
  3. Check the spray arm
  4. Inspect the float switch
  5. Check the dishwasher tub
  6. Inspect the dishwasher drain hose
  7. Call a Professional

1. Turn off the power and water supply

To turn off the power supply to the dishwasher, you should locate the circuit breaker that controls the dishwasher’s electrical circuit and switch it off. If you’re not sure which circuit breaker controls the dishwasher, you can turn off the main circuit breaker that controls the entire house.

To turn off the water supply to the dishwasher, you can locate the shut-off valve under the kitchen sink or near the dishwasher. Turn the valve clockwise to shut off the water supply to the dishwasher. If you can’t find the shut-off valve, you can turn off the main water supply to the house.

2. Inspect the door gasket

To inspect the door gasket of your dishwasher, follow these steps:

  1. Open the dishwasher door and visually inspect the rubber seal that runs around the perimeter of the door.
  2. Look for any signs of damage, wear, or tear. The gasket may have cracks, gaps, or breaks in the rubber.
  3. Check for any debris or buildup of dirt or grime along the gasket. This buildup can cause the gasket to lose its seal and cause water to leak out of the dishwasher.
  4. Use a clean, damp cloth to wipe the gasket clean and remove any buildup.
  5. Close the dishwasher door and check the seal. If the seal is still damaged or worn, it will need to be replaced.
  6. To replace the gasket, consult your dishwasher’s user manual or contact the manufacturer for guidance. Typically, the gasket can be easily removed and replaced with a new one.

By inspecting and maintaining the door gasket of your dishwasher, you can prevent water from leaking out of the appliance during the wash cycle.

3. Check the spray arm

To check the spray arm of your dishwasher, follow these steps:

  1. Open the dishwasher door and locate the spray arm. The spray arm is a rotating component that sprays water onto the dishes during the wash cycle.
  2. Check the spray arm for any cracks, splits, or damage. If you notice any damage, the spray arm may need to be replaced.
  3. Make sure that the spray arm is securely attached to the dishwasher. If it is loose or wobbly, it may not spray water properly and could cause leaks.
  4. Check the spray arm for any blockages. Use a toothpick or other small object to remove any debris that may be clogging the spray arm.
  5. Manually rotate the spray arm to make sure that it moves freely and isn’t getting caught on any dishes or other objects in the dishwasher.
  6. If the spray arm is damaged or not functioning properly, consult your dishwasher’s user manual or contact the manufacturer for guidance on how to replace the spray arm.

By checking and maintaining the spray arm of your dishwasher, you can ensure that it is spraying water properly and preventing leaks from occurring.

4. Inspect the float switch

To inspect the float switch of your dishwasher, follow these steps:

  1. Locate the float switch, which is typically a small plastic component located at the bottom of the dishwasher.
  2. Make sure that the float switch moves up and down freely. If it is stuck in the up or down position, it may not be able to detect the water level properly and could cause leaks.
  3. Check the float switch for any signs of damage or wear. If it is cracked or broken, it may need to be replaced.
  4. Clean the float switch and the area around it. Debris or buildup around the float switch could cause it to malfunction.
  5. Test the float switch by pouring a small amount of water into the dishwasher tub. The float switch should rise as the water level in the dishwasher increases, and it should stop the dishwasher from filling with water if the level gets too high.
  6. If the float switch is not working properly, consult your dishwasher’s user manual or contact the manufacturer for guidance on how to replace the float switch.

By inspecting and maintaining the float switch of your dishwasher, you can ensure that it is detecting the water level properly and preventing leaks from occurring.

5. Check the dishwasher tub

To check the dishwasher tub for leaks, follow these steps:

  1. Empty the dishwasher of any dishes and remove any racks or other components that may be blocking access to the tub.
  2. Inspect the dishwasher tub for any cracks, holes, or other signs of damage. Check the corners and edges of the tub, as well as the area around the spray arm and the drain.
  3. Look for any signs of rust or corrosion on the interior of the dishwasher tub. Rust can weaken the metal and cause leaks to occur.
  4. Fill the dishwasher tub with a few inches of water and leave it for several hours. Check for any signs of water leaking from the bottom of the dishwasher.
  5. Check the door of the dishwasher for any signs of damage or misalignment. If the door is not closing properly, water may leak out during the wash cycle.
  6. If you find any leaks or damage to the dishwasher tub or door, consult your dishwasher’s user manual or contact the manufacturer for guidance on how to repair or replace the affected components.

By checking the dishwasher tub regularly for leaks, you can catch any problems early and prevent water damage to your home.

6. Inspect the dishwasher drain hose

To inspect the dishwasher drain hose, follow these steps:

  1. Locate the drain hose, which is typically a flexible hose that connects the dishwasher to the garbage disposal or drains under the sink.
  2. Check the drain hose for any kinks, bends, or damage. If the hose is kinked or bent, it can cause water to back up in the dishwasher and leak out.
  3. Look for any signs of cracks or wear on the drain hose. If the hose is damaged, it may need to be replaced.
  4. Ensure that the drain hose is securely attached to the dishwasher and the drain under the sink. If it is loose or not connected properly, it can cause leaks.
  5. Check the end of the drain hose that connects to the garbage disposal or drain for any blockages. Use a small object such as a toothpick or wire to remove any debris that may be clogging the hose.
  6. Test the drain hose by running the dishwasher and observing the hose for any leaks. If you notice any leaks, turn off the dishwasher and inspect the hose again for any damage or blockages.

If you find any damage to the dishwasher drain hose, replace it with a new one. Consult your dishwasher’s user manual or contact the manufacturer for guidance on how to replace the drain hose. By inspecting and maintaining the dishwasher drain hose, you can prevent leaks and ensure that the dishwasher is draining properly.

7. Call a Professional

If you have followed all of the previous troubleshooting steps and still cannot identify or fix the cause of the dishwasher leak, it may be time to call a professional.

A qualified appliance repair technician or plumber can diagnose and fix the issue with your dishwasher. They have the expertise and tools necessary to safely and effectively repair or replace any damaged components.

When choosing a professional, look for someone who is licensed, insured, and experienced in dishwasher repair. You can ask for recommendations from friends or family members, or search for professionals online.

It’s important to address any leaks in your dishwasher as soon as possible to prevent water damage to your home and ensure that your dishwasher is working properly.

Conclusion

In conclusion, a dishwasher that is leaking can be a frustrating and potentially damaging problem. However, by following these troubleshooting steps, you can identify and fix the issue:

  1. Turn off the power and water supply to the dishwasher.
  2. Inspect the door gasket, spray arm, float switch, dishwasher tub, and drain hose for any signs of damage or wear.
  3. Clean and maintain the affected components to prevent further damage.
  4. Test the dishwasher after each repair to ensure that the issue has been resolved.

If you have followed all of these steps and still cannot fix the issue, it may be time to call a professional appliance repair technician or plumber. By addressing the issue promptly, you can prevent water damage to your home and ensure that your dishwasher is working properly.

Dishwasher that is Leaking from the Bottom of the Door

How to Fix a Dishwasher that is Leaking from the Bottom of the Door?

How to Fix a Dishwasher that is Leaking from the Bottom of the Door?

Dishwashers are an essential appliance in modern homes. They save time and effort, making cleaning dishes a breeze. However, a leaking dishwasher can be a real headache. If your dishwasher is leaking from the bottom of the door, it can cause significant water damage to your kitchen floor, cabinets, and walls. The good news is that fixing a leaking dishwasher is a relatively straightforward task that you can do yourself with the right tools and some know-how. In this article, we’ll walk you through how to fix a dishwasher that is leaking from the bottom of the door.

Here are some steps you can take to fix the issue:
  1. Check the door gasket
  2. Inspect the door hinges
  3. Tighten the latch
  4. Check the spray arm
  5. Clean the filter
  6. Inspect the float switch
  7. Check the drain hose

1. Check the door gasket

To check the door gasket on your dishwasher, follow these steps:

  1. Open the dishwasher door and inspect the gasket that runs around the perimeter of the door.
  2. Look for any signs of damage, such as cracks or tears, that could allow water to leak out.
  3. Run your fingers along the gasket to check for any irregularities, such as bumps or gaps.
  4. If you find any damage or irregularities, the gasket likely needs to be replaced.
  5. To replace the gasket, remove the old gasket by pulling it out of the channel around the door. Clean the channel with a mild soap solution and dry it thoroughly.
  6. Install the new gasket by starting at one corner of the door and pushing it into the channel. Work your way around the door, making sure that the gasket is securely seated in the channel.
  7. Close the door and run a cycle to check for any leaks. If the dishwasher still leaks, try the other troubleshooting steps listed earlier or call a professional for further assistance.

2. Inspect the door hinges

To inspect the door hinges on your dishwasher, follow these steps:

  1. Open the dishwasher door and locate the hinges on the sides of the door.
  2. Inspect the hinges for any signs of damage, such as rust or corrosion.
  3. Check that the hinges are securely attached to the dishwasher body and that they move freely.
  4. If the hinges are damaged or corroded, they may need to be replaced.
  5. To replace the hinges, first, disconnect the dishwasher from the power supply and water supply.
  6. Remove the screws that hold the hinges in place, and carefully remove the old hinges.
  7. Install the new hinges by aligning them with the screw holes and tightening the screws.
  8. Reconnect the power supply and water supply, and run a cycle to check for any leaks.

If the dishwasher still leaks, try the other troubleshooting steps listed earlier or call a professional for further assistance.

3. Tighten the latch

To tighten the latch on your dishwasher, follow these steps:

  1. Open the dishwasher door and inspect the latch mechanism.
  2. Check that the latch is securely attached to the dishwasher and that there are no visible signs of damage.
  3. Locate the screws that hold the latch in place and tighten them using a screwdriver. Be careful not to over-tighten the screws, as this can cause the latch to become misaligned.
  4. Close the dishwasher door and check that the latch engages properly.
  5. If the latch is still loose or not engaging properly, it may need to be replaced.
  6. To replace the latch, first, disconnect the dishwasher from the power supply and water supply.
  7. Remove the screws that hold the old latch in place and carefully remove it.
  8. Install the new latch by aligning it with the screw holes and tightening the screws.
  9. Reconnect the power supply and water supply, and run a cycle to check for any leaks.

If the dishwasher still leaks, try the other troubleshooting steps listed earlier or call a professional for further assistance.

4. Check the spray arm

To check the spray arm on your dishwasher, follow these steps:

  1. Open the dishwasher door and locate the spray arm, which is usually located at the bottom of the dishwasher.
  2. Carefully remove the spray arm by pulling it up and off the spray arm mount.
  3. Inspect the spray arm for any signs of damage, such as cracks or clogs.
  4. Clean the spray arm by running it under hot water and using a small brush or toothpick to remove any debris or buildup.
  5. Reinstall the spray arm by placing it back onto the spray arm mount and pushing it down until it clicks into place.
  6. Run a cycle to check for any leaks. If the dishwasher still leaks, try the other troubleshooting steps listed earlier or call a professional for further assistance.

5. Clean the filter

To clean the filter on your dishwasher, follow these steps:

  1. Open the dishwasher door and locate the filter, which is usually located at the bottom of the dishwasher.
  2. Carefully remove the filter by pulling it up and out of the dishwasher.
  3. Inspect the filter for any signs of damage, such as cracks or clogs.
  4. Clean the filter by rinsing it under hot water and using a soft-bristled brush to gently scrub away any debris or buildup.
  5. Once the filter is clean, reinstall it by placing it back into the dishwasher and pushing it down until it clicks into place.
  6. Run a cycle to check for any leaks. If the dishwasher still leaks, try the other troubleshooting steps listed earlier or call a professional for further assistance.

6. Inspect the float switch

To inspect the float switch on your dishwasher, follow these steps:

  1. Locate the float switch, which is usually located at the bottom of the dishwasher.
  2. Check that the float is moving freely up and down with no obstructions.
  3. If the float is stuck or not moving, carefully remove any obstructions or debris that may be causing it to stick.
  4. Check the wiring connections to the float switch and make sure they are securely connected.
  5. If the float switch is damaged or not working correctly, it may need to be replaced.
  6. To replace the float switch, first, disconnect the dishwasher from the power supply and water supply.
  7. Remove the screws that hold the old float switch in place and carefully remove them.
  8. Install the new float switch by aligning it with the screw holes and tightening the screws.
  9. Reconnect the power supply and water supply, and run a cycle to check for any leaks.

If the dishwasher still leaks, try the other troubleshooting steps listed earlier or call a professional for further assistance.

7. Check the drain hose

To check the drain hose on your dishwasher, follow these steps:

  1. Turn off the power supply and water supply to your dishwasher.
  2. Locate the drain hose, which is usually at the back of the dishwasher, and check for any visible signs of damage, such as cracks, kinks, or holes.
  3. Make sure the drain hose is not clogged or obstructed. You can use a long wire or pipe cleaner to remove any debris or buildup from the hose.
  4. Check that the drain hose is properly connected to the dishwasher and the drain pipe under the sink.
  5. Make sure the drain hose is not positioned too high or too low, as this can cause drainage problems. The hose should be installed at a height of at least 18 inches above the floor.
  6. If the drain hose is damaged or not working correctly, it may need to be replaced.
  7. To replace the drain hose, first, disconnect the dishwasher from the power supply and water supply.
  8. Carefully remove the old drain hose from the dishwasher and from the drain pipe.
  9. Install the new drain hose by connecting it to the dishwasher and the drain pipe.
  10. Reconnect the power supply and water supply, and run a cycle to check for any leaks.

If the dishwasher still leaks, try the other troubleshooting steps listed earlier or call a professional for further assistance.

Summary

If your dishwasher is leaking from the bottom of the door, there are several possible causes, including a damaged door gasket, loose door hinges, a loose or misaligned latch, a damaged spray arm, a clogged or damaged filter, a malfunctioning float switch, or a damaged or incorrectly installed drain hose. To troubleshoot the issue, you can inspect and address each of these potential causes, such as cleaning the filter, checking the spray arm, inspecting the door gasket and hinges, tightening the latch, inspecting the float switch, or checking the drain hose for damage or obstructions. If none of these steps resolve the issue, you may need to call a professional for further assistance.