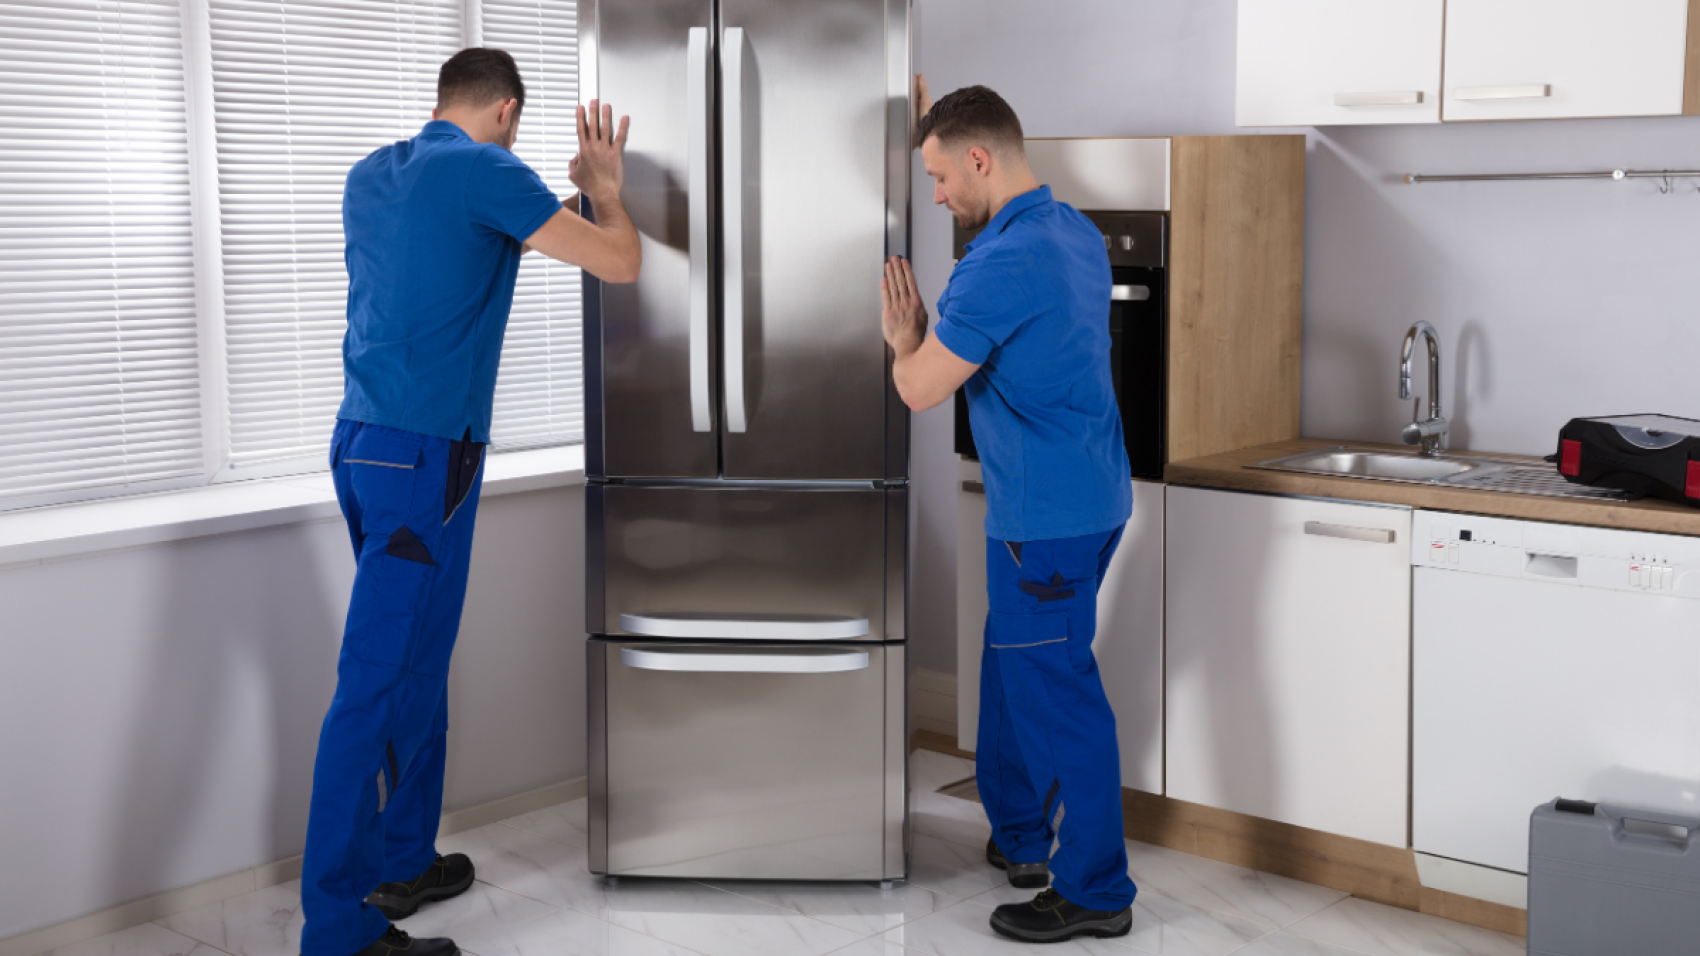
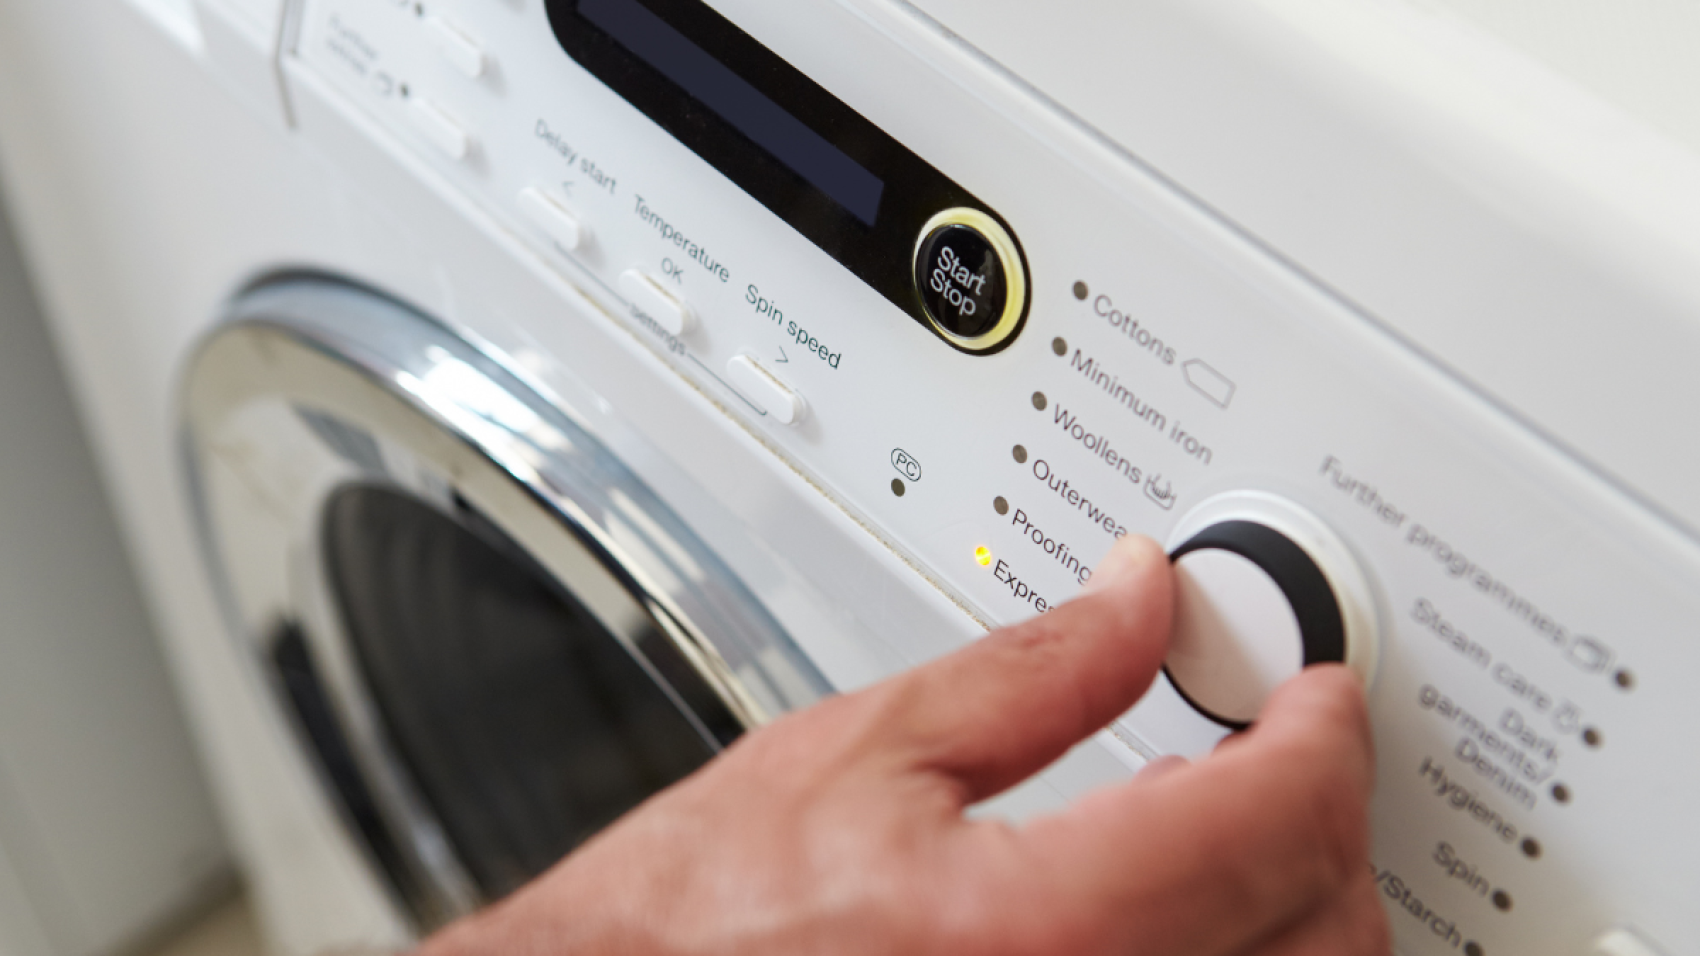
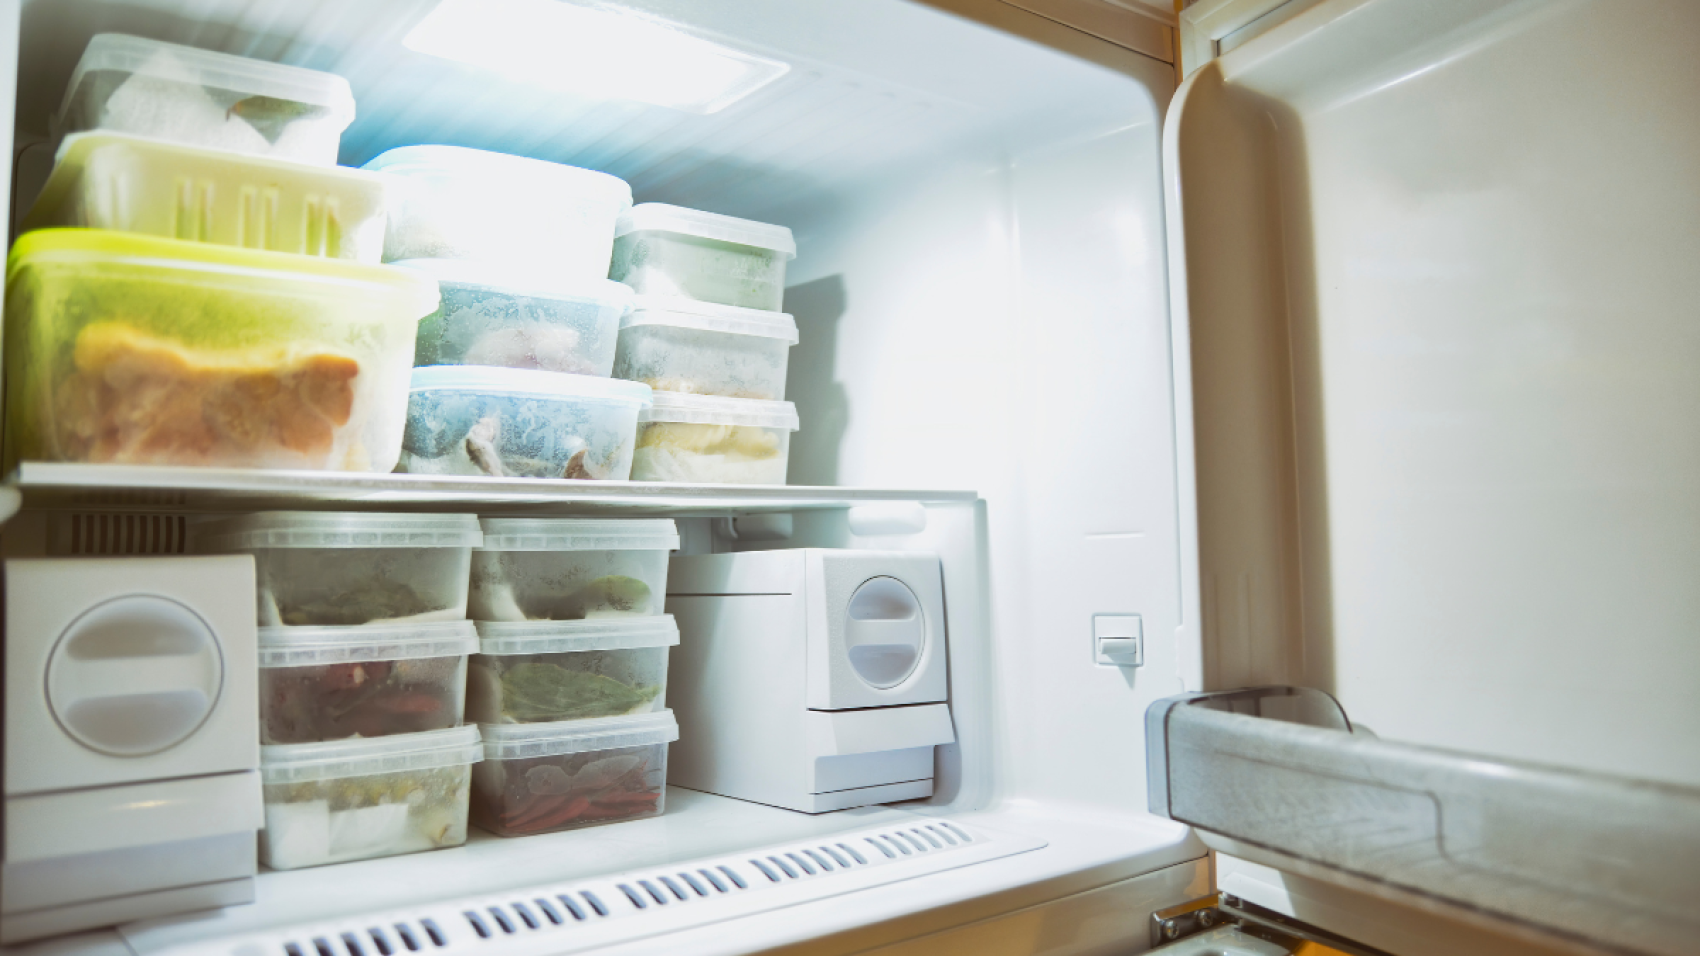
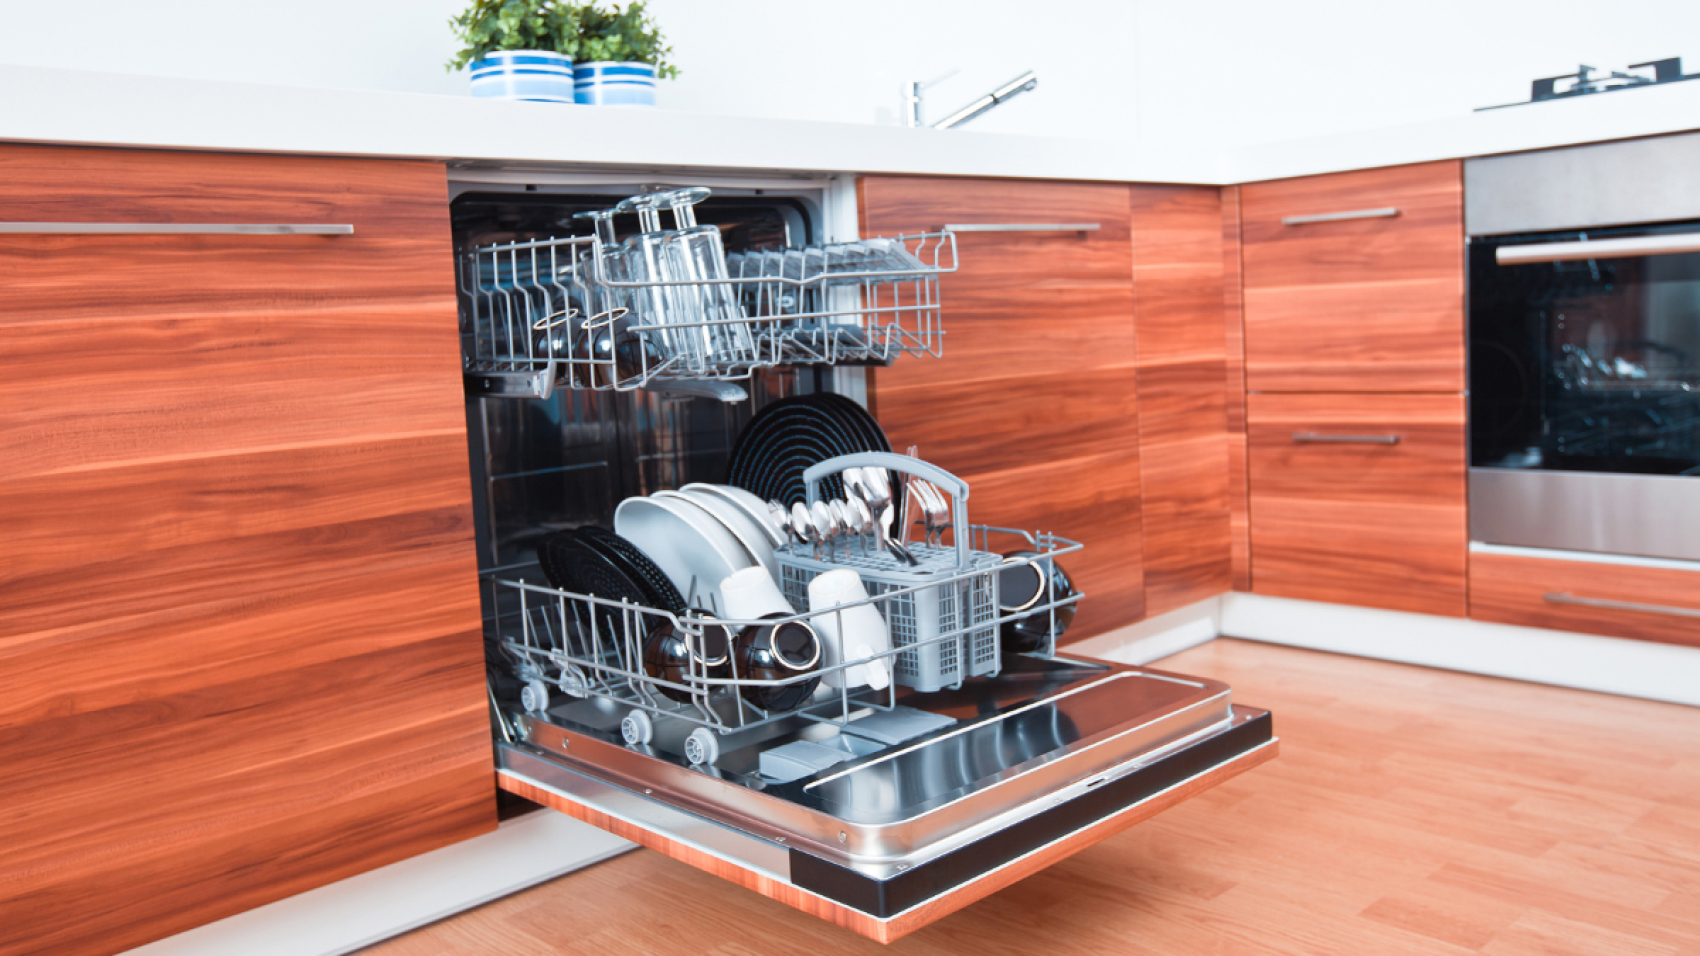
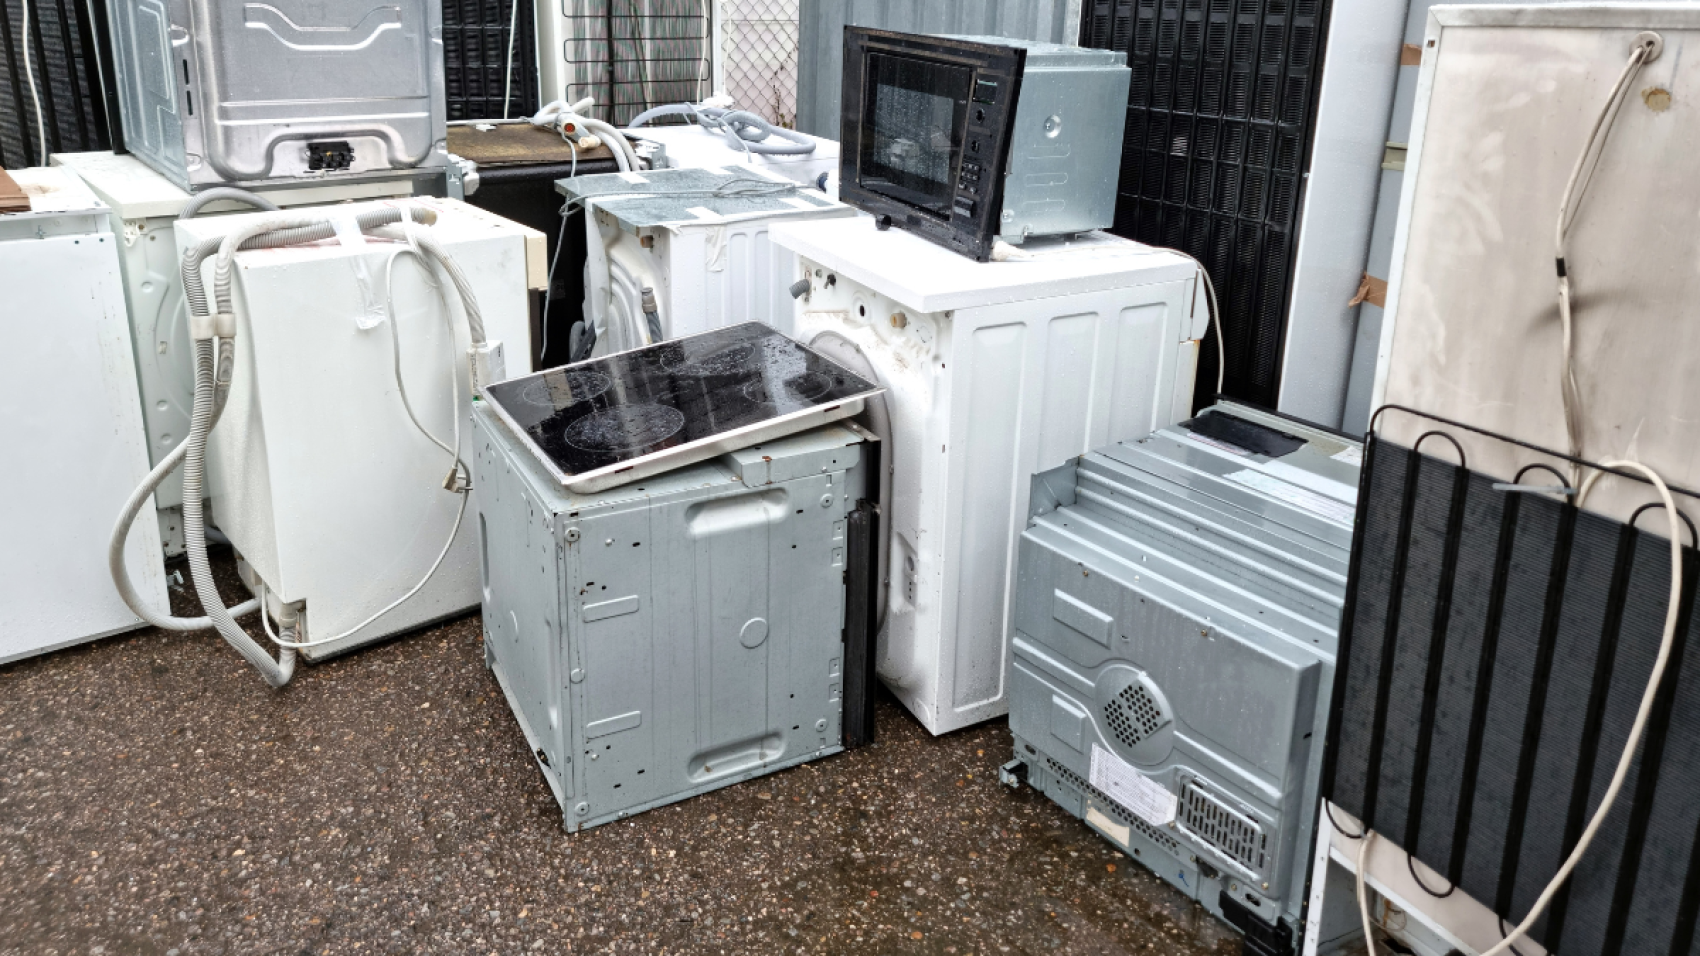
Oven Repair & Dishwasher Repair

Oven Repair & Dishwasher Repair – How to Fix Your Oven or Dishwasher That Won’t Work Properly?

Oven Repair & Dishwasher Repair – How to Fix Your Oven or Dishwasher That Won’t Work Properly?

Are you facing issues with your oven or dishwasher? Do you have trouble getting it to work properly? If so, don’t worry, as there are ways to fix these problems. In this article, we will discuss some common issues that people face with their ovens and dishwashers and provide you with some tips on how to fix them.

Introduction

Before we dive into the details of fixing ovens and dishwashers, it’s important to understand that these appliances are complex machines that require proper care and maintenance. Neglecting them can lead to serious issues, such as fire hazards or electrical shocks. Therefore, it’s essential to take proper safety precautions and follow manufacturer instructions when attempting any repairs.

Common issues with Ovens

The oven not heating up

One of the most common issues with ovens is that they don’t heat up properly. This could be due to a malfunctioning thermostat or a faulty heating element. To fix this issue, you need to identify the source of the problem first. If the thermostat is broken, you’ll need to replace it. If the heating element is faulty, you can either repair or replace it.

Uneven cooking

Another issue that people face with their ovens is uneven cooking. This could be due to a faulty heating element or a malfunctioning convection fan. To fix this issue, you need to ensure that the heating element is working properly and that the convection fan is circulating the hot air evenly. If the heating element is faulty, you can either repair or replace it. If the convection fan is not working correctly, you’ll need to replace it.

The oven door not closing properly

If your oven door is not closing properly, it could be due to a broken hinge or a worn-out gasket. To fix this issue, you need to check the hinges and gasket and replace them if necessary.

Common issues with Dishwashers

The dishwasher not cleaning properly

One of the most common issues with dishwashers is that they don’t clean dishes properly. This could be due to a clogged spray arm or a malfunctioning pump. To fix this issue, you need to remove the spray arm and clean it thoroughly. If the pump is malfunctioning, you’ll need to replace it.

The dishwasher not draining properly

Another issue that people face with their dishwashers is that they don’t drain properly. This could be due to a clogged drain hose or a malfunctioning drain pump. To fix this issue, you need to remove the drain hose and clean it thoroughly. If the drain pump is malfunctioning, you’ll need to replace it.

The dishwasher making unusual noises

If your dishwasher is making unusual noises, it could be due to a malfunctioning motor or a worn-out pump. To fix this issue, you need to check the motor and pump and replace them if necessary.

Preventing Issues with Ovens and Dishwashers

Regular cleaning and maintenance can prevent most issues with your oven or dishwasher. Follow manufacturer instructions for cleaning and use, and avoid overloading or misusing these appliances.

For ovens, clean the heating element regularly to prevent excess food or grease buildup. Avoid slamming the oven door, as this can damage the seal and affect the oven’s performance.

For dishwashers, rinse dishes before loading to prevent clogs in the spray arm and filter. Clean the dishwasher’s interior and components regularly to prevent mold and bacteria growth.

Conclusion:

In conclusion, fixing your oven or dishwasher that won’t work properly can be a challenging task, but it’s not impossible. With the right knowledge and tools, you can troubleshoot and fix many common issues on your own, saving you time and money. It’s important to always follow safety precautions and turn off the power before attempting any repairs. If you are unsure about a repair or feel uncomfortable doing it yourself, it’s best to call a professional for help.

FAQs

1. Can I fix my oven or dishwasher myself?
Answer: It depends on the issue. Minor issues like a dirty heating element or clogged filter can be easily fixed at home. However, for more complex issues, it’s best to call a professional to avoid causing further damage or risking injury.

2. How often should I clean my oven or dishwasher?
Answer: It’s recommended to clean your oven and dishwasher at least once a month. However, if you use them frequently, you may need to clean them more often.

3. Why is my oven door not closing properly?
Answer: A faulty door hinge or latch could be causing your oven door to not close properly. Check these components and replace any that are damaged.

4. How do I clean the dishwasher’s spray arm?
Answer: Remove the spray arm from the dishwasher and soak it in a solution of warm water and vinegar for 30 minutes. Use a toothbrush or other soft-bristled brush to remove any debris or buildup, then rinse the arm thoroughly and reinstall it in the dishwasher.

5. Why is my dishwasher making strange noises?
Answer: Strange noises in a dishwasher could be due to a clogged spray arm, a malfunctioning motor, or a faulty pump. Check these components and replace any that are damaged.

We hope this article has provided you with valuable insights and tips for fixing your oven or dishwasher that won’t work properly. Remember to always prioritize safety and turn off the power before attempting any repairs. If you’re unsure or uncomfortable with a repair, it’s best to call a professional. For more great prompts and topics, visit the link above and unlock a world of possibilities for your content writing needs. Thank you for reading!

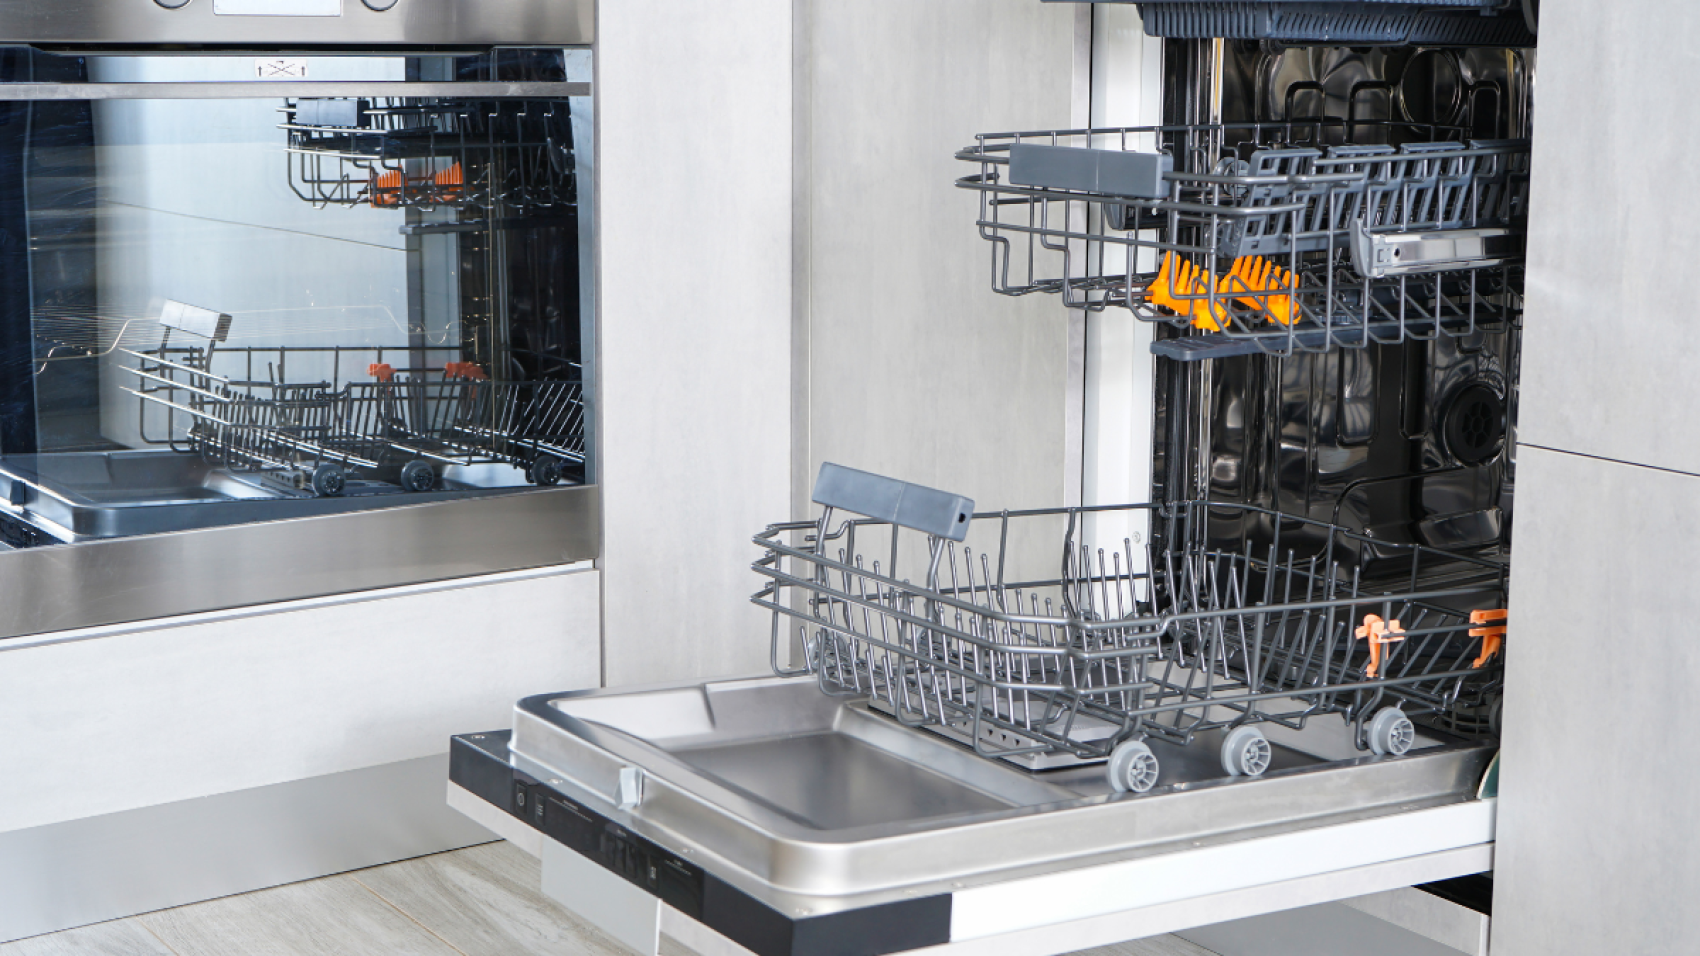
Dryer Is Overheating

Dryer Is Overheating – How to Fix an Overheated Dryer: A Complete Guide

Dryer Is Overheating – How to Fix an Overheated Dryer: A Complete Guide

Are you tired of dealing with a dryer that overheats every time you use it? Overheating can cause damage to your clothes, and the dryer, and even start a fire. Fortunately, fixing an overheated dryer is not as complicated as you might think. In this guide, we will take you through everything you need to know about fixing an overheated dryer.

Understanding the Causes of Overheating

Before we dive into the steps of fixing an overheated dryer, it is essential to understand what causes the dryer to overheat in the first place. Here are some of the most common causes of dryer overheating:

Blocked Ventilation

One of the most common causes of dryer overheating is a blocked ventilation system. When the ventilation is blocked, the dryer can’t release hot air, leading to overheating.

Clogged Lint Filter

A clogged lint filter can also cause a dryer to overheat. When the filter is clogged, the hot air can’t circulate correctly, leading to overheating.

Malfunctioning Thermostat

A faulty thermostat can also cause an overheated dryer. When the thermostat is not working correctly, it cannot regulate the temperature of the dryer.

Broken Heating Element

The heating element produces hot air, which is used to dry clothes. If the heating element is broken, the dryer can overheat as it tries to compensate for the lack of hot air.

Steps to Fix an Overheated Dryer

Now that we know the causes of dryer overheating let’s dive into the steps to fix an overheated dryer:

Step 1: Disconnect the Dryer

The first step in fixing an overheated dryer is to disconnect it from the power source. This ensures that you are safe while you work on the dryer.

Step 2: Clean the Ventilation System

The next step is to clean the ventilation system. Start by disconnecting the vent hose from the dryer and the wall. Use a vacuum cleaner to remove any dust or lint that may have accumulated in the ventilation system.

Step 3: Clean the Lint Filter

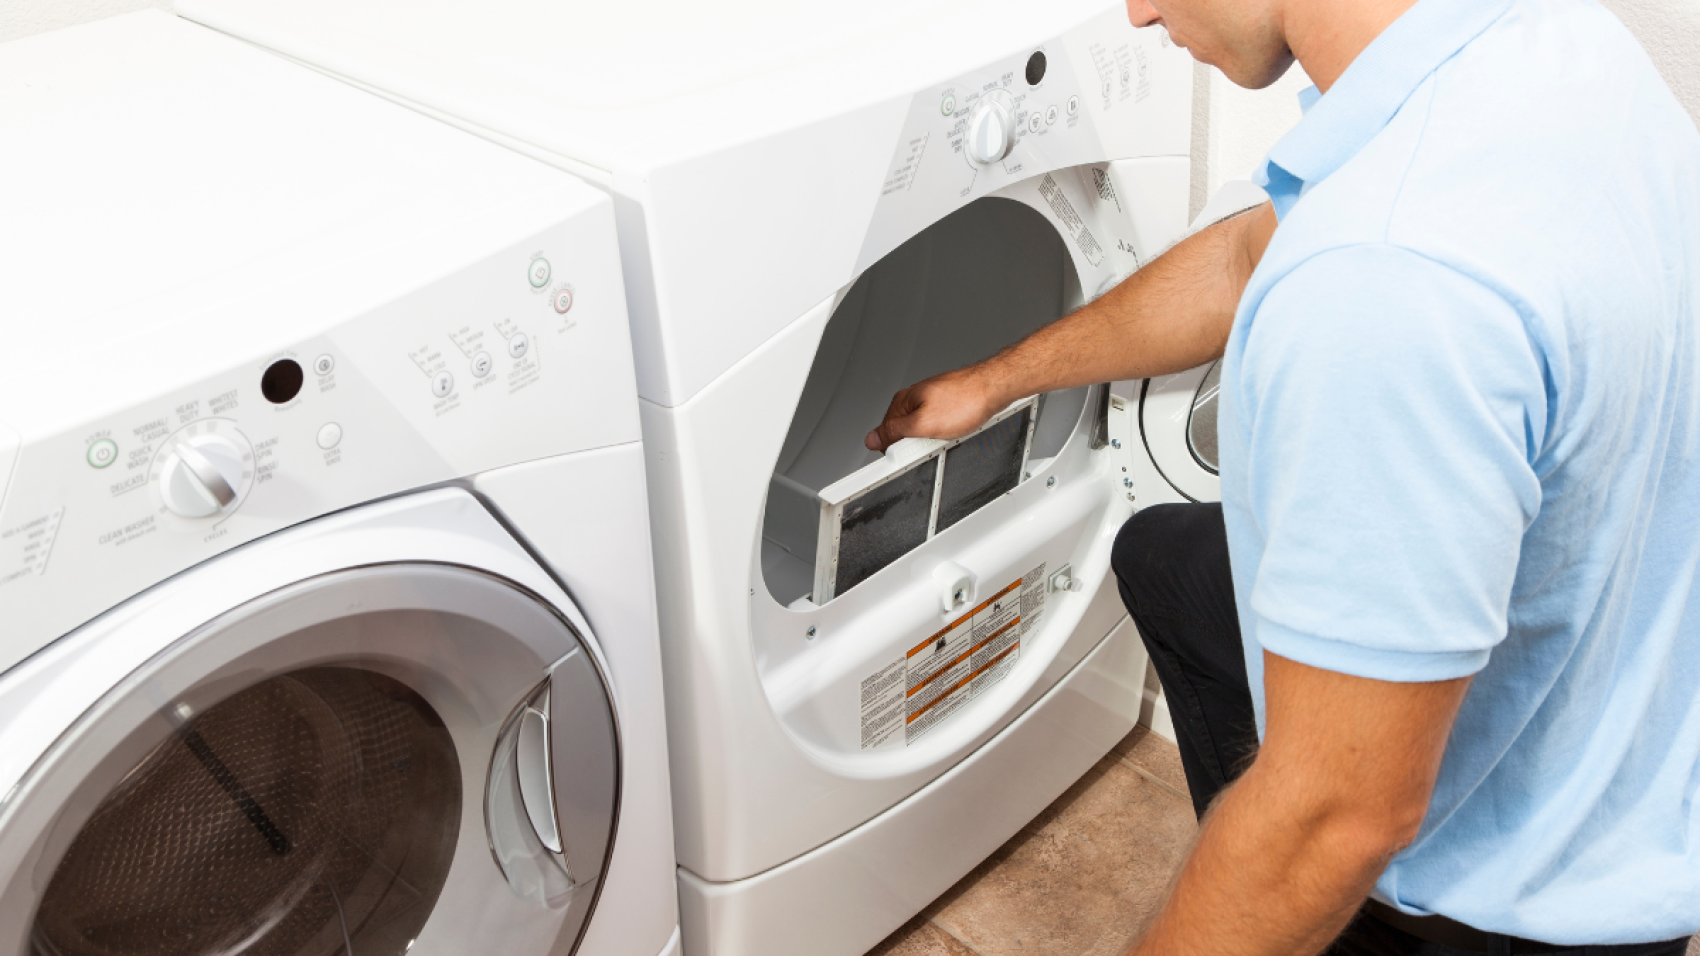
After cleaning the ventilation system, you need to clean the lint filter. Remove the filter from the dryer and use a brush or your fingers to remove any lint that may have accumulated on it.

Step 4: Check the Thermostat

Check the thermostat to see if it’s working correctly. You can use a multimeter to test the thermostat. If it’s not working correctly, you will need to replace it.

Step 5: Check the Heating Element

Finally, check the heating element. If it’s broken, you will need to replace it. You can use a multimeter to test the heating element.

Tips to Prevent Overheating

Preventing dryer overheating is much easier than fixing it. Here are some tips to help avoid overheating dryer:

Clean the Lint Filter Regularly

Cleaning the lint filter regularly helps prevent dryer overheating. It ensures that the hot air circulates correctly, preventing overheating.

Clean the Ventilation System Regularly

Regularly cleaning the ventilation system also helps prevent dryer overheating. It ensures that hot air is released correctly, preventing overheating.

Avoid Overloading the Dryer

Overloading the dryer can also cause overheating. Ensure that you don’t overload the dryer, as this can cause the dryer to overwork and overheat.

Use a Professional Technician

If you are unsure about fixing an overheated dryer, consider using a professional technician. They have the expertise and tools required to fix an overheated dryer.

Conclusion

Fixing an overheated dryer is not as complicated as it may seem. By understanding the causes of overheating and following the steps we’ve outlined, you can easily fix an overheated dryer. Additionally, taking preventive measures, such as cleaning the lint filter and ventilation system regularly, can help prevent dryer overheating.

If you are unsure about fixing an overheated dryer, it’s always best to use a professional technician. They have the expertise and tools to fix an overheated dryer safely and efficiently.

FAQs

  1. What should I do if my dryer overheats repeatedly?

If your dryer overheats repeatedly, you should check the ventilation system, clean the lint filter, and check the thermostat and heating element. If you’re unsure about what to do, consider using a professional technician.

  1. Can I use my dryer while it’s overheating?

No, you should not use your dryer while it’s overheating. This can cause damage to your clothes, and the dryer, and even start a fire.

  1. How often should I clean the lint filter?

You should clean the lint filter after every use of the dryer. This helps prevent dryer overheating and ensures that the dryer operates efficiently.

  1. How do I know if my thermostat is malfunctioning?

You can use a multimeter to test the thermostat. If it’s not working correctly, it will need to be replaced.

  1. What should I do if I’m unsure about fixing an overheated dryer?

If you’re unsure about fixing an overheated dryer, it’s always best to use a professional technician. They have the expertise and tools to fix an overheated dryer safely and efficiently.

Thank you for reading this article on how to fix an overheated dryer. We hope that you found the information helpful and informative. By following the steps outlined in this article, you can fix an overheated dryer and prevent any potential safety hazards. Remember to always prioritize safety when dealing with appliances and to seek professional help if you’re unsure about fixing an issue yourself.

If you have any further questions or concerns, please don’t hesitate to reach out to a professional technician. They can provide you with tailored advice based on your specific situation and ensure that your dryer operates safely and efficiently.

And don’t forget to check out our other helpful articles on home maintenance and repair.

How to Prevent Your Appliances from Overheating in Summer

Overheating of Electrical Appliances – How to Prevent Your Appliances from Overheating in Summer?

Overheating of Electrical Appliances – How to Prevent Your Appliances from Overheating in Summer?

As the temperature rises during the summer months, the risk of your appliances overheating increases. This can lead to a variety of problems, including reduced performance, increased energy consumption, and even electrical fires. In this article, we’ll discuss some practical tips to prevent your appliances from overheating in summer.

Table of Contents

  1. Introduction
  2. Importance of Preventing Appliances from Overheating
  3. Common Causes of Appliance Overheating
  4. Tips to Prevent Appliance Overheating
    1. Keep Appliances Clean and Dust-Free
    2. Provide Adequate Ventilation
    3. Avoid Overloading Electrical Outlets
    4. Keep Appliances Away from Direct Sunlight
    5. Schedule Regular Maintenance and Repairs
    6. Use Energy-Efficient Appliances
  5. Conclusion
  6. FAQs

Introduction

In the scorching heat of summer, it’s crucial to keep your home and its appliances cool. Not only will this improve your comfort, but it will also help prevent your appliances from overheating. This article will provide you with some simple and effective ways to prevent your appliances from overheating this summer.

Importance of Preventing Appliances from Overheating

Overheating can damage the internal components of your appliances, leading to reduced performance and a shorter lifespan. It can also cause safety hazards such as electrical fires, which can be dangerous and costly to repair. Therefore, it’s essential to take preventive measures to avoid overheating.

Common Causes of Appliance Overheating

There are several reasons why your appliances may overheat during the summer months. Some of the most common causes include:

  • Lack of proper ventilation
  • Accumulation of dust and debris
  • Overloading of electrical outlets
  • Direct exposure to sunlight
  • Old or worn-out components
  • Insufficient maintenance and repairs

Tips to Prevent Appliance Overheating

Here are some practical tips to keep your appliances cool and prevent them from overheating:

1. Keep Appliances Clean and Dust-Free

Dirt, dust, and debris can accumulate on the surface and internal components of your appliances, reducing their efficiency and causing them to overheat. To prevent this, make sure to clean your appliances regularly using a soft cloth or brush. This will help maintain their optimal performance and extend their lifespan.

2. Provide Adequate Ventilation

Appliances that generate heat, such as refrigerators, air conditioners, and ovens, require proper ventilation to prevent overheating. Ensure that your appliances are placed in areas with sufficient air circulation, away from walls or other obstructions. You can also use fans or install vents to improve airflow and reduce the risk of overheating.

3. Avoid Overloading Electrical Outlets

Plugging too many appliances into a single electrical outlet can overload it and cause it to overheat. This can also lead to electrical fires, so it’s essential to use multiple outlets or power strips instead of relying on one. Be sure to follow the manufacturer’s instructions for the maximum number of appliances that can be plugged into a single outlet.

4. Keep Appliances Away from Direct Sunlight

Direct sunlight can heat up your appliances and cause them to overheat. To prevent this, place your appliances away from windows or other areas where they may be exposed to direct sunlight. If you can’t avoid direct sunlight, use curtains or blinds to block out the sun’s rays.

5. Schedule Regular Maintenance and Repairs

Regular maintenance and repairs are essential for keeping your appliances in top condition and preventing them from overheating. Hire a professional technician to inspect and service your appliances at least once a year, especially if they are older or have experienced issues in the past. This will help identify and fix any potential problems before they cause serious damage or overheating.

6. Use Energy-Efficient Appliances

Energy-efficient appliances consume less energy, generate less heat, and are less likely to overheat. Consider upgrading to newer, more energy-efficient appliances that are designed to operate efficiently even in high temperatures. This will not only reduce the risk of overheating but also lower your energy bills and carbon footprint.

Conclusion

In conclusion, preventing your appliances from overheating in summer is essential to ensure their longevity, efficiency, and safety. By following the tips mentioned above, you can keep your appliances cool and comfortable, save energy consumption, and prevent costly repairs or safety hazards. Remember to clean the filters of your appliances regularly, schedule professional maintenance, provide proper ventilation and insulation, avoid overloading your circuits, and turn off your appliances when not in use.

Keep in mind that taking care of your appliances is not only beneficial for your comfort and safety but also for the environment. By preventing overheating and saving energy consumption, you can reduce your carbon footprint and contribute to a greener and more sustainable future.

If you notice any signs of overheating in your appliances, such as strange noises or burning smells, don’t hesitate to contact a professional technician. They can diagnose the problem and provide the necessary repairs or replacements to ensure your appliances are working safely and efficiently.

Remember, prevention is always better than cure, so take care of your appliances and stay cool this summer!

FAQs:

  1. How can I tell if my appliance is overheating? You can tell if your appliance is overheating by checking for signs such as strange noises, burning smells, or hot surfaces.
  2. Can I use my appliances for extended periods during summer? It is not recommended to use your appliances for extended periods during summer as it can cause them to overheat and decrease their efficiency.
  3. Is it safe to clean the filters of my appliances myself? Yes, it is safe to clean the filters of your appliances yourself, but make sure to turn off and unplug your appliances before cleaning and follow the manufacturer’s instructions.
  4. Can insulation prevent my appliances from overheating? Yes, proper insulation can prevent your appliances from overheating by reducing the heat transfer from the outside to the inside.
  5. How can I prevent my air conditioning unit from overworking? You can prevent your air conditioning unit from overworking by setting the temperature at a moderate level, closing windows and doors, and using curtains or shades to block the sun’s rays.
Appliance Maintenance Tips

Appliance Maintenance Tips – 7 Easy Ways to Tell If Your Appliance Needs Repair or Maintenance

Appliance Maintenance Tips – 7 Easy Ways to Tell If Your Appliance Needs Repair or Maintenance

Home appliances are essential for making our daily lives more convenient and comfortable. From refrigerators to washing machines, appliances play a vital role in keeping our homes running smoothly. However, like all machines, appliances need maintenance and repairs from time to time. Knowing when to call a repairman can save you a lot of money and trouble. In this article, we will discuss seven easy ways to tell if your appliance needs repair or maintenance.

Table of Contents

  • Introduction
  • Strange Noises
  • Leaks
  • Unusual Smells
  • Decreased Performance
  • Electrical Issues
  • Wear and Tear
  • Conclusion
  • FAQs

Introduction

Home appliances are an essential part of our daily lives. They help us with cooking, cleaning, and many other household chores. But how do you know if your appliance needs repair or maintenance? The following tips will help you identify potential problems before they become major issues.

Strange Noises

Appliances such as washing machines, dryers, and refrigerators can produce strange noises that indicate they need attention. If you hear a clunking or banging sound when the machine is in use, it could indicate a loose part or a worn-out belt. Grinding or squeaking noises could indicate a problem with the motor or the drum. In any case, strange noises are not normal and require immediate attention.

Leaks

Leaks are another indicator that your appliance needs repair. Water leaks from your washing machine or dishwasher can cause damage to your floors and walls, while gas leaks from your oven or stove can be dangerous. If you notice any leaks, turn off the appliance and call a professional repairman.

Unusual Smells

If your appliance produces an unusual smell, it could indicate a problem. Burning smells from your oven or stove could indicate an electrical problem, while a musty smell from your washing machine could indicate a mold or mildew problem. If you notice any unusual smells, turn off the appliance and call a professional.

Decreased Performance

If your appliance is not performing as it should, it could indicate a problem. For example, if your refrigerator is not keeping your food cold, it could indicate a problem with the compressor or the refrigerant. If your washing machine is not cleaning your clothes properly, it could indicate a problem with the agitator or the motor. If you notice any decreased performance, call a professional to diagnose the problem.

Electrical Issues

Electrical issues are a serious problem and require immediate attention. If your appliance is tripping your circuit breaker or producing sparks, turn it off and call a professional repairman. Electrical issues can be dangerous and should never be ignored.

Wear and Tear

Over time, appliances can experience wear and tear. Parts can become worn out or damaged, leading to performance issues or breakdowns. If your appliance is several years old, it may be time to have it serviced by a professional to ensure it is in good working condition.

Conclusion

In conclusion, keeping your appliances in good working condition is essential for the smooth running of your home. With these seven easy ways to tell if your appliance needs repair or maintenance, you can identify potential problems early and prevent further damage. Remember to pay attention to any strange noises, leaks, unusual smells, decreased performance, electrical issues, or wear and tear. Regular maintenance and cleaning, following the manufacturer’s instructions for care and cleaning, and avoiding overloading your appliances can help prevent problems from occurring. When in doubt, call a professional repairman to diagnose and fix the problem.

FAQs

  1. What are some common signs that an appliance needs repair? Common signs that an appliance needs repair include strange noises, leaks, unusual smells, decreased performance, electrical issues, and wear and tear.
  2. Can I repair my appliance myself? It is not recommended to repair your appliance yourself unless you have experience and training in appliance repair. Attempting to repair an appliance on your own can be dangerous and may cause further damage. It is best to call a professional repairman to diagnose and fix the problem.
  3. How often should I have my appliances serviced? It is recommended to have your appliances serviced once a year to ensure they are in good working condition. Regular maintenance can help prevent breakdowns and extend the life of your appliances.
  4. How can I prevent appliance problems? Regular maintenance and cleaning can help prevent appliance problems. Follow the manufacturer’s instructions for care and cleaning, and avoid overloading your appliances. If you notice any potential problems, address them promptly to prevent further damage.
  5. How much does appliance repair cost? The cost of appliance repair varies depending on the type of appliance and the extent of the damage. Minor repairs can cost a few hundred dollars, while major repairs or replacements can cost several thousand dollars.
  1. How do I find a reliable repairman for my appliances? It is important to do some research before hiring a repairman for your appliances. Look for reviews and recommendations from family and friends, and check the company’s credentials and certifications. Make sure the repairman is licensed and insured, and ask for a written estimate before agreeing to any repairs.
  2. Can I prevent the need for appliance repair all together? While it may not be possible to prevent the need for appliance repair entirely, regular maintenance and care can help prevent major breakdowns and extend the life of your appliances. Follow the manufacturer’s instructions for care and cleaning, avoid overloading your appliances, and address any potential problems promptly to prevent further damage.

Overall, taking care of your appliances and knowing when to call a professional repairman can save you time, money, and trouble. By paying attention to the signs of potential problems, you can keep your appliances running smoothly and avoid major breakdowns. Remember to have your appliances serviced regularly and to call a professional if you notice any strange noises, leaks, unusual smells, decreased performance, electrical issues, or wear and tear.

Dryer is Squeaking

Dryer is Squeaking – How to Fix a Dryer That’s Making a Screeching Noise: A Step-by-Step Guide

A Dryer is Squeaking – How to Fix a Dryer That’s Making a Screeching Noise: A Step-by-Step Guide

Introduction

If you have a dryer at home, you may have experienced a screeching noise coming from it at some point. This can be a major annoyance, and can also indicate that there is a problem with your appliance. Luckily, many dryer issues are easy to fix on your own, without the need for professional repair. In this article, we will go over some common reasons why your dryer may be making a screeching noise, and provide step-by-step instructions on how to fix it.

Table of Contents

  1. Understanding the Anatomy of a Dryer

1.1. Belt

1.2. Rollers

1.3. Idler Pulley

  1. Common Causes of a Screeching Noise

2.1. Worn-Out Belt

2.2. Damaged Rollers

2.3. Loose or Worn Out Idler Pulley

  1. How to Fix a Dryer That’s Making a Screeching Noise

3.1. Tools Needed

3.2. Steps to Fix a Worn-Out Belt

3.3. Steps to Fix Damaged Rollers

3.4. Steps to Fix a Loose or Worn-Out Idler Pulley

Conclusion

FAQs

1. Understanding the Anatomy of a Dryer

Before we delve into the causes and solutions of a screeching dryer, it is important to understand the anatomy of your appliance. Dryers have three main components that may cause a screeching noise: the belt, rollers, and idler pulley.

1.1. Belt

The belt is responsible for rotating the drum of the dryer. Over time, the belt can wear out and cause a screeching noise.

1.2. Rollers

The rollers support the drum and allow it to rotate smoothly. If the rollers are damaged, they can cause a screeching noise.

1.3. Idler Pulley

The idler pulley helps to keep the tension on the belt. If the pulley is loose or worn out, it can cause the belt to slip and create a screeching noise.

2. Common Causes of a Screeching Noise

Now that you know the three main components of a dryer, let’s explore some common causes of screeching noise.

2.1. Worn-Out Belt

As mentioned earlier, a worn-out belt can cause a screeching noise. This is because the belt is not able to grip the drum tightly enough, causing it to slip and create a screeching noise.

2.2. Damaged Rollers

If the rollers are damaged, they can cause the drum to become misaligned and create a screeching noise.

2.3. Loose or Worn Out Idler Pulley

A loose or worn-out idler pulley can cause the belt to slip and create a screeching noise.

3. How to Fix a Dryer That’s Making a Screeching Noise

Now that we have identified the common causes of a screeching dryer, let’s go over how to fix the issue.

3.1. Tools Needed

  • Screwdriver
  • Wrench
  • Replacement parts (belt, rollers, or idler pulley)

3.2. Steps to Fix a Worn-Out Belt

  1. Unplug the dryer from the power source.
  2. Remove the front panel of the dryer.
  3. Remove the drum by releasing the tension on the belt.
  4. Take out the old belt and install the new one.
  5. Reattach the drum and put the front panel back in place.
  6. Plug the dryer back in and test it to make sure the screeching noise is gone.

3.3. Steps to Fix Damaged Rollers

  1. Unplug the dryer from the power source.
  2. Remove the front panel and drum from the dryer.
  3. Take out the damaged rollers and replace them with new ones.
  4. Reattach the drum and front panel.
  5. Plug the dryer back in and test it to make sure the screeching noise is gone.

3.4. Steps to Fix a Loose or Worn-Out Idler Pulley

  1. Unplug the dryer from the power source.
  2. Remove the front panel of the dryer.
  3. Locate the idler pulley and check if it’s loose or worn out.
  4. If it’s loose, tighten the bolts to secure it in place.
  5. If it’s worn out, replace it with a new one.
  6. Put the front panel back in place.
  7. Plug the dryer back in and test it to make sure the screeching noise is gone.

4. Conclusion

A screeching noise coming from your dryer can be a sign of a problem, but it doesn’t always mean you need to replace your appliance. In many cases, you can fix the issue yourself by identifying the root cause and following the steps outlined in this article. Whether the problem is a loose belt, damaged rollers, or a worn-out idler pulley, the solutions are relatively simple and can save you the cost of a repair or replacement. By performing regular maintenance and addressing any issues as soon as they arise, you can keep your dryer running smoothly and quietly for years to come.

5. FAQs

  1. Can I still use my dryer if it’s making a screeching noise?
  • It’s not recommended, as the noise may indicate a problem that could worsen with continued use.
  1. How often should I replace the components in my dryer?
  • It depends on the usage and age of your dryer. Refer to your manufacturer’s guidelines for recommended replacement intervals.
  1. Can I fix a screeching dryer myself?
  • Yes, many dryer issues can be fixed by following the step-by-step instructions provided in this article.
  1. What if the screeching noise persists after following the steps in this article?
  • If the screeching noise persists, it’s best to contact a professional repair service.
  1. How can I prevent my dryer from making screeching noises in the future?
  • Regular maintenance, such as cleaning the lint filter and drum, can help prevent issues that lead to screeching noises.
My Fridge is Leaking Water Here’s What to Do!

Refrigerator Leaking Water – My Fridge is Leaking Water? Here’s What to Do!

Refrigerator Leaking Water – My Fridge is Leaking Water? Here’s What to Do!

Your fridge is one of the most important appliances in your home, keeping your food fresh and your drinks cold. But what happens when your fridge starts leaking water? Not only can it cause damage to your flooring and furniture, but it can also be a sign of a larger problem with your fridge. In this article, we’ll explore the common causes of fridge leaks and what you can do to fix them.

Common Causes of Fridge Leaks

There are several reasons why your fridge might be leaking water. Some of the most common causes include:

1. Clogged or Frozen Defrost Drain

Your fridge has a defrost drain that removes any water that accumulates during the defrost cycle. However, if this drain becomes clogged or frozen, it can cause water to back up and leak out of your fridge. To fix this issue, you’ll need to locate the drain and clear any debris or ice that may be blocking it.

2. Cracked Drain Pan

Your fridge’s drain pan collects any water that drips down from the defrost drain. However, if this pan becomes cracked or damaged, it can cause water to leak out of your fridge. To fix this issue, you’ll need to replace the drain pan with a new one.

3. Faulty Water Filter or Valve

If your fridge has a built-in water dispenser or ice maker, a faulty water filter or valve can cause water to leak out. To fix this issue, you’ll need to replace the faulty part with a new one.

4. Door Gasket Issues

Your fridge’s door gasket creates an airtight seal that prevents cold air from escaping. However, if the gasket becomes worn or damaged, it can allow warm air to enter your fridge, causing moisture buildup and leaks. To fix this issue, you’ll need to replace the door gasket with a new one.

How to Fix a Leaking Fridge

Now that you know the common causes of fridge leaks, let’s explore what you can do to fix them.

1. Unclog the Defrost Drain

To unclog the defrost drain, you’ll need to locate it at the back of your fridge, usually behind a panel. Once you’ve located the drain, use a pipe cleaner or a small brush to clear any debris or ice that may be blocking it. You can also try pouring hot water down the drain to help melt any ice.

2. Replace the Drain Pan

To replace the drain pan, you’ll need to locate it at the bottom of your fridge, usually behind a kickplate. Once you’ve located the pan, remove it and replace it with a new one. Make sure to clean any water that may have spilled out of the pan before installing the new one.

3. Replace the Water Filter or Valve

To replace the water filter or valve, consult your fridge’s user manual to locate the faulty part. Once you’ve located the part, purchase a new one and follow the instructions in the manual to replace it.

4. Replace the Door Gasket

To replace the door gasket, you’ll need to remove the old gasket and replace it with a new one. Make sure to clean the area around the gasket before installing the new one to ensure a tight seal.

Additional Tips

  • If you notice water pooling around your fridge, it’s important to clean it up immediately to prevent any damage to your flooring or furniture.
  • Regularly inspect your fridge for any signs of wear and tear, such as cracks in the drain pan or door gasket.
  • If you’re not comfortable performing any of the steps outlined in this article, it’s always best to contact a professional.
  • Remember to turn off your fridge and unplug it before attempting any repairs or maintenance.

By following these tips and being proactive about maintaining your fridge, you can prevent water leaks and ensure that your fridge operates at its best.

Conclusion

A leaking fridge can be a frustrating and potentially damaging problem, but with the right knowledge and steps, it can be addressed and resolved. By regularly maintaining your fridge, such as cleaning the defrost drain and checking for any signs of wear or damage, you can prevent leaks from occurring in the first place. If your fridge does start to leak, it’s important to identify the cause and take the necessary steps to fix it, whether that’s cleaning the defrost drain, replacing a faulty water filter or valve, or calling a professional for more serious issues.

FAQs

  1. How can I prevent my fridge from leaking water in the first place?

Ans. To prevent your fridge from leaking water, it’s important to maintain it regularly. This includes cleaning the defrost drain, replacing the water filter or valve when needed, and checking the door gasket for any signs of wear or damage.

  1. Is it safe to use my fridge if it’s leaking water?

Ans. It’s generally safe to continue using your fridge if it’s leaking water, but it’s important to address the issue as soon as possible to prevent any damage to your flooring or furniture. Additionally, a leaking fridge can be a sign of a larger problem, so it’s important to investigate and fix the issue to ensure that your fridge is operating at its best.

  1. Can I fix a leaking fridge myself, or do I need to call a professional?

Ans. In many cases, you can fix a leaking fridge yourself by identifying the cause of the leak and taking the necessary steps to fix it. However, if you’re unsure or uncomfortable with performing any repairs, it’s always best to call a professional to avoid causing further damage.

  1. How often should I clean the defrost drain in my fridge?

Ans. It’s a good idea to clean the defrost drain in your fridge at least once a year to prevent any buildup of debris or ice that can cause it to become clogged.

  1. What should I do if I’ve tried all of these solutions and my fridge is still leaking water?

Ans. If you’ve tried all of the above solutions and your fridge is still leaking water, it may be a sign of a more serious issue, such as a damaged compressor or faulty condenser. In this case, it’s best to call a professional to diagnose and repair the problem.

The Washing Machine Won't Drain or Spin

The Washing Machine Won’t Drain or Spin – What to Do When Your Washing Machine Won’t Spin or Drain Properly

The Washing Machine Won’t Drain or Spin – What to Do When Your Washing Machine Won’t Spin or Drain Properly

If you’ve ever been in the middle of doing laundry and your washing machine suddenly stops spinning or draining properly, you know just how frustrating it can be. Not only can it delay your laundry day, but it can also be a sign of a larger issue with your machine. Here are some steps you can take to troubleshoot the problem and get your washing machine back in working order.

Table of Contents

  1. Check the Power Source
  2. Inspect the Lid Switch
  3. Examine the Drain Hose
  4. Inspect the Pump
  5. Check the Belt
  6. Clean the Filter
  7. Inspect the Motor Coupling
  8. Look at the Clutch
  9. Examine the Agitator Directional Cogs
  10. Check the Motor
  11. Inspect the Tub Bearing
  12. Look at the Shock Absorbers
  13. Examine the Suspension Springs
  14. Call a Professional
  15. Prevent Future Issues

1. Check the Power Source

The first step in troubleshooting your washing machine is to make sure it’s receiving power. Check the outlet your machine is plugged into and ensure it’s functioning properly. If the outlet is functioning correctly, check the power cord for any signs of damage or wear. If you notice any damage, replace the cord before proceeding.

2. Inspect the Lid Switch

The lid switch is a safety feature on your washing machine that prevents the machine from spinning or draining if the lid is open. If the lid switch is malfunctioning, it can prevent your machine from spinning or draining properly. To test the lid switch, open and close the lid of your machine. If you hear a clicking sound when you close the lid, the switch is working correctly. If not, it may need to be replaced.

3. Examine the Drain Hose

The drain hose is responsible for carrying water out of your washing machine and into your home’s drainage system. If the hose becomes clogged or kinked, it can prevent your machine from draining properly. Check the hose for any signs of damage, such as cracks or kinks, and clear any clogs before attempting to use your machine again.

4. Inspect the Pump

The pump in your washing machine is responsible for circulating water through the machine and draining it out. If the pump becomes clogged or damaged, it can prevent your machine from draining properly. To check the pump, unplug your machine and remove the back panel. Locate the pump and inspect it for any signs of damage or clogging. If the pump is damaged, it will need to be replaced.

5. Check the Belt

The belt in your washing machine is responsible for connecting the motor to the drum and allowing the drum to spin. If the belt becomes worn or stretched, it can prevent your machine from spinning properly. To check the belt, unplug your machine and remove the back panel. Locate the belt and inspect it for any signs of wear or damage. If the belt is worn or stretched, it will need to be replaced.

6. Clean the Filter

The filter in your washing machine is responsible for catching any debris that may be in the water before it reaches the pump. If the filter becomes clogged, it can prevent your machine from draining properly. To clean the filter, unplug your machine and locate the filter, which is typically located at the bottom of the machine. Remove any debris and clean the filter thoroughly before replacing it.

7. Inspect the Motor Coupling

The motor coupling in your washing machine is responsible for connecting the motor to the transmission. If the coupling becomes worn or damaged, it can prevent the drum from spinning or draining properly. To inspect the motor coupling, unplug your machine and remove the cabinet. Locate the motor and transmission and inspect the coupling for any signs of wear or damage. If the coupling is damaged, it will need to be replaced.

8. Look at the Clutch

The clutch in your washing machine is responsible for engaging the transmission and allowing the drum to spin. If the clutch becomes worn or damaged, it can prevent your machine from spinning properly. To inspect the clutch, unplug your machine and remove the cabinet. Locate the clutch and inspect it for any signs of wear or damage. If the clutch is damaged, it will need to be replaced.

9. Examine the Agitator Directional Cogs

The agitator directional cogs in your washing machine are responsible for turning the agitator in one direction during the wash cycle and then in the opposite direction during the spin cycle. If the cogs become worn or damaged, it can prevent your machine from spinning properly. To inspect the cogs, unplug your machine and remove the agitator. Locate the cogs and inspect them for any signs of wear or damage. If the cogs are damaged, they will need to be replaced.

10. Check the Motor

The motor in your washing machine is responsible for powering the drum and the pump. If the motor becomes damaged, it can prevent your machine from spinning or draining properly. To check the motor, unplug your machine and remove the cabinet. Locate the motor and inspect it for any signs of damage. If the motor is damaged, it will need to be replaced.

11. Inspect the Tub Bearing

The tub bearing in your washing machine is responsible for supporting the drum and allowing it to spin smoothly. If the bearing becomes worn or damaged, it can prevent your machine from spinning properly. To inspect the bearing, unplug your machine and remove the back panel. Locate the bearing and inspect it for any signs of wear or damage. If the bearing is damaged, it will need to be replaced.

12. Look at the Shock Absorbers

The shock absorbers in your washing machine are responsible for reducing the vibration caused by the spinning drum. If the shock absorbers become worn or damaged, they may not be able to effectively reduce the vibration, which can cause your machine to stop spinning properly. To inspect the shock absorbers, unplug your machine and remove the cabinet. Locate the shock absorbers and inspect them for any signs of wear or damage. If the shock absorbers are damaged, they will need to be replaced.

13. Examine the Suspension Springs

The suspension springs in your washing machine are responsible for supporting the drum and allowing it to move smoothly. If the springs become worn or damaged, they may not be able to properly support the drum, which can cause your machine to stop spinning properly. To inspect the suspension springs, unplug your machine and remove the cabinet. Locate the springs and inspect them for any signs of wear or damage. If the springs are damaged, they will need to be replaced.

14. Call a Professional

If you’ve tried all of the above steps and your washing machine still isn’t spinning or draining properly, it may be time to call in a professional. A qualified technician will be able to diagnose the issue and recommend the appropriate course of action.

15. Prevent Future Issues

To prevent future issues with your washing machine, be sure to clean it regularly and follow the manufacturer’s recommended maintenance schedule. Additionally, avoid overloading the machine and using too much detergent, as both of these can cause excessive wear and tear on the components.

In conclusion, a washing machine that won’t spin or drain properly can be a frustrating and inconvenient problem to deal with. However, by following these 14 steps, you can diagnose and potentially fix the issue yourself. Remember to always unplug your machine before attempting any repairs and to take proper safety precautions. If all else fails, don’t hesitate to call a professional for assistance.

FAQs

  1. Why won’t my washing machine spin or drain properly? There are a variety of reasons why a washing machine may not be spinning or draining properly, including issues with the lid switch, belt, pump, motor, or other components.
  2. How can I tell if my washing machine’s lid switch is the problem? If your washing machine is not spinning or draining and you hear a clicking noise when you close the lid, the lid switch may be the issue.
  3. What should I do if my washing machine’s belt is worn or damaged? If your washing machine’s belt is worn or damaged, it will need to be replaced. You can do this yourself or call a professional for assistance.
  4. Can overloading my washing machine cause it to stop spinning or draining properly? Yes, overloading your washing machine can cause excessive wear and tear on the components, which can lead to issues with spinning or draining.
  5. How often should I clean and maintain my washing machine? You should clean your washing machine regularly and follow the manufacturer’s recommended maintenance schedule to prevent future issues. This typically includes cleaning the drum, detergent dispenser, and lint filter, as well as checking for any signs of wear or damage.
  1. What other common problems can occur with washing machines? Common problems with washing machines include leaks, strange noises, failure to fill or drain properly, and failure to complete cycles.
  2. Can I fix my washing machine myself, or do I need to call a professional? Minor issues such as clogged hoses or a tripped circuit breaker can often be fixed by homeowners themselves. However, if you are unsure about any repairs or if the issue is more complex, it’s best to call a professional.
  3. How can I prevent issues with my washing machine? Regularly cleaning and maintaining your washing machine can help prevent future issues. Additionally, avoid overloading the machine, use the appropriate amount of detergent, and make sure to only wash items that are safe for machine washing.
  4. Is it safe to attempt washing machine repairs myself? It is generally safe to attempt minor repairs such as cleaning clogged hoses or replacing a worn belt, as long as proper safety precautions are taken. However, more complex repairs should be left to professionals.
  5. How can I find a reliable professional to repair my washing machine? Ask for referrals from friends or family, read online reviews, and make sure the professional is licensed and insured. You can also contact the manufacturer or a local appliance repair company for recommendations.
Freezer Not Freezing

Freezer Not Freezing – What Causes a Fridge Not to Freeze?

What Causes a Fridge Not to Freeze?

If you’ve ever experienced a fridge that doesn’t freeze your food, then you know the frustration that comes with it. A refrigerator that doesn’t keep things cold enough can lead to spoilage, waste, and expensive repairs. In this article, we’ll explore the common reasons why a fridge may fail to freeze and what you can do to troubleshoot and fix the problem.

How Does the Freezer of My Fridge Work?

When we think of our fridge, the first thing that comes to mind is often the freezer compartment. It’s where we store our ice cream, frozen vegetables, and meats, and it’s a crucial part of our daily lives. But have you ever stopped to wonder how the freezer in your fridge actually works? In this article, we’ll explore the inner workings of your fridge’s freezer and explain the science behind it.

Understanding the Basics of Refrigeration

Before we dive into the specifics of the freezer, it’s important to understand the basics of refrigeration. At its core, refrigeration is the process of removing heat from an enclosed space. This is achieved through a cycle of compression and expansion of a refrigerant gas, which absorbs and releases heat as it changes states.

Components of a Refrigeration System

A typical refrigeration system consists of four main components: the compressor, the condenser, the expansion valve, and the evaporator. The compressor is responsible for compressing the refrigerant gas, which increases its temperature and pressure. The hot, high-pressure gas then flows to the condenser, where it is cooled and condensed into a liquid. The liquid refrigerant then flows through the expansion valve, where it undergoes a sudden drop in pressure, causing it to expand and evaporate. This evaporation process absorbs heat, cooling the refrigerant gas, which then flows to the evaporator.

The Freezer Compartment

Now that we understand the basics of refrigeration, let’s take a closer look at the freezer compartment of your fridge. The freezer works by taking advantage of the fact that the evaporator coils are located inside the freezer compartment. As the liquid refrigerant flows through the evaporator coils, it absorbs heat from the air inside the freezer, cooling it down.

How the Freezer Maintains a Cold Temperature

To maintain a constant cold temperature in the freezer, the refrigeration system continuously circulates the refrigerant gas. As the refrigerant gas absorbs heat from the air inside the freezer, it becomes warmer and flows back to the compressor to be compressed and heated up again. This cycle repeats, keeping the temperature inside the freezer constant.

Frost Build-Up

One common issue with freezers is frost build-up. Frost can form on the evaporator coils over time, reducing their ability to absorb heat and causing the freezer to work less efficiently. To prevent frost build-up, most modern freezers have automatic defrost systems that periodically heat up the evaporator coils to melt any accumulated frost.

Reasons Why Your Fridge May Not Be Freezing

1. Dirty Condenser Coils

The condenser coils are responsible for releasing heat from the fridge’s refrigerant. Over time, these coils can become covered in dust and debris, which can make it difficult for the fridge to expel heat properly. This can cause the fridge to work harder than it should and may lead to inadequate cooling. Cleaning the condenser coils regularly can help prevent this problem.

2. Malfunctioning Evaporator Fan

The evaporator fan is responsible for circulating the cold air from the evaporator throughout the fridge. If this fan isn’t working correctly, then cold air may not be distributed evenly, leading to areas of the fridge that are too warm. Replacing the fan motor or blade can fix this issue.

3. Faulty Thermostat

The thermostat is responsible for regulating the temperature inside the fridge. If the thermostat is malfunctioning, then it may not be sending the correct signals to the compressor or evaporator fan, leading to temperature fluctuations. Replacing the thermostat can solve this problem.

4. Low Refrigerant Levels

If the refrigerant levels are low, then the fridge may not be able to cool properly. This could be due to a leak in the system or an improper charge. An HVAC technician can test the refrigerant levels and add more if necessary.

5. Clogged Capillary Tube

The capillary tube is responsible for regulating the flow of refrigerant through the system. If this tube becomes clogged with debris or ice, then the flow of refrigerant may be restricted, leading to inadequate cooling. Cleaning or replacing the capillary tube can solve this problem.

Troubleshooting Tips

If your fridge isn’t freezing properly, there are a few things you can try before calling in a professional.

  • Check the temperature settings to ensure they are at the correct level.
  • Clean the condenser coils to ensure proper heat dissipation.
  • Make sure the evaporator fan is working correctly.
  • Check for any leaks in the refrigerant system.
  • Defrost the fridge if ice has built up on the evaporator coils.

Conclusion:

A fridge that doesn’t freeze can be a frustrating problem to deal with, but with the right troubleshooting steps, it can often be resolved. Checking the temperature settings, ensuring proper air circulation, and examining the components can all help identify the cause of the issue. However, if none of these steps work, it’s best to call in a professional technician to avoid causing further damage.

FAQs:

  1. Why is my fridge running but not cooling? If your fridge is running but not cooling, it could be due to a variety of issues, including a faulty compressor or evaporator fan, a clogged capillary tube, or low refrigerant levels.
  2. Can I fix a fridge that’s not freezing on my own? While there are some troubleshooting steps you can take on your own, it’s often best to call in a professional technician to avoid causing further damage to the fridge.
  3. How often should I clean the condenser coils on my fridge? It’s recommended to clean the condenser coils on your fridge at least once every six months to ensure proper cooling and prevent energy waste.
  4. How can I prevent my fridge from not freezing in the future? Regular maintenance, such as cleaning the condenser coils and checking the temperature settings, can help prevent issues with a fridge not freezing in the future.
  5. How long should a fridge last before needing repairs? The lifespan of a fridge can vary depending on usage and maintenance, but on average, a well-maintained fridge can last between 10-15 years before needing significant repairs.
Dishwasher Not Draining

Dishwasher Not Draining? Here’s What to Do

Dishwasher Not Draining? Here’s What to Do

A dishwasher is an essential appliance in many households, making cleaning up after meals a breeze. However, when it fails to drain properly, it can become a frustrating and inconvenient problem. In this article, we’ll explore the reasons why your dishwasher may not be draining correctly and provide practical solutions to fix the issue.

Table of Contents

  • Introduction
  • Understanding the dishwasher draining system
  • Common causes of dishwasher not draining
  • How to troubleshoot a dishwasher that’s not draining
    • Check for blockages in the dishwasher drain
    • Inspect the dishwasher’s air gap
    • Inspect the dishwasher’s garbage disposal
    • Check the dishwasher’s drain hose
    • Inspect the dishwasher’s drain pump
  • How to prevent future dishwasher draining problems
  • Conclusion
  • FAQs

Introduction

A dishwasher not draining is a common issue that can cause significant inconvenience in a household. It can lead to dirty dishes, bad smells, and even damage to the appliance if left unaddressed. Fortunately, there are several reasons why your dishwasher may not be draining, and there are also several solutions you can try to fix the problem.

Understanding the Dishwasher Draining System

Before diving into the reasons why your dishwasher may not be draining, it’s helpful to understand how the dishwasher draining system works. When you start a dishwasher cycle, water is pumped into the appliance and sprayed onto the dishes by a rotating arm. The dirty water then flows down into the drain, where it’s carried away by the drain pump and out of the appliance.

Common Causes of Dishwasher Not Draining

Several reasons can cause a dishwasher not to drain correctly, including:

  • Blockages in the dishwasher drain
  • Clogged air gap
  • Issues with the garbage disposal
  • Problems with the drain hose
  • Faulty drain pump

How to Troubleshoot a Dishwasher That’s Not Draining

If your dishwasher is not draining correctly, here are some troubleshooting steps you can take:

Check for Blockages in the Dishwasher Drain

One of the most common reasons for a dishwasher not draining is a blockage in the dishwasher drain. To check for blockages, start by turning off the dishwasher and unplugging it. Then, remove any standing water from the appliance using a towel or a cup.

Next, remove the dishwasher’s bottom rack to access the drain. Look for any debris or food particles that may be blocking the drain and remove them using a small brush or a toothbrush.

Inspect the Dishwasher’s Air Gap

The air gap is a small device that prevents dirty water from flowing back into the dishwasher. If the air gap becomes clogged, it can prevent the dishwasher from draining correctly.

To inspect the air gap, start by locating it on the countertop next to the sink. Remove the cap and clean any debris that may be blocking the device using a small brush or a toothbrush.

Inspect the Dishwasher’s Garbage Disposal

If your dishwasher is connected to a garbage disposal, issues with the disposal can cause the dishwasher not to drain correctly. To check the garbage disposal, start by turning off the power to the appliance.

Next, remove any standing water from the dishwasher using a towel or a cup. Then, use a flashlight to inspect the disposal for any blockages or clogs. If you find any debris, use tongs or pliers to remove it.

Check the Dishwasher, Drain Hose

If you are experiencing issues with your dishwasher not draining properly, one of the first things to check is the drain hose. The drain hose is responsible for carrying the water from the dishwasher to the sink drain or garbage disposal. If it is clogged or damaged, it can cause water to back up into the dishwasher, preventing it from draining properly.

To check the drain hose, turn off the power to the dishwasher and disconnect the hose from the sink drain or garbage disposal. Inspect the hose for any clogs or kinks. If you find any clogs, use a long, thin object such as a wire hanger or plumbing snake to remove them. If the hose is kinked, straighten it out to allow water to flow freely.

It is also important to ensure that the drain hose is properly installed. The hose should be installed so that it is not kinked or bent, and it should be positioned higher than the water level in the dishwasher to prevent backflow. If the hose is not installed correctly, consult the dishwasher’s manual or call a professional for assistance.

By checking the drain hose and ensuring that it is free of clogs, and kinks, and installed properly, you can help to ensure that your dishwasher drains properly and avoid any potential water damage.

Check the Dishwasher’s Drain Pump

The drain pump is responsible for pumping the dirty water out of the dishwasher and into the drain. If the pump is faulty, it can cause the dishwasher not to drain correctly.

To check the drain pump, start by disconnecting the power to the dishwasher. Then, remove any standing water from the appliance using a towel or a cup. Next, locate the drain pump and inspect it for any signs of damage or wear. If the pump is faulty, it will need to be replaced.

How to Prevent Future Dishwasher Draining Problems

To prevent future dishwasher draining problems, here are some tips to keep in mind:

  • Run hot water in the sink before starting the dishwasher to ensure that the water entering the appliance is hot.
  • Scrape any large food particles off of dishes before placing them in the dishwasher.
  • Run the garbage disposal before starting the dishwasher to prevent clogs.
  • Regularly clean the dishwasher’s filter to prevent blockages.

Conclusion

A dishwasher not draining is a frustrating problem that can cause inconvenience and damage to the appliance if left unaddressed. However, with the tips and solutions provided in this article, you can troubleshoot and fix the issue. Remember to regularly maintain your dishwasher to prevent future draining problems.

FAQs

  1. Can a clogged dishwasher drain cause water to back up into the sink? Yes, a clogged dishwasher drain can cause water to back up into the sink.
  2. How do I clean the dishwasher’s filter? To clean the dishwasher’s filter, remove the bottom rack of the dishwasher and locate the filter. Remove any debris or food particles from the filter using a brush or a toothbrush.
  3. How often should I clean my dishwasher’s filter? It’s recommended to clean your dishwasher’s filter at least once a month to prevent blockages.
  4. Can a faulty drain pump cause the dishwasher not to drain? Yes, a faulty drain pump can cause the dishwasher not to drain correctly.
  5. How can I prevent future dishwasher draining problems? To prevent future dishwasher draining problems, make sure to run hot water in the sink before starting the dishwasher, scrape large food particles off dishes, run the garbage disposal before starting the dishwasher, and regularly clean the dishwasher’s filter.
Common Appliance Problems

Common Appliance Problems – How to Identify and Diagnose Faulty Home Appliances

Common Appliance Problems – How to Identify and Diagnose Faulty Home Appliances

Identifying and diagnosing a faulty appliance involves a few steps that you can follow to help you isolate the problem:

  1. Check the power source
  2. Check for any visible damage
  3. Listen for unusual noises
  4. Check for leaks
  5. Look for error codes
  6. Test the appliance
  7. Consult a professional

1. Check the power source

To check the power source for an appliance, follow these steps:

  1. Make sure the appliance is plugged in: Check that the appliance is properly plugged into an electrical outlet or power strip. If the appliance is not plugged in correctly, it may not receive power.
  2. Check the outlet: Verify that the outlet is functioning correctly by plugging in a different device or appliance. If the other device works, then the outlet is likely not the issue.
  3. Check the circuit breaker: If the appliance is not receiving power, check the circuit breaker to see if it has tripped. If the breaker has tripped, switch it back on and try using the appliance again.
  4. Check the fuse: If the appliance uses a fuse, check to see if it has blown. If the fuse has blown, replace it with a new one of the same type and amperage.

If the appliance still does not receive power after following these steps, the issue may be with the appliance itself and not the power source. It may be necessary to consult a professional technician for further assistance.

2. Check for any visible damage

To check for visible damage on an appliance, follow these steps:

  1. Unplug the appliance: Before inspecting an appliance for damage, it’s important to unplug it from the power source to avoid any electrical shock or injury.
  2. Inspect the power cord: Check the power cord for any visible damage, such as frayed wires, cuts, or punctures. If you notice any damage, the cord may need to be repaired or replaced.
  3. Check the appliance housing: Look for any cracks, dents, or other signs of physical damage on the exterior of the appliance. This type of damage can indicate a problem with the appliance’s internal components.
  4. Inspect the appliance’s components: Open the appliance, if possible, and look for any visible damage on its internal components, such as wires, switches, or motors.
  5. Check for loose or disconnected parts: Inspect the appliance for any loose or disconnected parts, such as screws or wires, which can cause the appliance to malfunction.

If you notice any visible damage or loose parts, it may be necessary to repair or replace the affected component. In some cases, it may be best to consult a professional appliance repair technician to ensure the appliance is repaired safely and correctly.

3. Listen for unusual noises

To listen for unusual noises coming from an appliance, follow these steps:

  1. Turn off any background noise: Before listening to unusual noises, turn off any background noise in the room, such as music or a television, to make it easier to hear the appliance.
  2. Run the appliance: Turn on the appliance and listen for any unusual sounds, such as grinding, rattling, or screeching noises. Try to locate where the noise is coming from.
  3. Listen for changes in sound: Pay attention to any changes in the appliance’s sound during operation. For example, if the noise becomes louder or changes in pitch, this could indicate a problem.
  4. Check the user manual: Consult the user manual to see if any unusual sounds are mentioned as a potential problem for the appliance. The manual may also provide guidance on how to resolve the issue.

If you notice any unusual noises coming from the appliance or changes in its normal sound, it may be best to consult a professional technician to diagnose and resolve the problem. Ignoring unusual noises can cause further damage to the appliance and potentially make repairs more costly.

4. Check for leaks

To check for leaks on an appliance, follow these steps:

  1. Turn off the appliance: Before checking for leaks, turn off the appliance and unplug it from the power source to avoid any potential electrical shock.
  2. Look for signs of water damage: Check the surrounding area for signs of water damage, such as water stains, mold, or mildew. This can indicate that the appliance has been leaking for some time.
  3. Inspect the hoses and connections: For appliances that involve water, such as a washing machine or dishwasher, inspect the hoses and connections for any visible signs of leakage, such as water droplets, dampness, or corrosion. Check the hoses for any cracks or kinks, and ensure all connections are secure.
  4. Check the seals and gaskets: For appliances such as a refrigerator or oven, inspect the seals and gaskets for any signs of wear and tear or damage. Damaged seals and gaskets can cause leaks and reduce the appliance’s efficiency.
  5. Run the appliance: Turn the appliance back on and run it for a short period of time to see if any leaks occur. Check for any water droplets or signs of moisture that may have accumulated during operation.

If you notice any leaks or signs of water damage, it may be necessary to repair or replace the affected component. In some cases, it may be best to consult a professional appliance repair technician to ensure the appliance is repaired safely and correctly.

5. Look for error codes

To look for error codes on an appliance, follow these steps:

  1. Consult the user manual: The user manual for the appliance may provide a list of error codes and troubleshooting steps to resolve the issue. Look for the section on error codes or troubleshooting in the manual.
  2. Check the display panel: Many modern appliances have a display panel that will show an error code when a problem occurs. Check the display panel for any error codes that may be displayed.
  3. Google the error code: If you are unsure what the error code means or how to resolve the issue, try searching for the error code online. You may find resources such as appliance forums or manufacturer websites that provide more information on how to diagnose and resolve the issue.
  4. Contact the manufacturer or a professional technician: If you are unable to resolve the issue using the user manual or online resources, it may be necessary to contact the manufacturer or a professional appliance repair technician for assistance. They may be able to provide additional guidance on how to diagnose and repair the appliance.

It’s important to address any error codes on an appliance promptly, as ignoring them can lead to further damage and potentially more costly repairs.

6. Test the appliance

To test an appliance, follow these steps:

  1. Prepare the appliance: Ensure that the appliance is properly plugged in and turned on. If the appliance requires any specific preparation, such as filling it with water or adding detergent, make sure to do so.
  2. Run the appliance: Run the appliance through its normal operating cycle, and monitor its performance. Pay attention to any unusual noises, leaks, or error messages that may appear during operation.
  3. Test the appliance’s features: If the appliance has multiple features, such as different wash cycles or temperature settings, test each feature to ensure that they are working correctly.
  4. Test the appliance’s safety features: If the appliance has safety features, such as an automatic shut-off or overheating protection, test them to ensure that they are functioning properly.
  5. Monitor energy consumption: For appliances that consume energy, such as refrigerators or washing machines, monitor their energy consumption to ensure that they are running efficiently.

If you notice any issues with the appliance’s performance during testing, it may be necessary to diagnose and repair the issue. Consult the user manual or a professional technician for guidance on how to resolve the problem. It’s important to test an appliance periodically to ensure that it is functioning properly and to catch any issues early on before they become more serious.

7. Consult a professional

If you are unsure about how to diagnose or repair an appliance or if you are experiencing a persistent problem with an appliance, it may be best to consult a professional. Here are some steps to follow when consulting a professional:

  1. Research appliance repair services: Research appliance repair services in your area and read reviews from previous customers to find a reputable technician.
  2. Schedule an appointment: Contact the technician or repair service to schedule an appointment. Be sure to describe the problem in detail so that the technician can bring any necessary tools or replacement parts.
  3. Allow the technician to diagnose the problem: When the technician arrives, allow them to diagnose the problem and provide a recommendation for repair or replacement.
  4. Ask for a cost estimate: Ask the technician for a cost estimate before they begin the repair work so that you know what to expect in terms of pricing.
  5. Ask for a warranty: Ask the technician if they offer a warranty on their repair work in case the problem persists or if any new issues arise.

Remember to be patient and courteous when working with a professional technician. They are there to help you resolve the issue and get your appliance back to working properly.